

How To Make Mock-Ups For Wall Decals (3 Ways)
Wall decals are such a great idea, I have these ones that compliment my gallery wall, here is the application video if you want to see it.
Although I did use permanent vinyl for those because when I take them down I will probably be redecorating, but I did also just buy some semi permanent black vinyl that I think I might use in a different room, and this is what you probably want to use if you’re selling them so people can remove them easily if they’re renting or want to change around their decoration.
In this post I'm going to go through multiple ways you can take pictures if you want to sell wall decals.
Watch the video or continue reading ……..
The content below contains affiliate links and we may earn a commission if you shop through them, however this won't cost you anything, it just helps us to keep the site running for free. For more information on affiliate links, see the disclosure here.
There are lots of different ways you can make mock-ups for wall decals, but I've come up with three ways you can source photos and three different places you can edit them. You can mix and match or try all three, or start with the easiest and cheapest and then of work your way up from there.
Finding your mock up photo
Option 1
The first type of photo is a commercially licensed stock photo and you can use this to add your design over the top and make it fit your needs.
I always tend to go to Unsplash for mine and you can use these pictures yourself for free for commercial purposes as long as you're not actually selling the photo in anything you do. Here is the license at the time of writing.
If you're using an image from elsewhere make sure you've got a commercial license. Avoid using an image from Google because it might be copyrighted and you may end up in trouble for doing that. It’s also polite to attribute the original photographer to the photo somewhere in your listing even if it's right at the bottom, just as a thank you for using their picture for free.
Go to Unsplash.com and type in the kind of room you would like. I'm using a baby's nursery as an example and chose this one because there's a bit of a blank space at the back.

You can download it free there and then a pop-up will appear where you can copy the photographer.
Option 2
If that's not quite working for you the next option is to go to somewhere like Creative Market or Design Bundles and look for mock-ups on there. These ones are specifically designed for adding your design over the top so they are a lot better than using stock photos. And there should be a lot more space on them to show off your designs.
On Creative Market I searched for a nursery mock-up and there are a lot of bundles which give you multiple pictures. There is a charge for them so it can be quite expensive but it's nice to have the same sort of style and colours in your rooms to give you a more cohesive look for your backgrounds. It also means you can do lots of different designs and not have them all look the same.
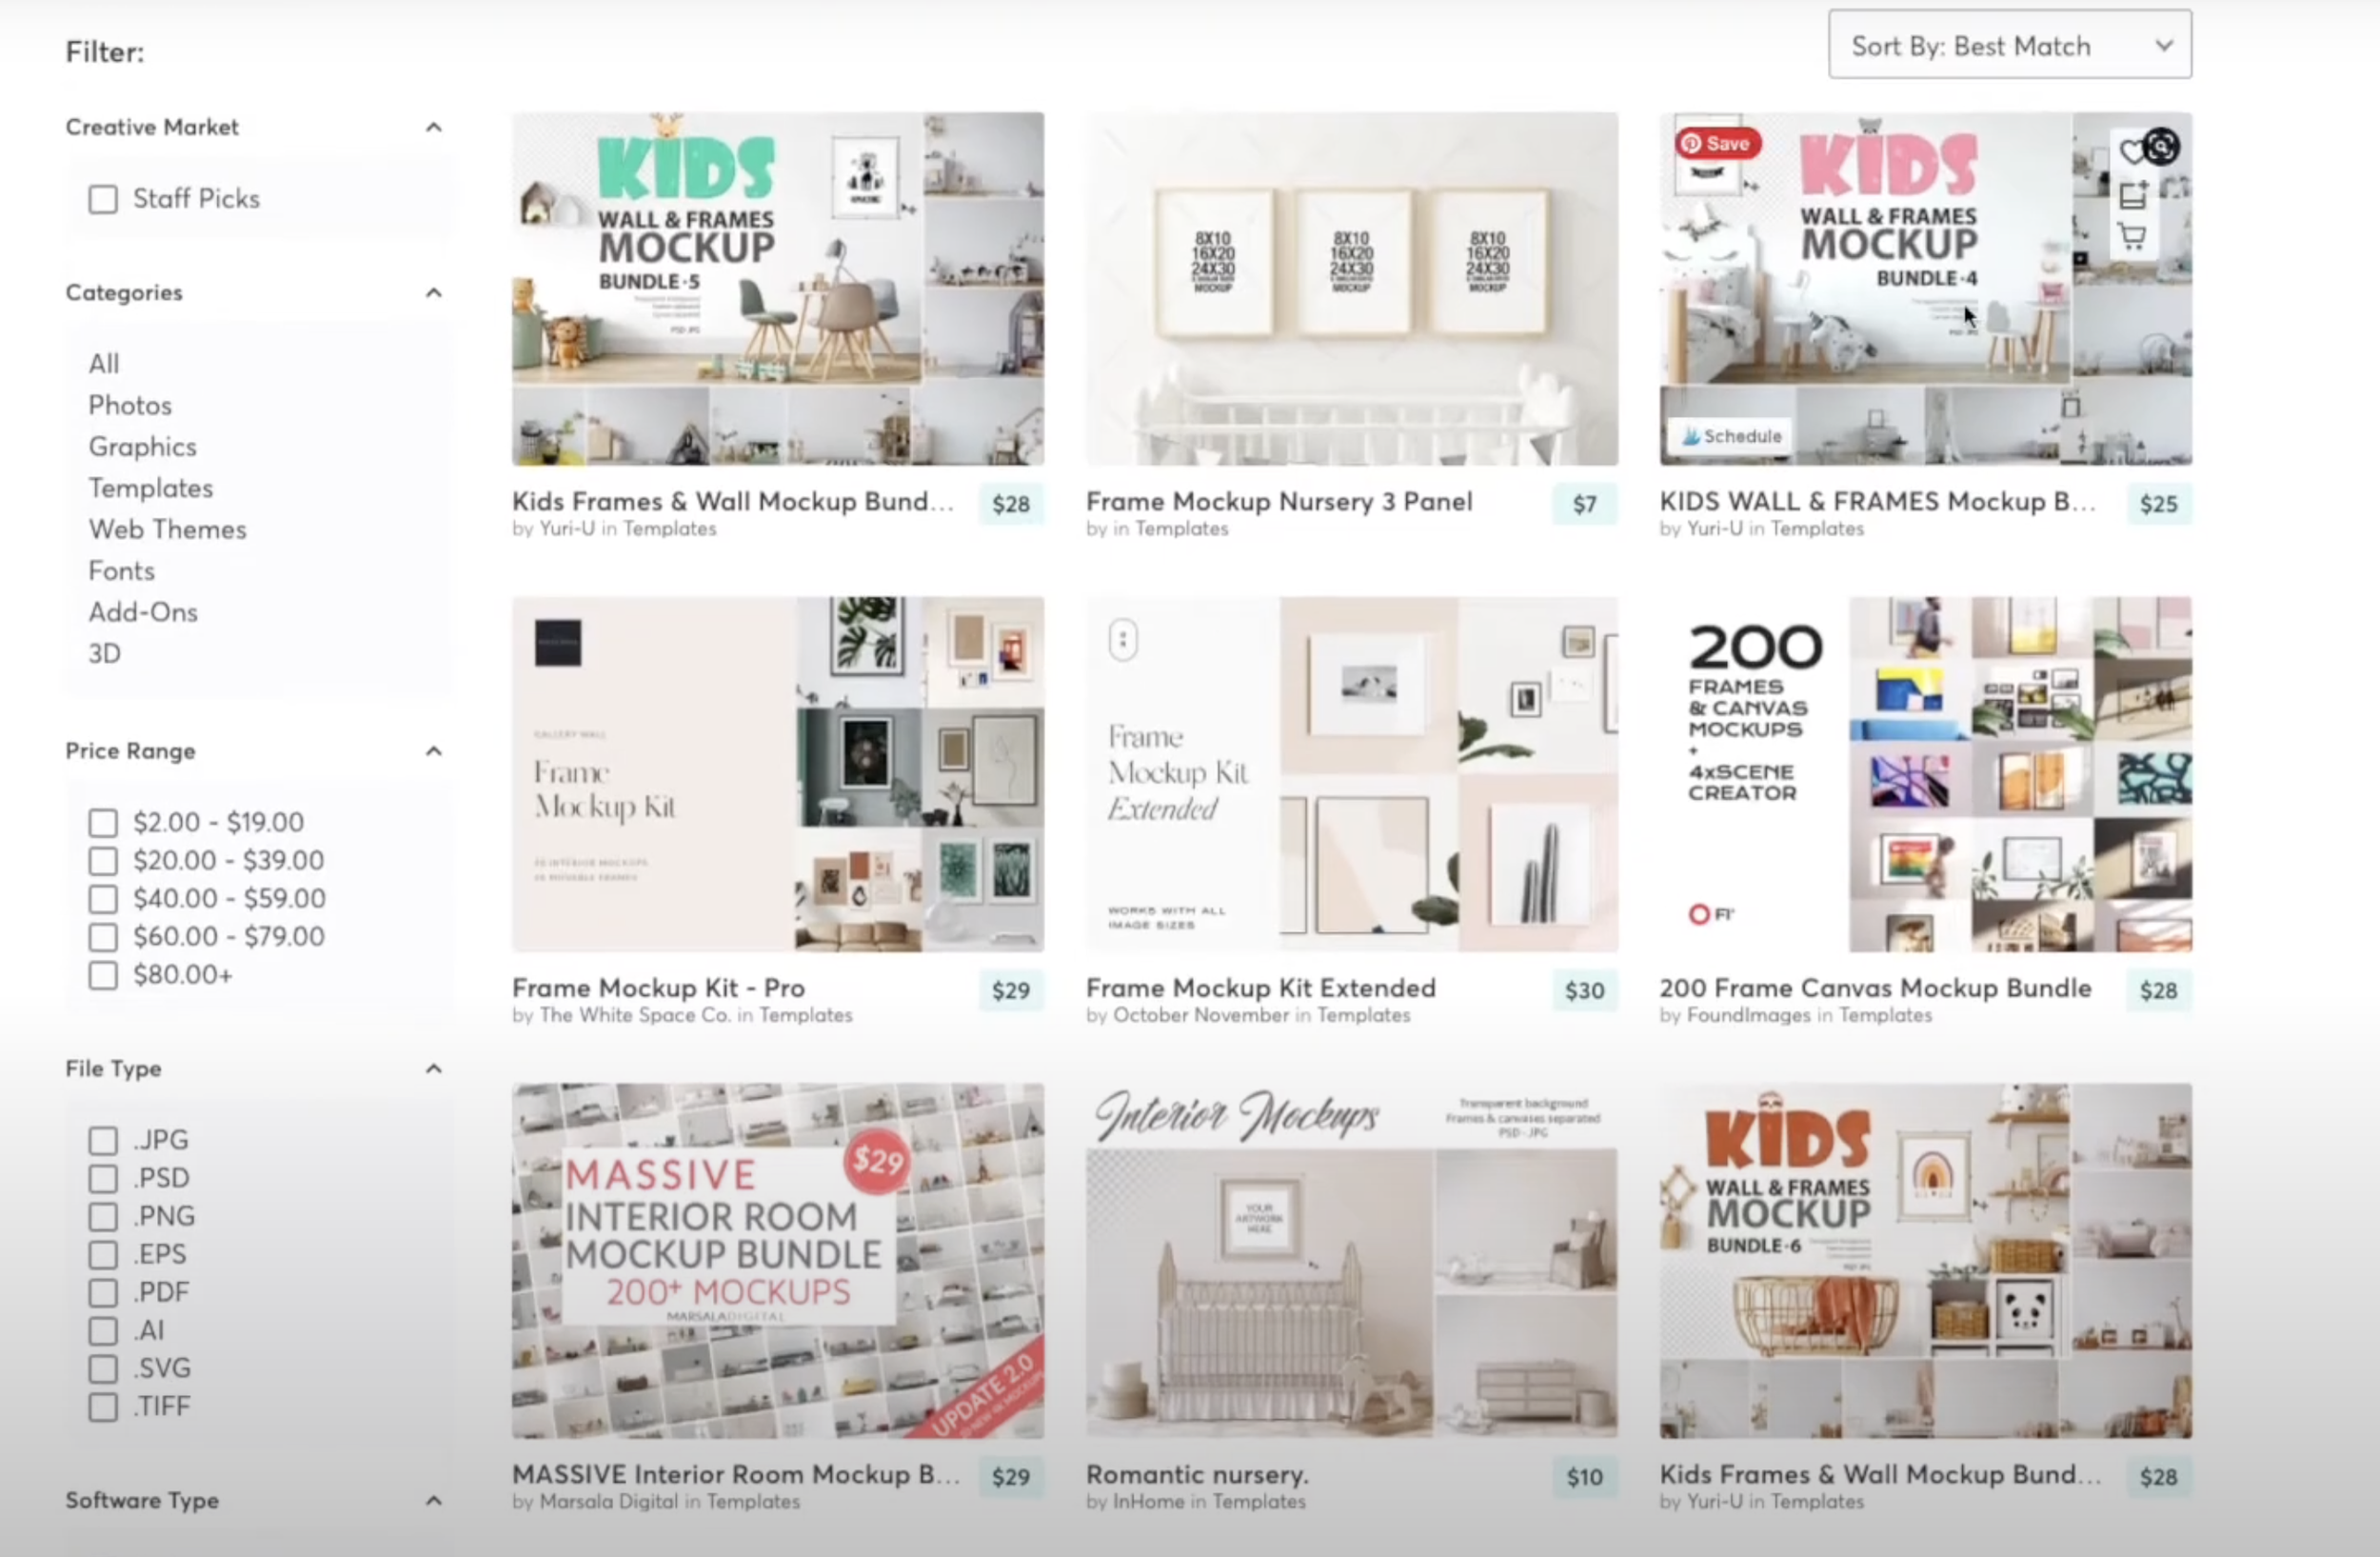
You will also get a little demonstration of how it works and there are some canvases and frames if you want to add in those too.
Design Bundles have a lot more singular mock-ups so they're a lot cheaper and better if you just want to buy one at a time. Again it will give you an example of how it works. Do also check their free resources because sometimes they have mock-ups in there too. Just be aware that if you don't have Photoshop you need to be buying a mock-up that includes a JPEG file and not just a PSD file.
Option 3
Your third option is of course to take your own photo of your own wall either with or without a decal already applied. This is how I do the majority of my mock-ups, but for walls, it is a bit trickier as you ideally need a clear wall with some interesting furniture with props in the background, and not all of us have Pinterest-worthy houses.
I did have to find somewhere in my house where there wasn't too much in the background and with decent enough light and this is the one I managed to get.

I just moved a lot of stuff out of the way and dressed the two cupboards with some items I already had in the house and took the photo as straight as I could, with as much of the wall space in the frame. You need to try and get it as light and bright as possible but with minimal shadow, which is not always that easy if it's really dull outside. And if it's really bright outside you can get really harsh shadows.
I'm sure you can find some photography videos on YouTube that will give you some better tips for taking photos and advice on what time of day is best etc. It is much better to try and take the photo with natural light if you can or with a light with a natural light filter on it because artificial lights tend to give it shadows and make it look kind of orangey tone.
So now you have three different options for finding the base photo for adding your design to in order to show it off to potential customers.
Adding your design
Here are three ways you can add your designs to those photos if you don't have any design software other than Design Space or Silhouette Studio.
Option 1
In this example, I used Design Space and uploaded my photo into it as a complex image, saved it as a print and cut image and then uploaded it into a new project.
Once uploaded into a new project, I made the image a bit smaller so that it was easier to see and uploaded the design I wanted for the wall decal.

As far as I'm aware there's no way you can save that as a picture so I screenshot it to make it into a picture. Not being the best quality, it's not ideal for Etsy because that needs to be at least 2000 pixels, but if you want it as a secondary image, or you're just going to use it for something not as high quality then it should be fine.
Option 2
If you want a better quality version of that photo but all you really need to change is the lighting of your original photo and you don't need to do any major edits, then you can use Canva for free. You can also use Canva on your phone or your tablet.
Go on Canva.com, click on Design Spotlight on the top bar and there's an option to edit your photo (Photo Editor). Upload your photo straight in there.
I used a mock-up that I already had with a design that I've got for sale on my Etsy shop. You can just move your design around to where you want it to go, and resize it. If you want to edit the original photo you click on it and adjust the brightness, contrast and saturation until you're happy with it.

Once you're happy download it as a PNG, which is the highest quality You may also be able to download it as a jpeg. The image will come out a lot higher quality.
Option 3
If you need to do more complex edits, such as removing something from the original photo or you want to manipulate your design in some way to fit the space better, you probably do need to get either Photoshop or PicMonkey. If you are using a tablet you could also use Procreate for this purpose.
I used Photoshop for this example and I always duplicate the image I intend to use so that if it goes wrong I've got a backup.
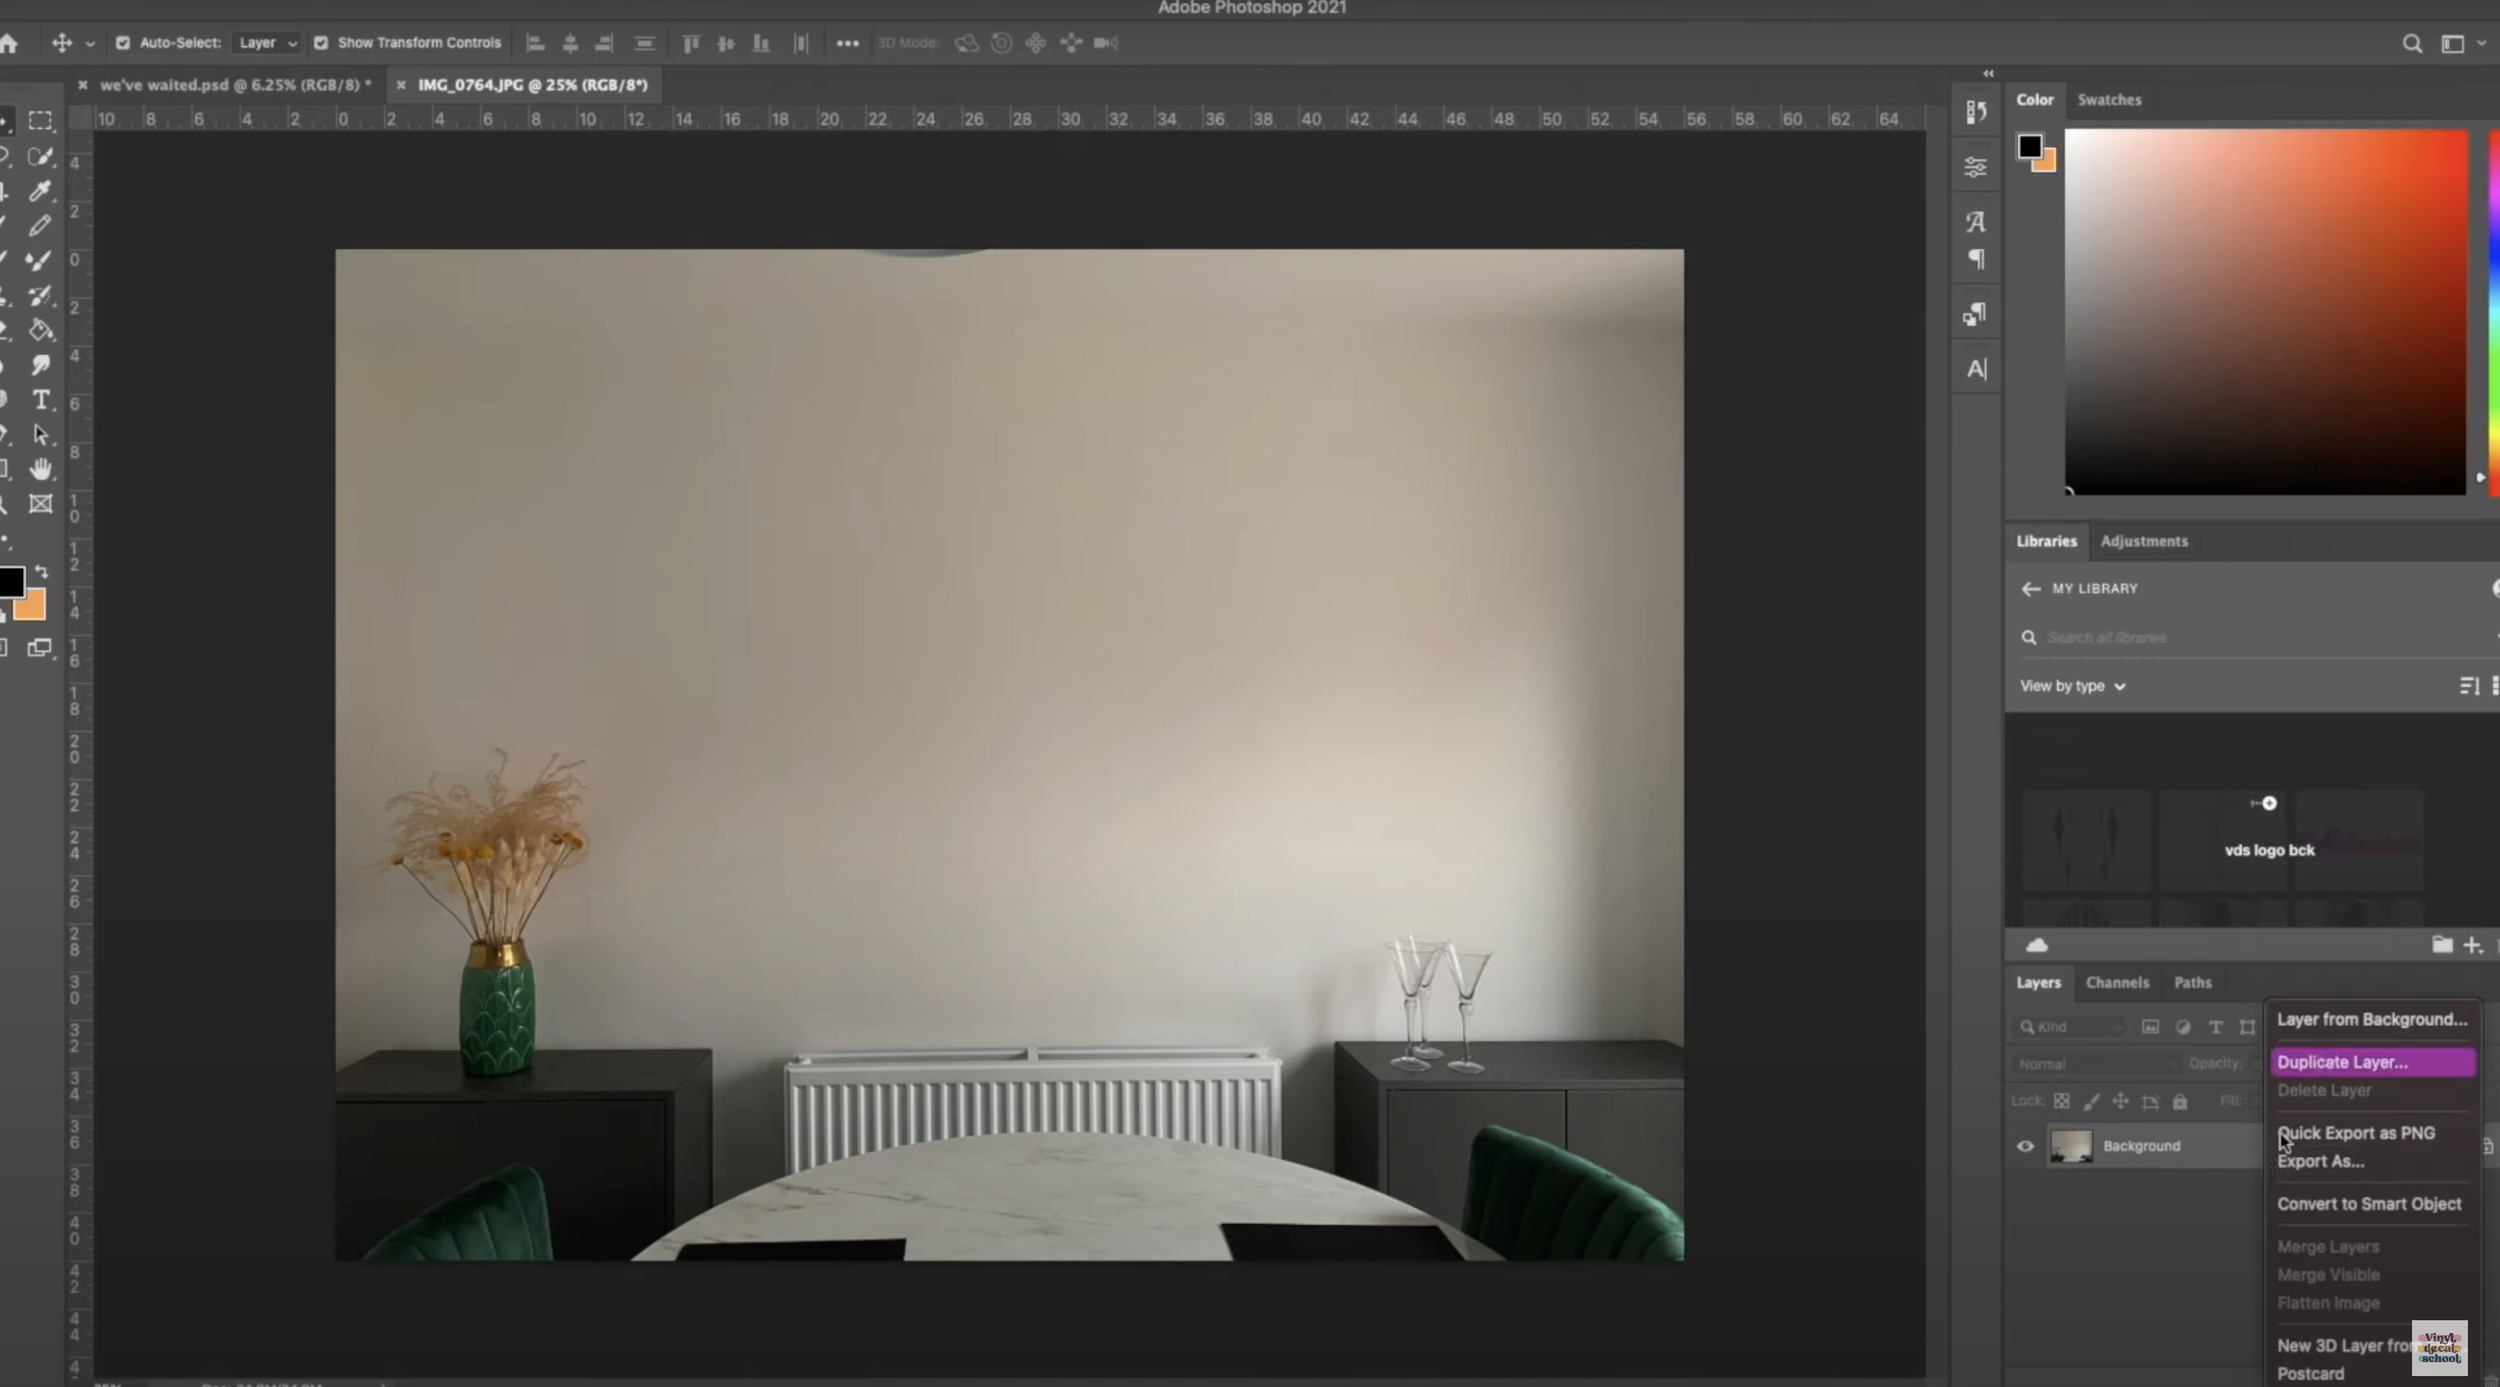
I usually use ‘curves’ first then bring up the brightness and the contrast as well to sharpen the image. I also brought up the saturation up a bit just to make that green and yellow pop make it a bit more interesting.


The next thing I did was drag the design that I have on my Etsy shop and changed the colour in ‘colour overlay’ to make it a muted grey.
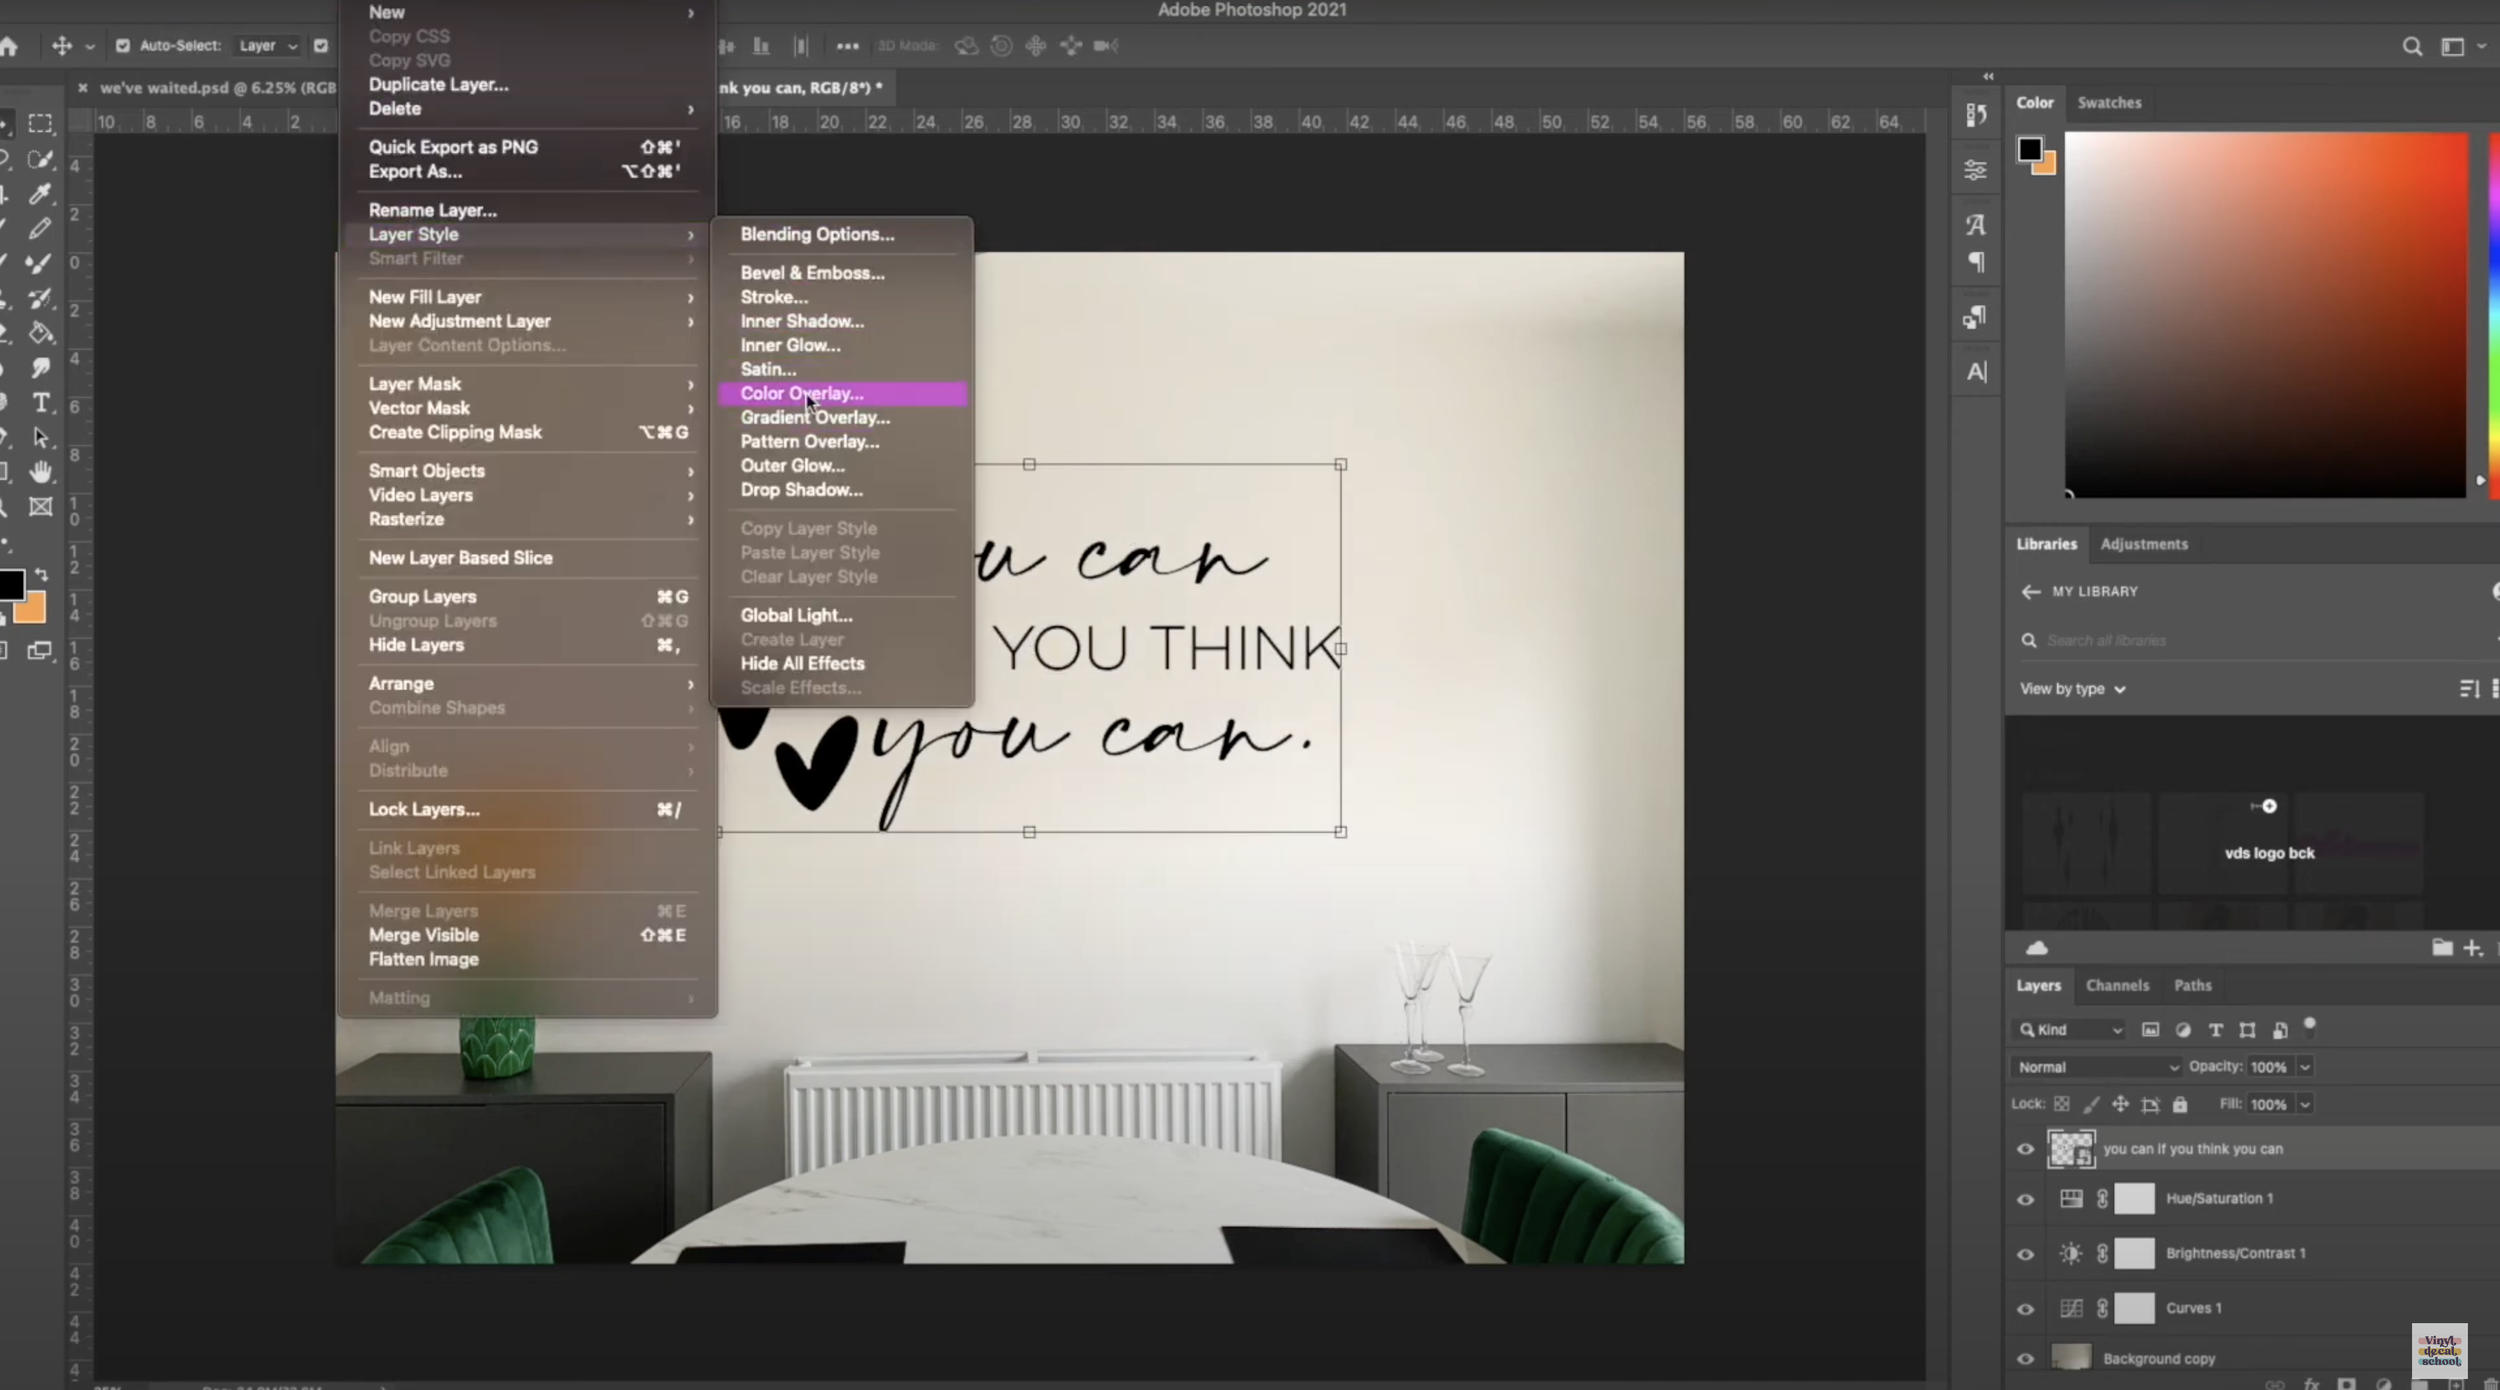
If you want to move it on an angle if your wall isn't completely straight you press the ‘command’ button which allows you to move the edges.

If you have loads of objects on the wall and you need to make it look as if the decal is behind them, you can use your lasso tool to go around the object and select anything that is in front of the design. Bear that in mind when you are taking your photo.
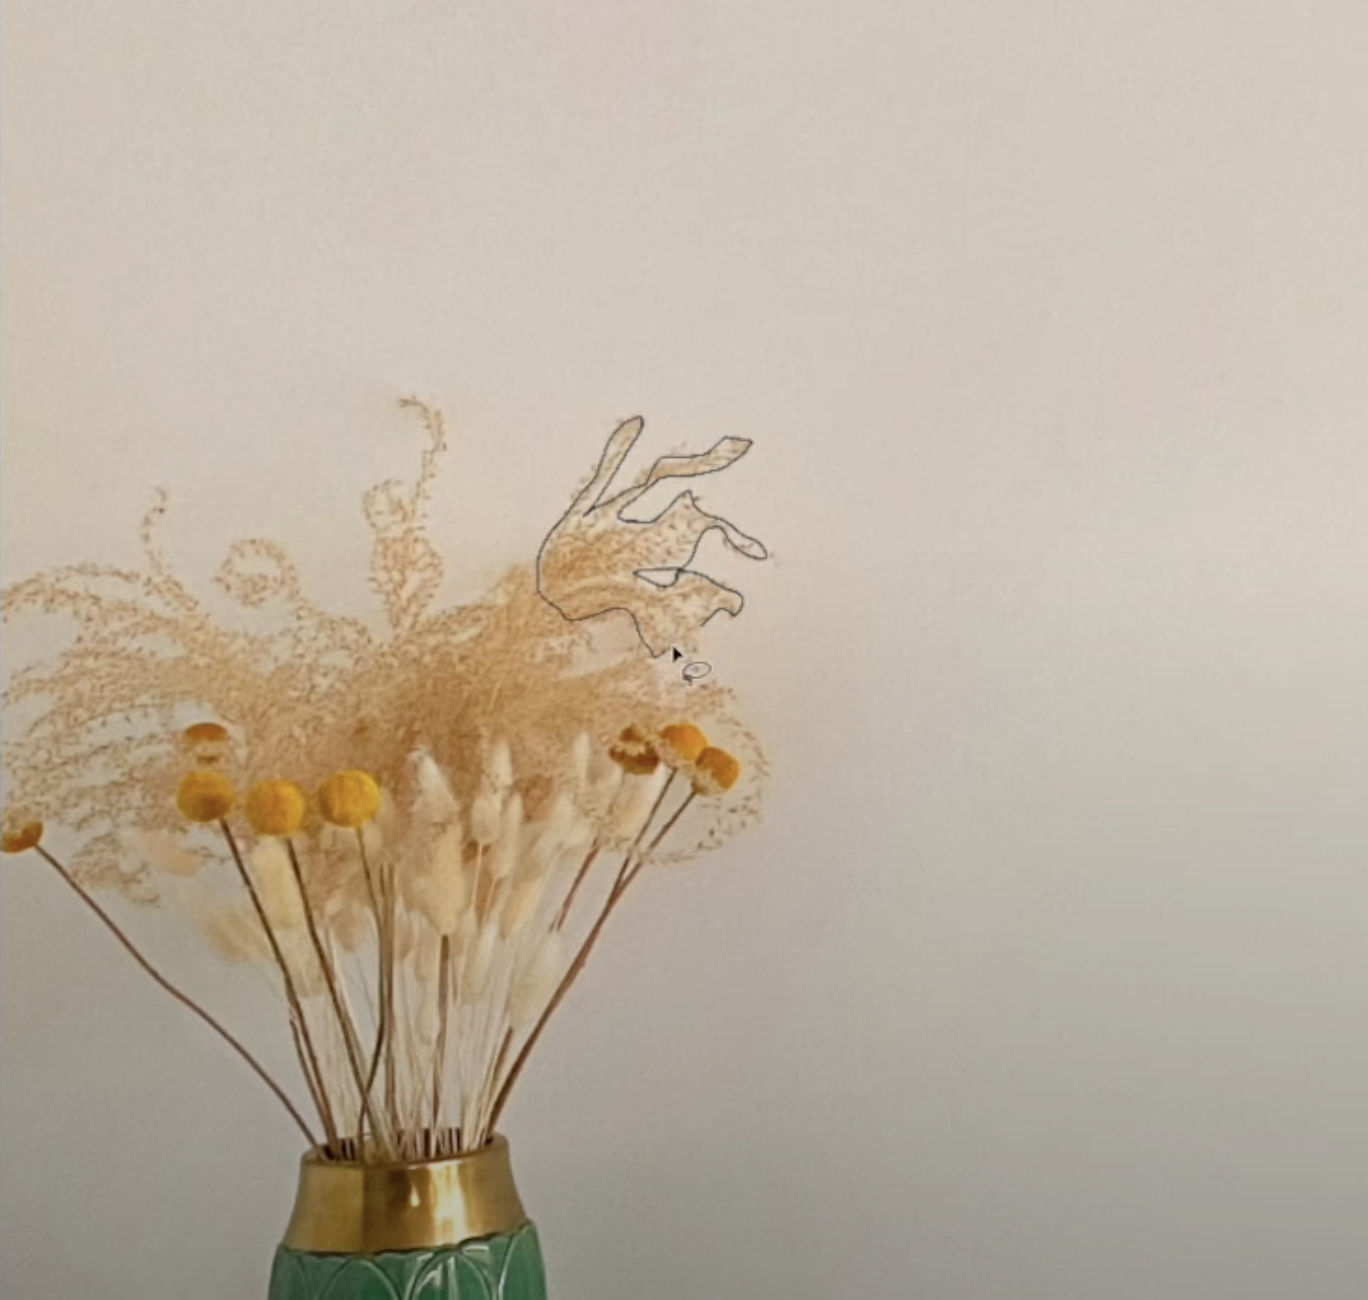
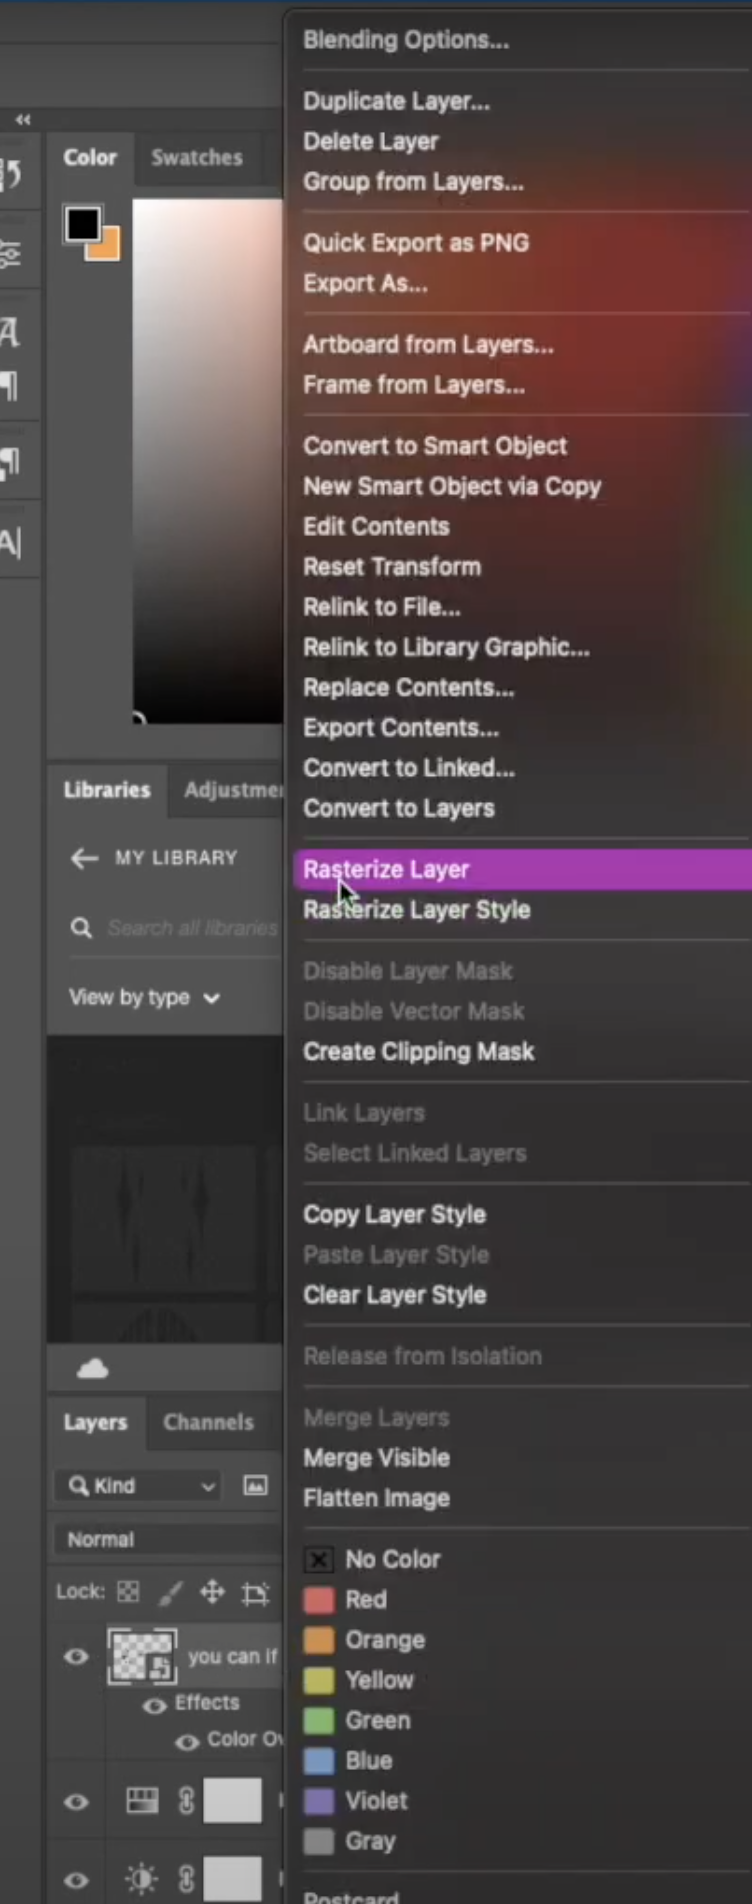
Click back on your design to make sure it is rasterized and then you'll be able to cut that section out of your design.


If you're adding shapes and lots of little decals, consider putting them off the page so it looks a bit more realistic.

Once you're done you can save your image as a PNG or a JPEG. I usually do JPEG for Etsy pictures.
So there are multiple ways you can create photos for wall decals in order to sell them.
Please let me know in the comments if you have any other ideas and please subscribe for more videos like this one in future.