

DIY Christmas Countdown sign
In this post, I'm going to show you how to make a DIY Christmas Countdown with a magnetic board and also show you a couple of new things I've learned in Silhouette. So, if you're a Silhouette Studio user, stick around for that.
Before we get going I'd appreciate it if you Follow, Like and Subscribe to my videos and channel so that I can keep creating lots more videos like this.
Watch the video or continue reading below…..
The below content may contain affiliate links and we may earn a commission if you shop through them, however, this won't cost you anything, it just helps us to keep the site running for free. For more information on affiliate links, see the disclosure here.
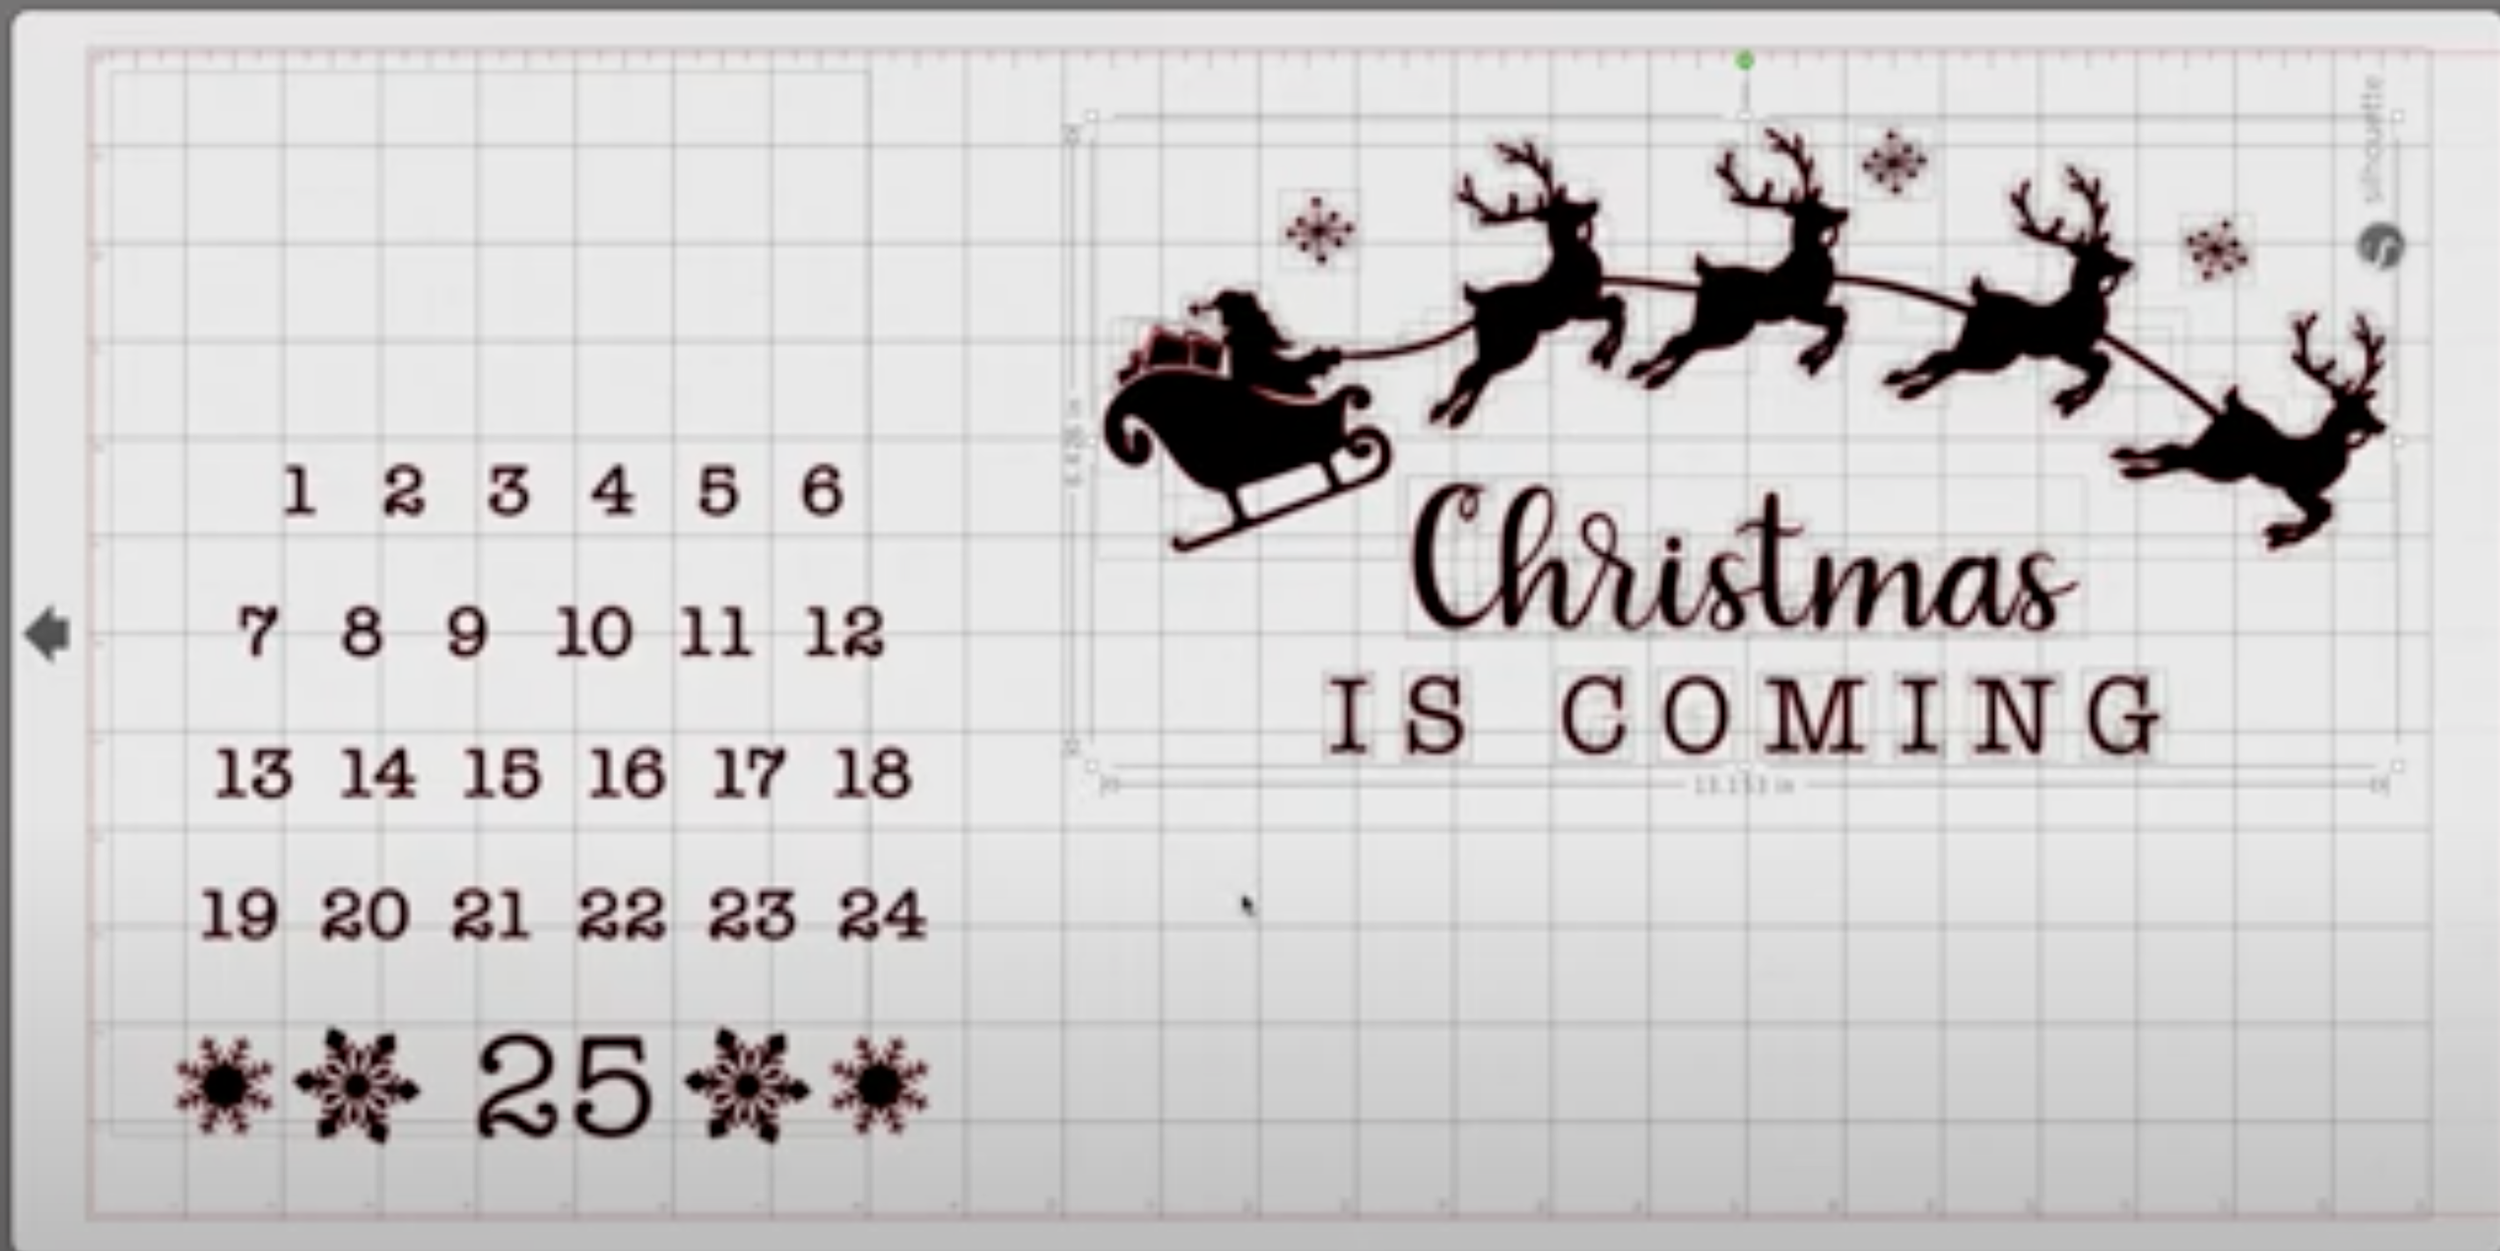
Firstly, I will show you the trick I learned in Silhouette Studio. It was really bothering me that I couldn't see the numbers down the side and across the top when I added a design and I wasn’t sure whether I could fit the design on the mat.

Apparently, if you set a cutting mat in the Page Setup you can either set it at 12 x 12 or 20 x 12 x 24. Then you bring the transparency all the way up, which will show the numbers through the lines. This will now give you a bit of a guide if you're trying to lay out things that going to be cut on a cutting mat.

Even though I didn’t need this design but thought I'd show you because it might be quite useful.
This is the design I’m using for my countdown board, there are lots of designs for sale in my Etsy shop if anyone wants to use one.

I wanted to make this design around 13 inches wide to fit on the board, which meant cutting it into sections and making it larger. This is how it’s done:

Put a box around one of the sections and when the image has turned yellow (you can increase the threshold if you need to).
Then click ‘trace’ and detach. Pop a box around the section again and move it to where you want it to go. I made this section 13 inches and grouped it together so it stayed together.
I repeated the process to make two more sections and placed them so that I could pop the entire design on the same cutting space.

Then I cut the design using the the vinyl roll feeder rather than putting it on a mat and made sure the cut settings were correct before sending it to my machine.
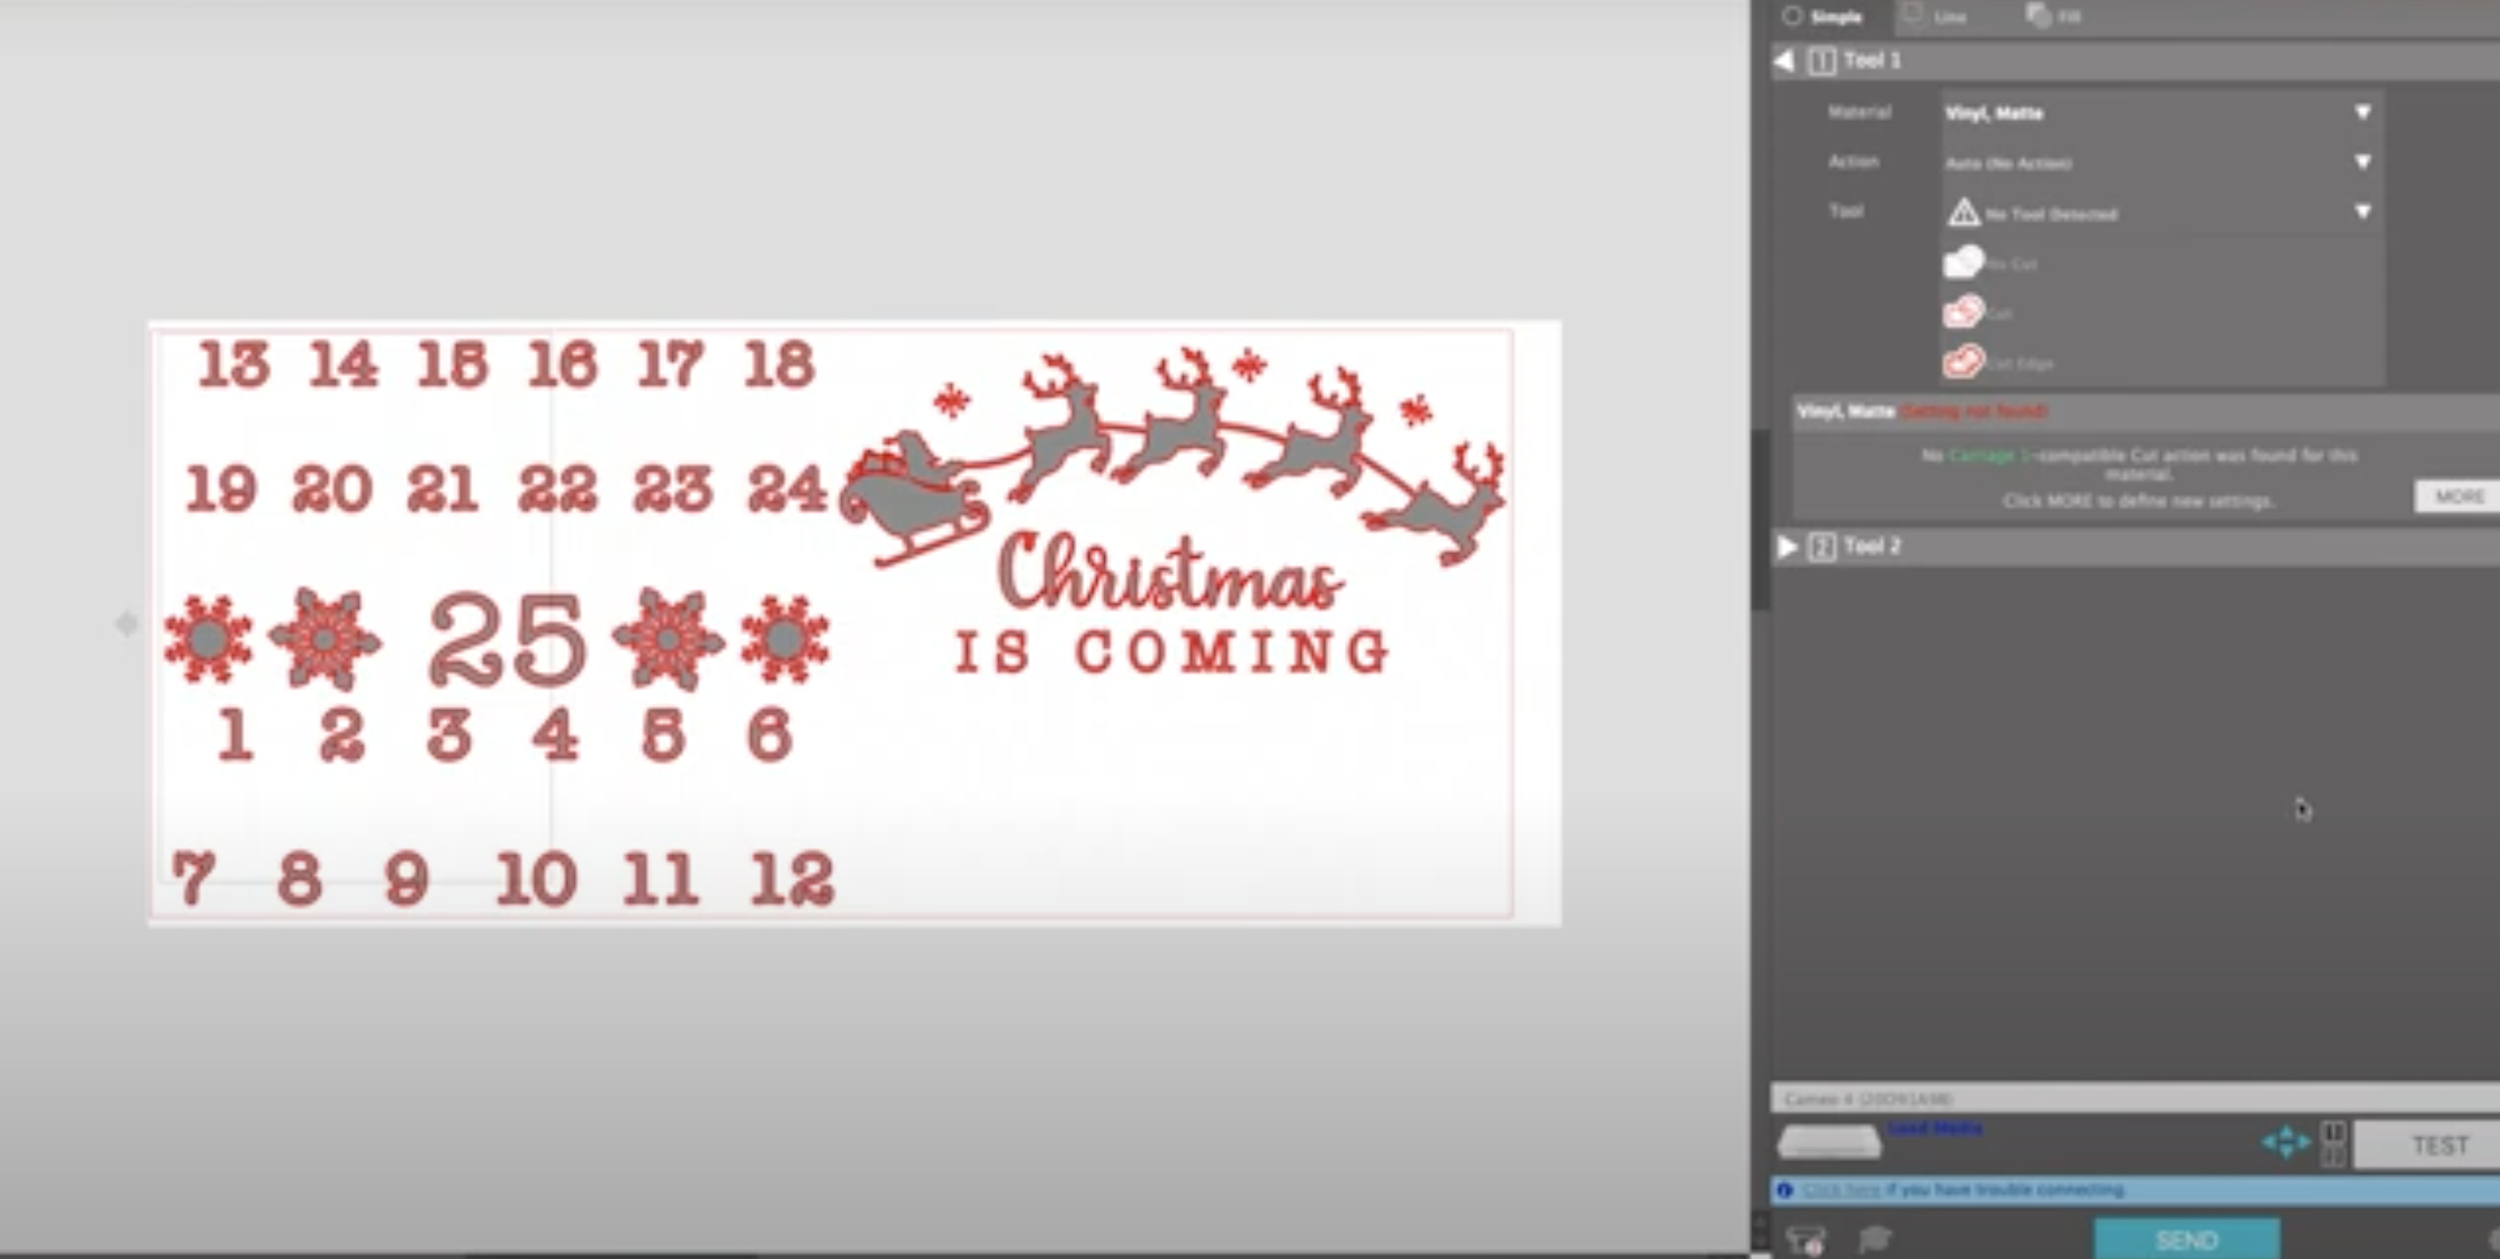


Make sure anything that needs to be the same dimensions (such as letters or numbers), is sized at the same time and then split into different sections to be able to cut it.
This design cut out pretty well and was quite easy to weed. I added the transfer tape and laid everything out on the board so I could figure out the correct spacing between everything.
The magnetic board I used is no longer available at Ikea but they do have others here.
I always flip my vinyl over and rub the back to ease removal. It does sometimes require just a little bit of extra pushing down though.

Once I've done that it was quite easy just to peel it off and apply.
For a marker, I bought some peel-off sticky magnets and placed a couple on a blank bauble (you could decorate the bauble before use).

I hope you liked that, there are lots of designs that can be bought in my Esty shop if you would like to use one too.