

Tips & Tricks For Applying Vinyl Decals
What To Do If You Can’t Get Vinyl To Stick Or Peel
Decals can sometimes be tricky to apply, and peel, so take a look below for some tips to get it right every time! Either watch the video…
The below content contains affiliate links and we may earn a commission if you shop through them, however this won't cost you anything, it just helps us to keep the site running for free. For more information on affiliate links, see the disclosure here.
Or take a look below…
Materials
First of all, the better the quality of vinyl and transfer tape, the easier it should be to use. For a list of some of the best Vinyl suppliers, check out my Members Only Area, especially for Cricut beginners:
Always test a piece first to make sure you have the correct cut settings if you have never used that brand/type before.
Then I use a medium tack transfer tape for almost everything I apply, and I don’t usually have any problems, however, if you are applying to something that may rip, or something quite delicate like a balloon then you may want to use something that is a lot less tacky, like a transfer paper or masking tape.
Watch my balloon tutorial if you need some more tips for that…
You also want to make sure you’re using a suitable surface. Most smooth, flat surfaces are fine, but if you are using fabric then you are usually going to be better off using iron-on vinyl. Take a look at my post Adhesive Vinyl vs. Iron on Vinyl if you’re unsure on what you should be using…
Prepare Your Surface
So once you have all of your materials ready, the first step is to prepare the surface you will be applying your decal to.
If you’re using wood, make sure it is sanded and smooth and remove any dust. You can stain or paint your wood, just make sure you leave enough time for it to completely dry and cure before you apply vinyl. Whether it is stained, painted, or left bare, you might also want to use a water-based sealer to help your vinyl stick.
For other surfaces, most of them shouldn’t need much preparation, but if you’re applying to something that might have had any dirt or grease on it, you can use rubbing alcohol and a cloth to get rid of this first. Just be careful not to apply this to anything that it might damage.

I’ve never seen the need to do this, I usually just clean stuff with a cleaning spray and let it dry, but then again I don’t sell the things I make, just the decals.

Get Your Decal Ready
So your surface is prepared, now to get your decal ready.
For the basics on how to create, make and weed your first decal check out this video…
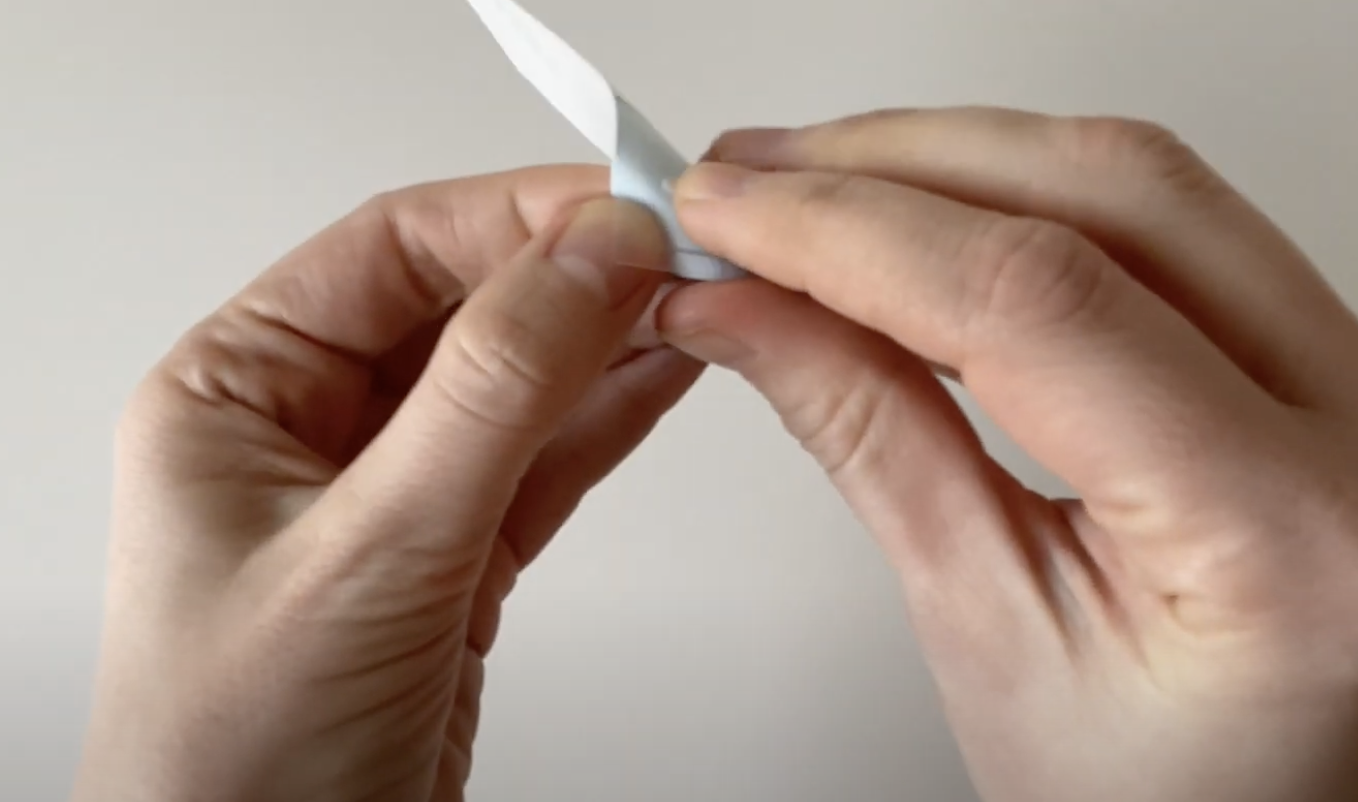
But if you follow all of the usual steps to cut and weed your vinyl and then add transfer tape but you’re having issues getting the decal away from the paper, then the first thing to do is to turn it over and rub the backing with your credit card or vinyl scraper. Then, pull the paper away from the transfer tape.

If the vinyl isn’t pulling away with the tape, put a small amount of pressure on the place where it won’t come off. Keep pushing it back down whenever it peels back up.
Or you can also try using your vinyl scraper or store card to push down on the vinyl while you pull the tape back.
Whatever you try, go as slow as possible, this part of the process may just take a little bit of patience.
Once It Is Applied
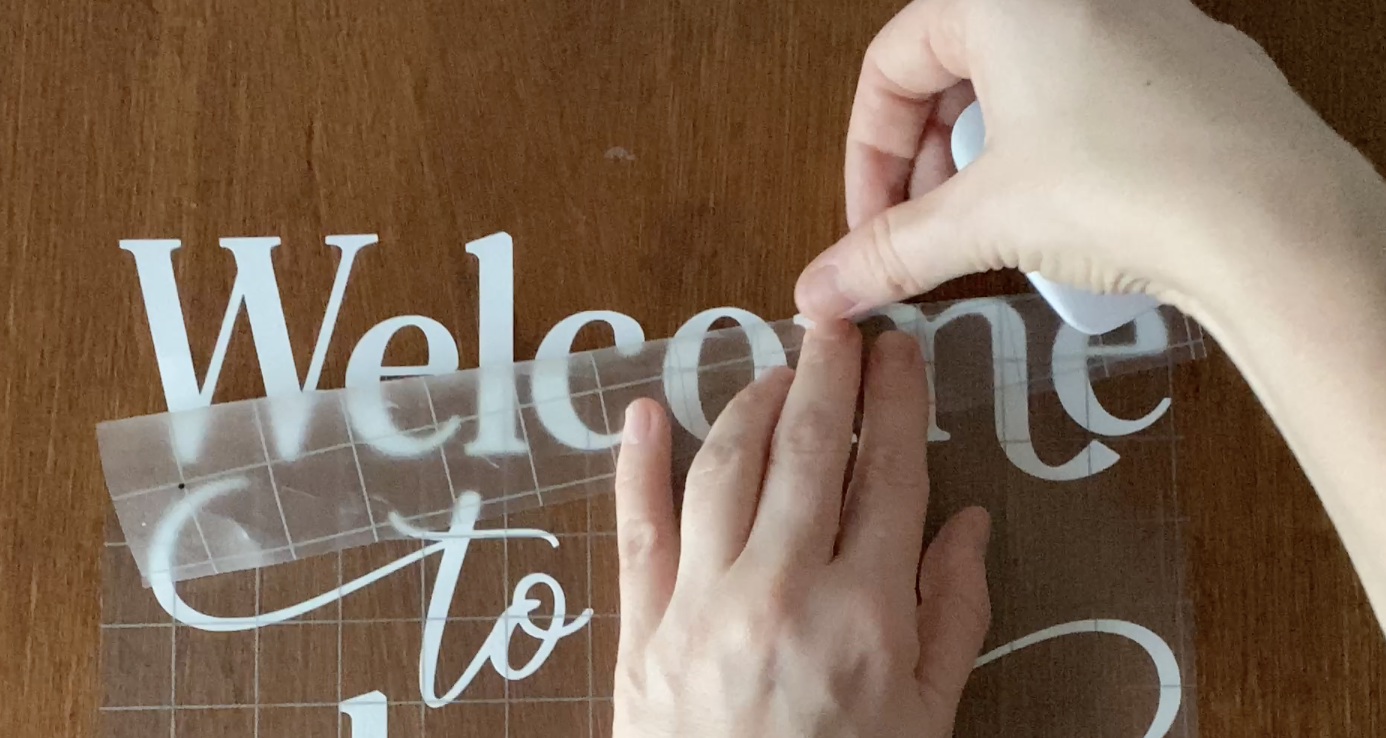
Then once the backing paper is off, and you have applied the decal, make sure all of the vinyl is fully stuck down on the item before lifting the tape. It may be easier to do this in sections,
If you start to lift it and the decal is not sticking to the surface, it may just be a case of taking it really slowly and pressing bits down as they lift up.
You may also want to try pushing down with a vinyl scraper or store card again, but obviously pushing down the vinyl as you peel back the transfer tape this time.

If You Have Wrinkles/Air Bubbles
Once it is applied, use your scraper/store card to smooth out the vinyl and get rid of any wrinkles or air bubbles. If needed, you may be able to (really carefully) lift the vinyl back up, and smooth it down. You ideally need something thin to get underneath it and do it as slowly as possible so you don’t accidentally rip the vinyl.

If you can no longer move your vinyl about though and you have ended up with some air bubbles, and they won’t push out with a card, you can use something sharp to pop the bubbles. Although obviously you need to be super careful with this, and I would only ever do this as a last resort if you really need to get rid of the bubbles.
The smaller the sharp thing the better, so you can’t see the hole, and you just want to do a quick pop and not move it about, just to get rid of the air so that you can flatten it down. Or you can make a tiny slit with a craft knife and push the pieces back together. I don’t currently have a tutorial on how to do this but do take a look at further Youtube videos for instructions if you’re unsure.
Don’t Use It Right Away
Once it is applied and you’re happy with the result, let the decal cure for as long as possible before you start using it - with glasses for example you want to be leaving them for 72 hours at least before getting them wet.

And then enjoy! How long it will last will depend completely on the surface you use, where it is placed and the type of vinyl that is used too.
Let me know if you have any further questions in the comments!