

How To Layer Vinyl Decals
In this post, I thought I would show you how to make this little guy using layered vinyl. So unless you have printable vinyl, this is what you have to do if you want to make your vinyl decal projects multi-coloured or multi-patterned.
Watch the video for a talkthrough, or have a read below…
The content below contains affiliate links and we may earn a commission if you shop through them, however, this won't cost you anything, it just helps us to keep the site running for free. For more information on affiliate links, see the disclosure here.
I don’t do a tonne of layered projects because I find that they’re too fiddly to sell, so it’s mostly when I’m making things for holidays that I put in that little bit of effort and go multicoloured. So if you make them all the time and have any other layering tips then do let me know in the comments!
Choose your design
You can either make your own design or choose an existing one. If you’re looking for existing ones just make sure they say they are layered somewhere… which they should be if they are a multicoloured SVG, but do always make sure.
Also, make sure you pick a design that you have all of the vinyl colours of already… there’s no point buying new colours for tiny little details unless you’re going to be making tonnes of these same designs
You can also try the parchment paper method or try leaving your weeding box around each design, which I saw Angie from Country Chic Cottage doing on TikTok and thought was a fab idea!
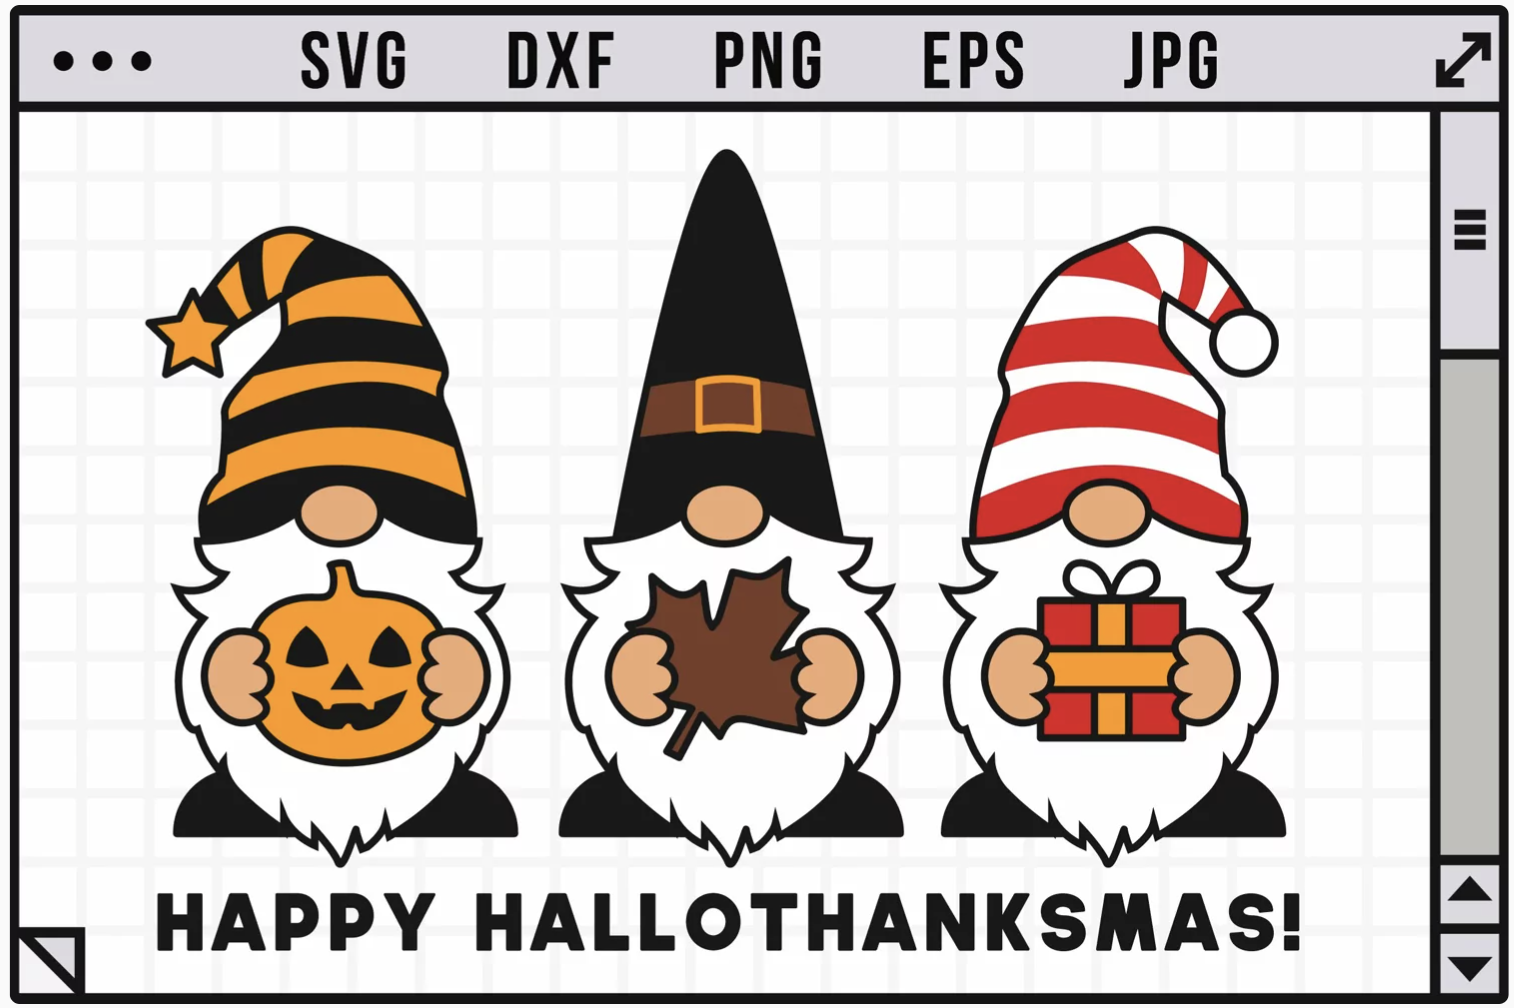
I found this really cute one from Cuteshop on Design Bundles
Prepare your design
I isolated the one with the pumpkin for this project but I can also use it later in the year. Just make sure that when you're looking for a design you see ‘layered SVG’ in the description somewhere to make sure it is actually layered before you buy it.
Also, try and get ones that use vinyl colours you already have in stock, rather than having to buy specific colours.
I wanted to get rid of the other two images and the wording underneath and there are a few ways you can do this:

Method 1
Click on one of the colour layers (I wanted to get rid of the other noses and hands). Press contour and just click on all the bits that you want to get rid of. When you come off it they will have disappeared.

If there are any colours that aren't on the design you want to keep you can just click on those and delete them. I got rid of the brown and the red from this one.

Method 2
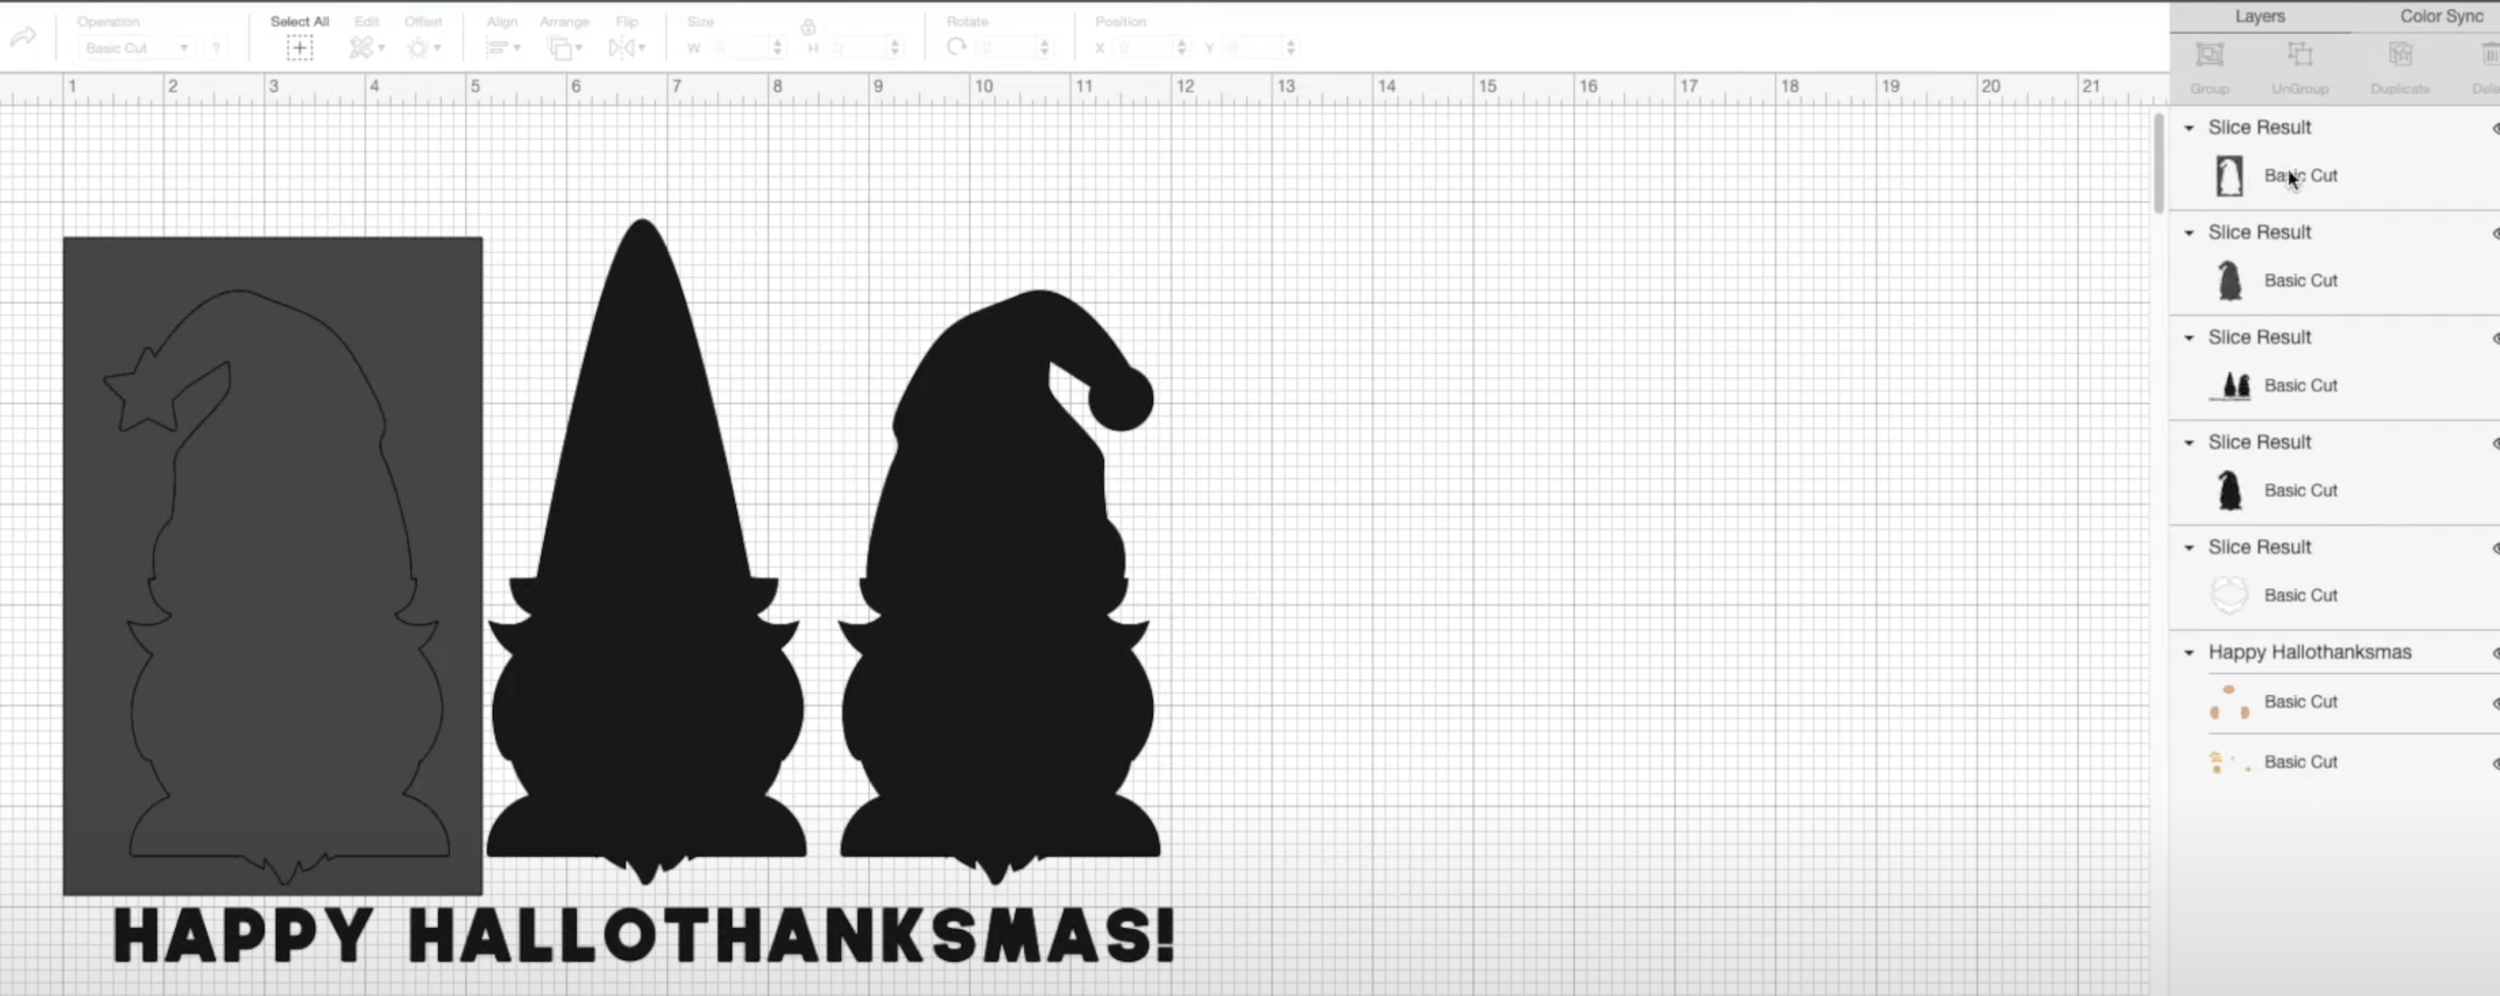
You can also do a box and then slice it.
Go to ‘Shapes’ (on the left panel) and create a square around the design you want to keep.
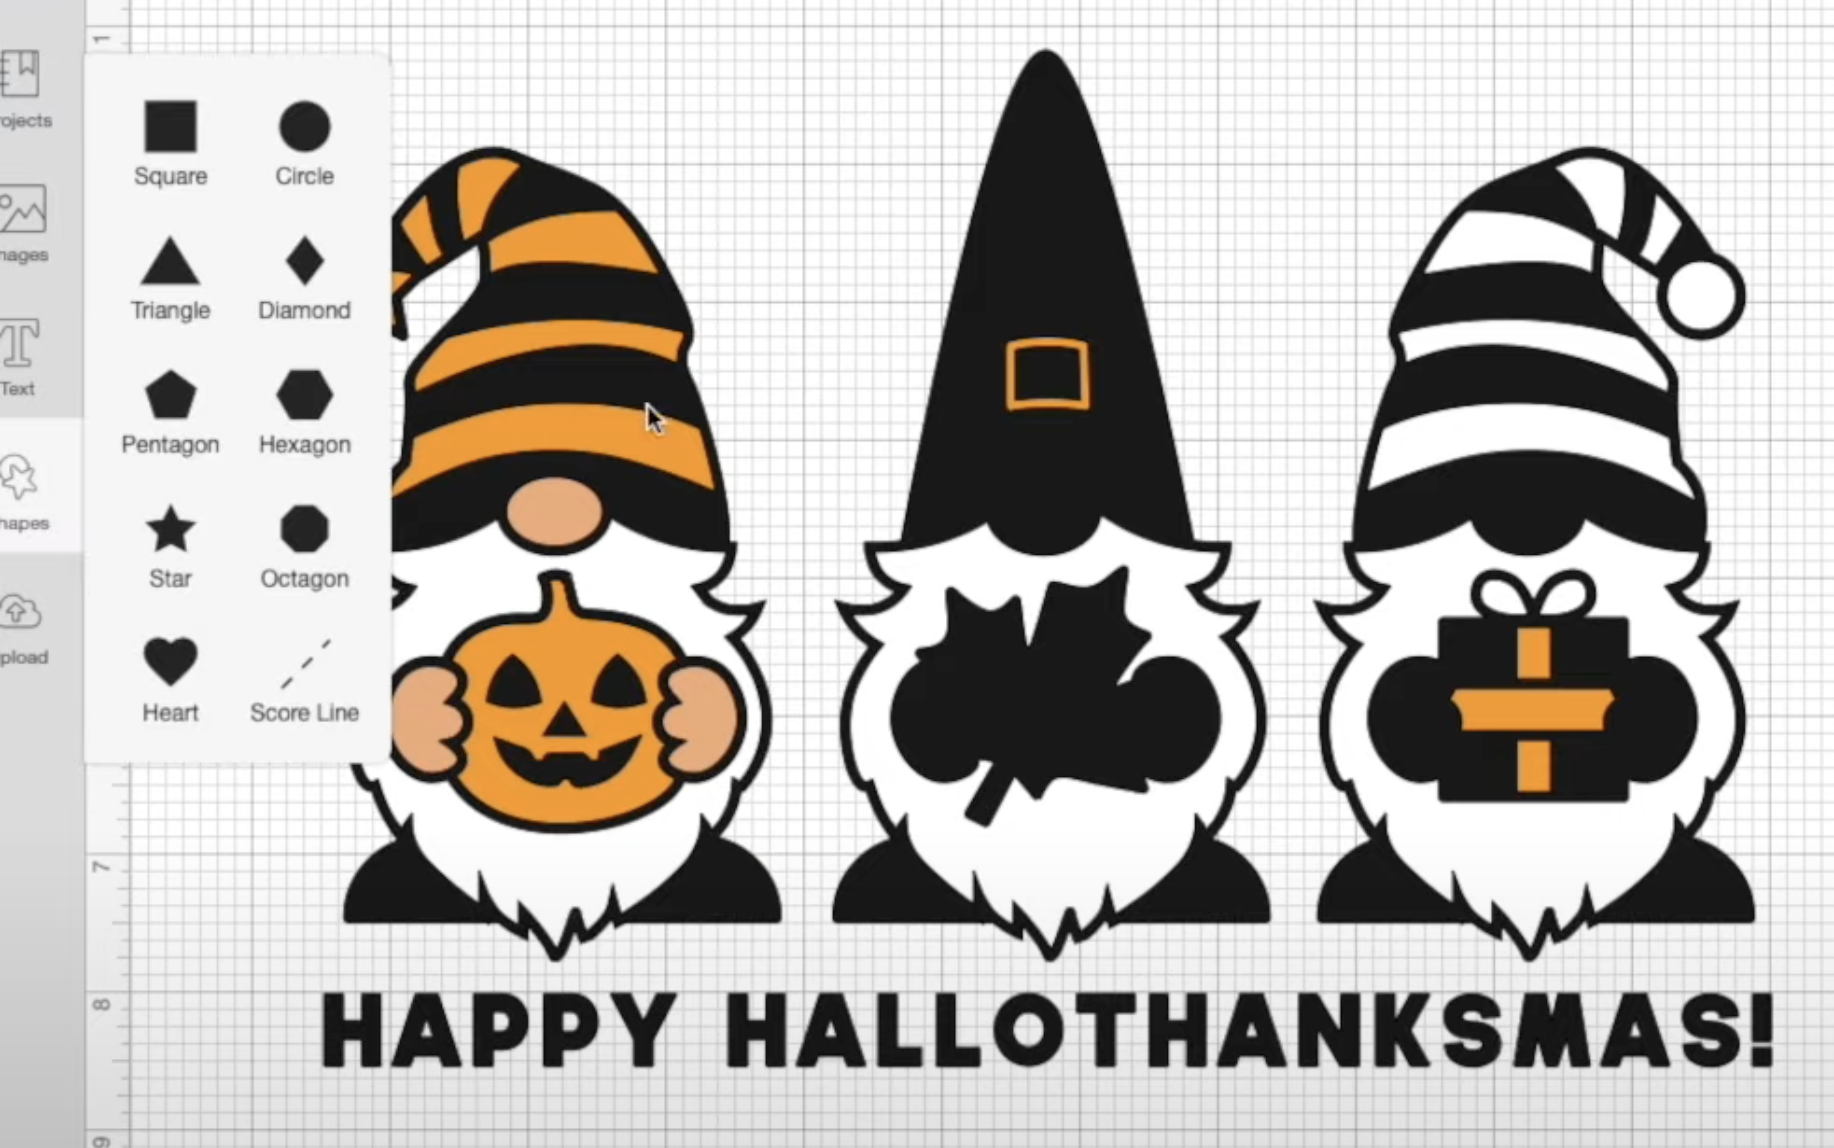
Make sure it's unlocked and pull it around the design you want to keep.
Click on both the box and then the colour you want to get rid of (or keep). Once they're both selected, click on ‘Slice’.
This will take the white slice out of the picture, so you can get rid of the box and any grey bits. You can get rid of whatever other colours you don't want. I got rid of the white beards in this design.
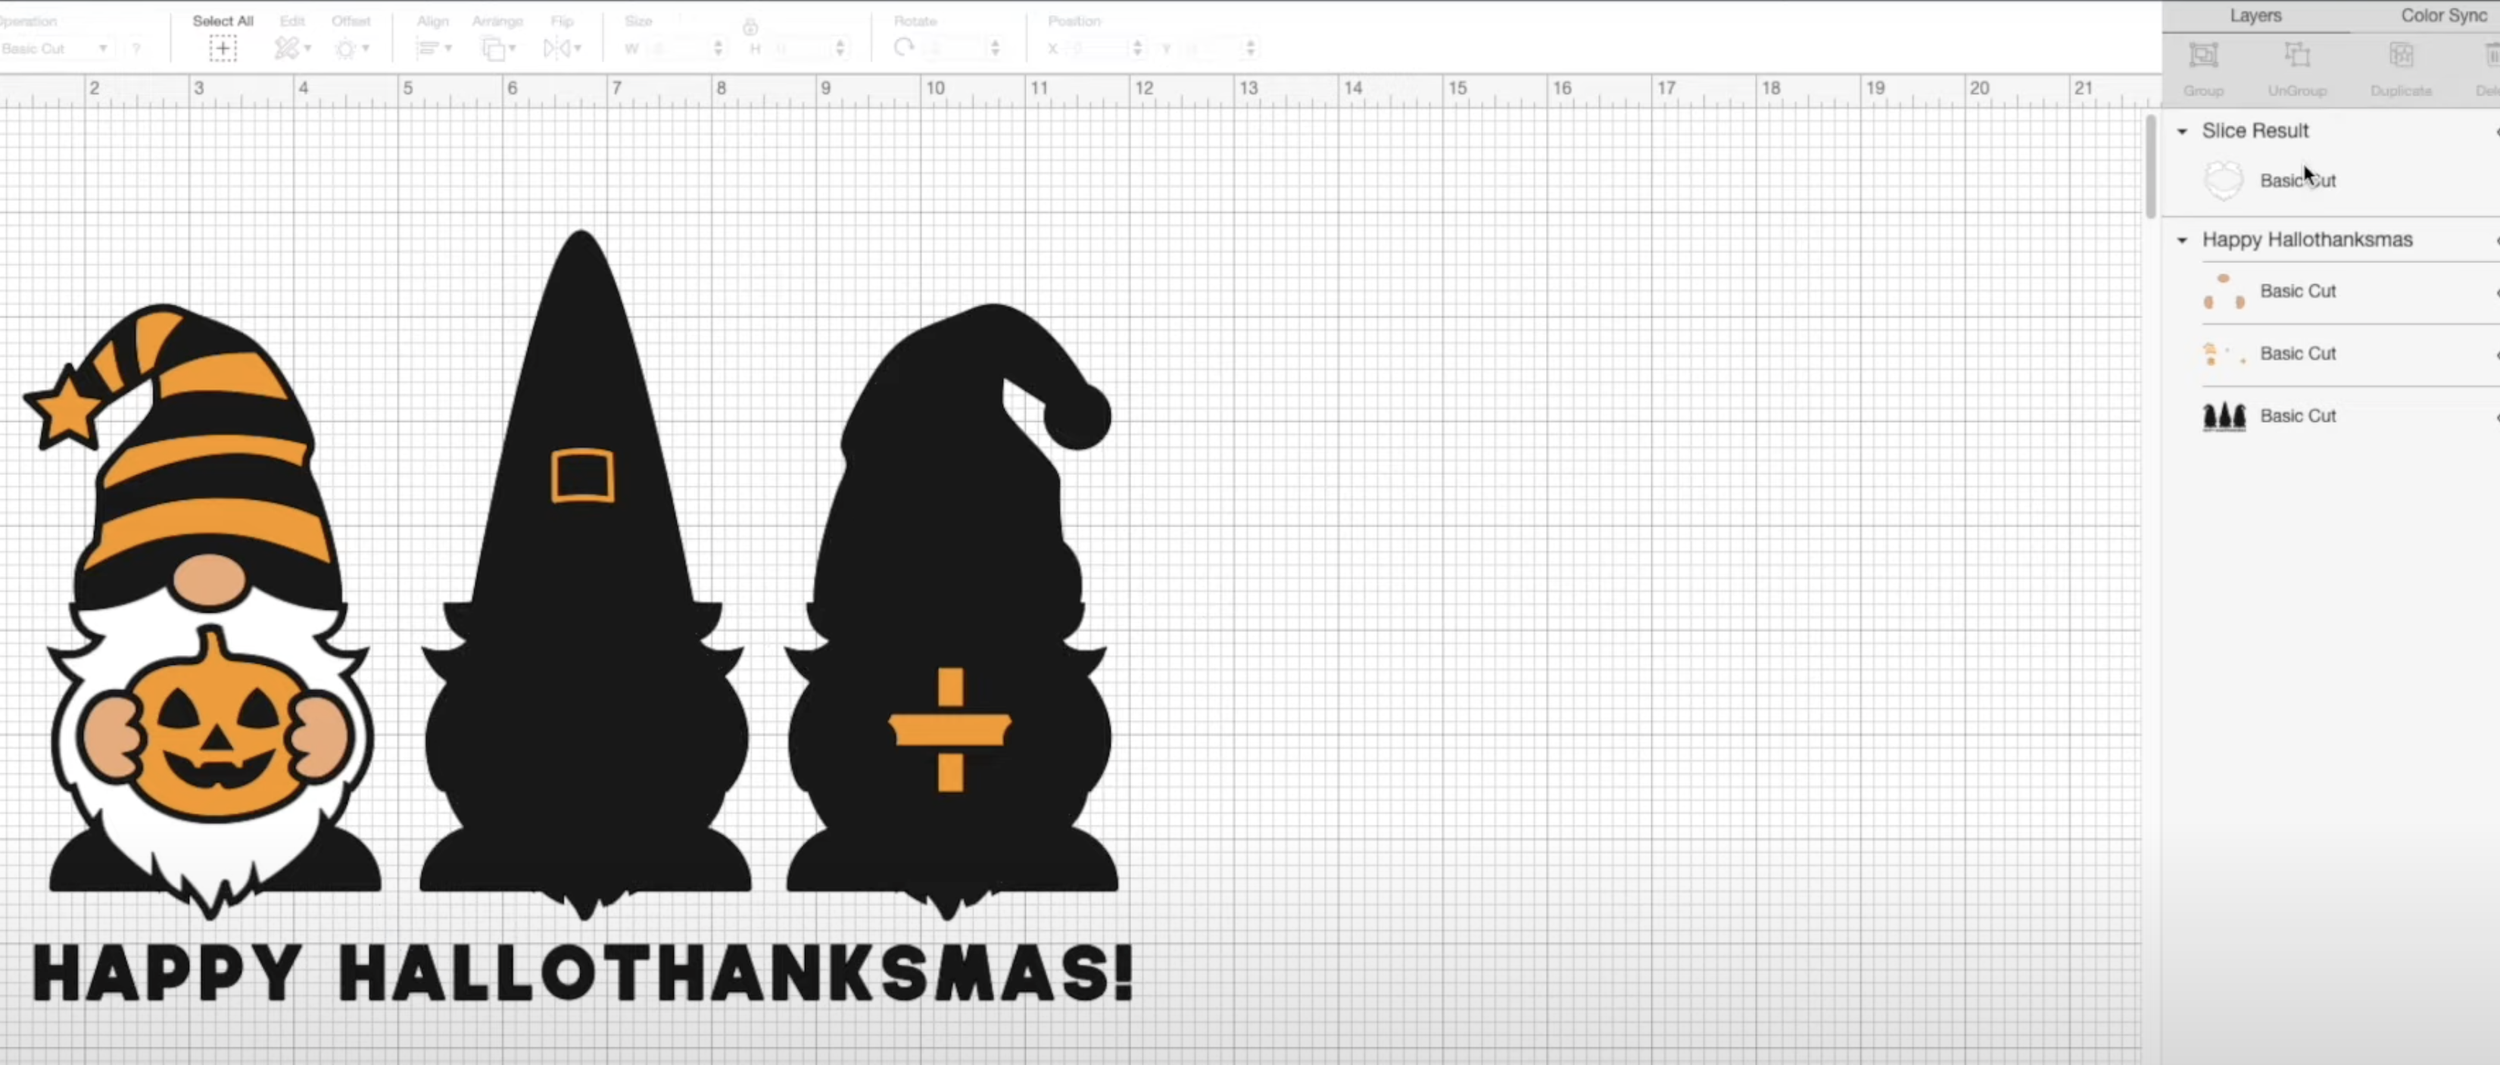
I did the exact same thing for the black section. Unlock it and put the box around the part of the image you want to keep. Make sure they're both selected, then click ‘Slice’ to get rid of that slice and also the bit you don't want.

For these little bits like these, I think it's probably just easiest to contour them.

If you but miss a couple of bits, (like I did!), repeat the process until they have all been removed. You don't have to click on them as you can look in the section on the right if that's a bit easier than clicking small pieces.

Once you've got rid of everything you need to make sure it is laid correctly. Bring the lightest section up (on the right panel). Usually, you will have your darkest layer on the bottom but it depends on the design.
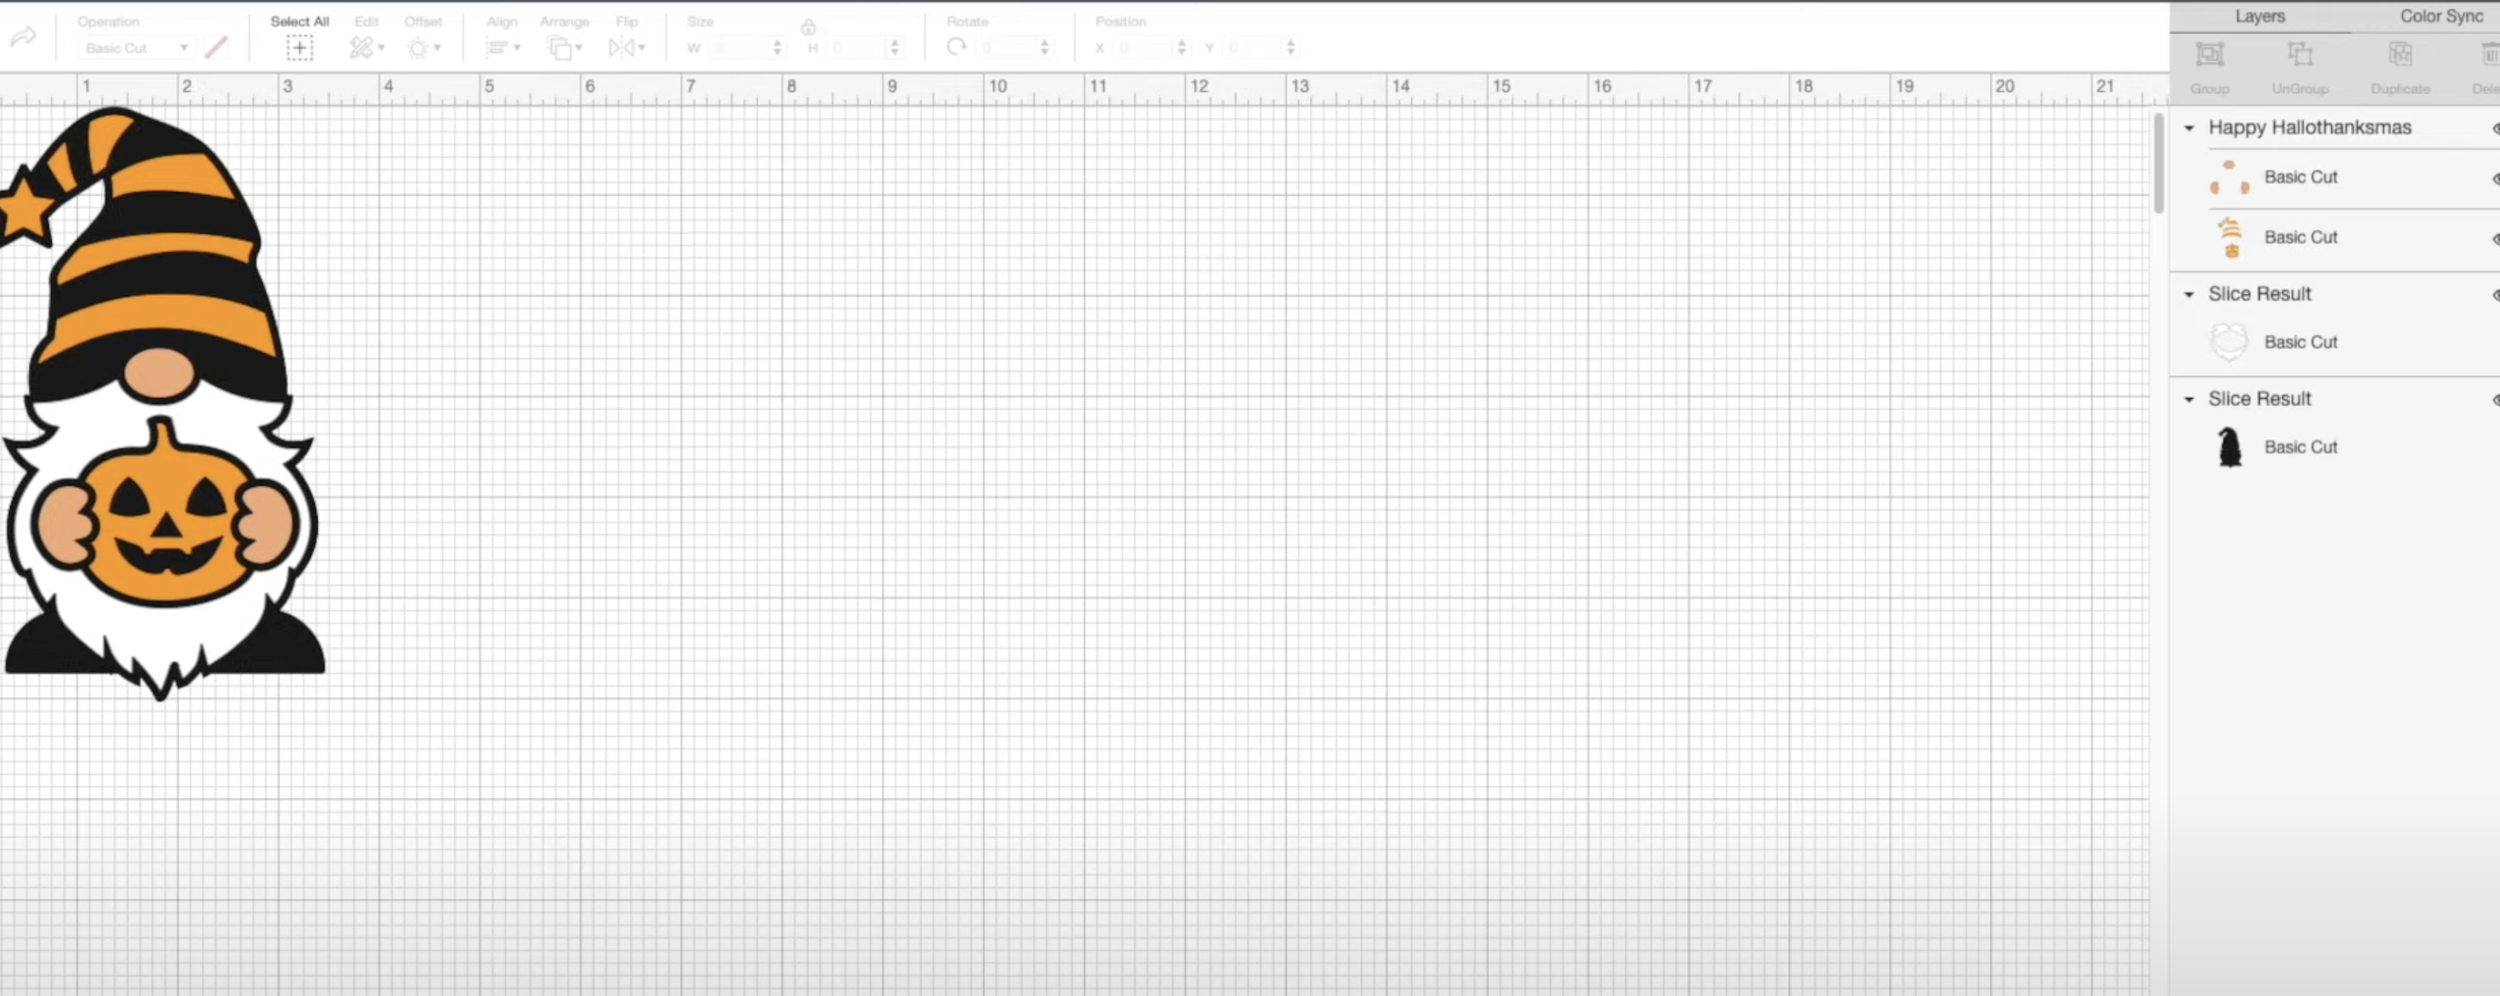
Make the design
To make the design, you have two options.
Option 1
You can either make it from there and it will divide it up into four different colours which you can cut separately.

Option 2
However, if you want a little bit of assistance to make sure everything is lined up correctly (which is what I and a lot of others do) there is an alternative way.
Step 1
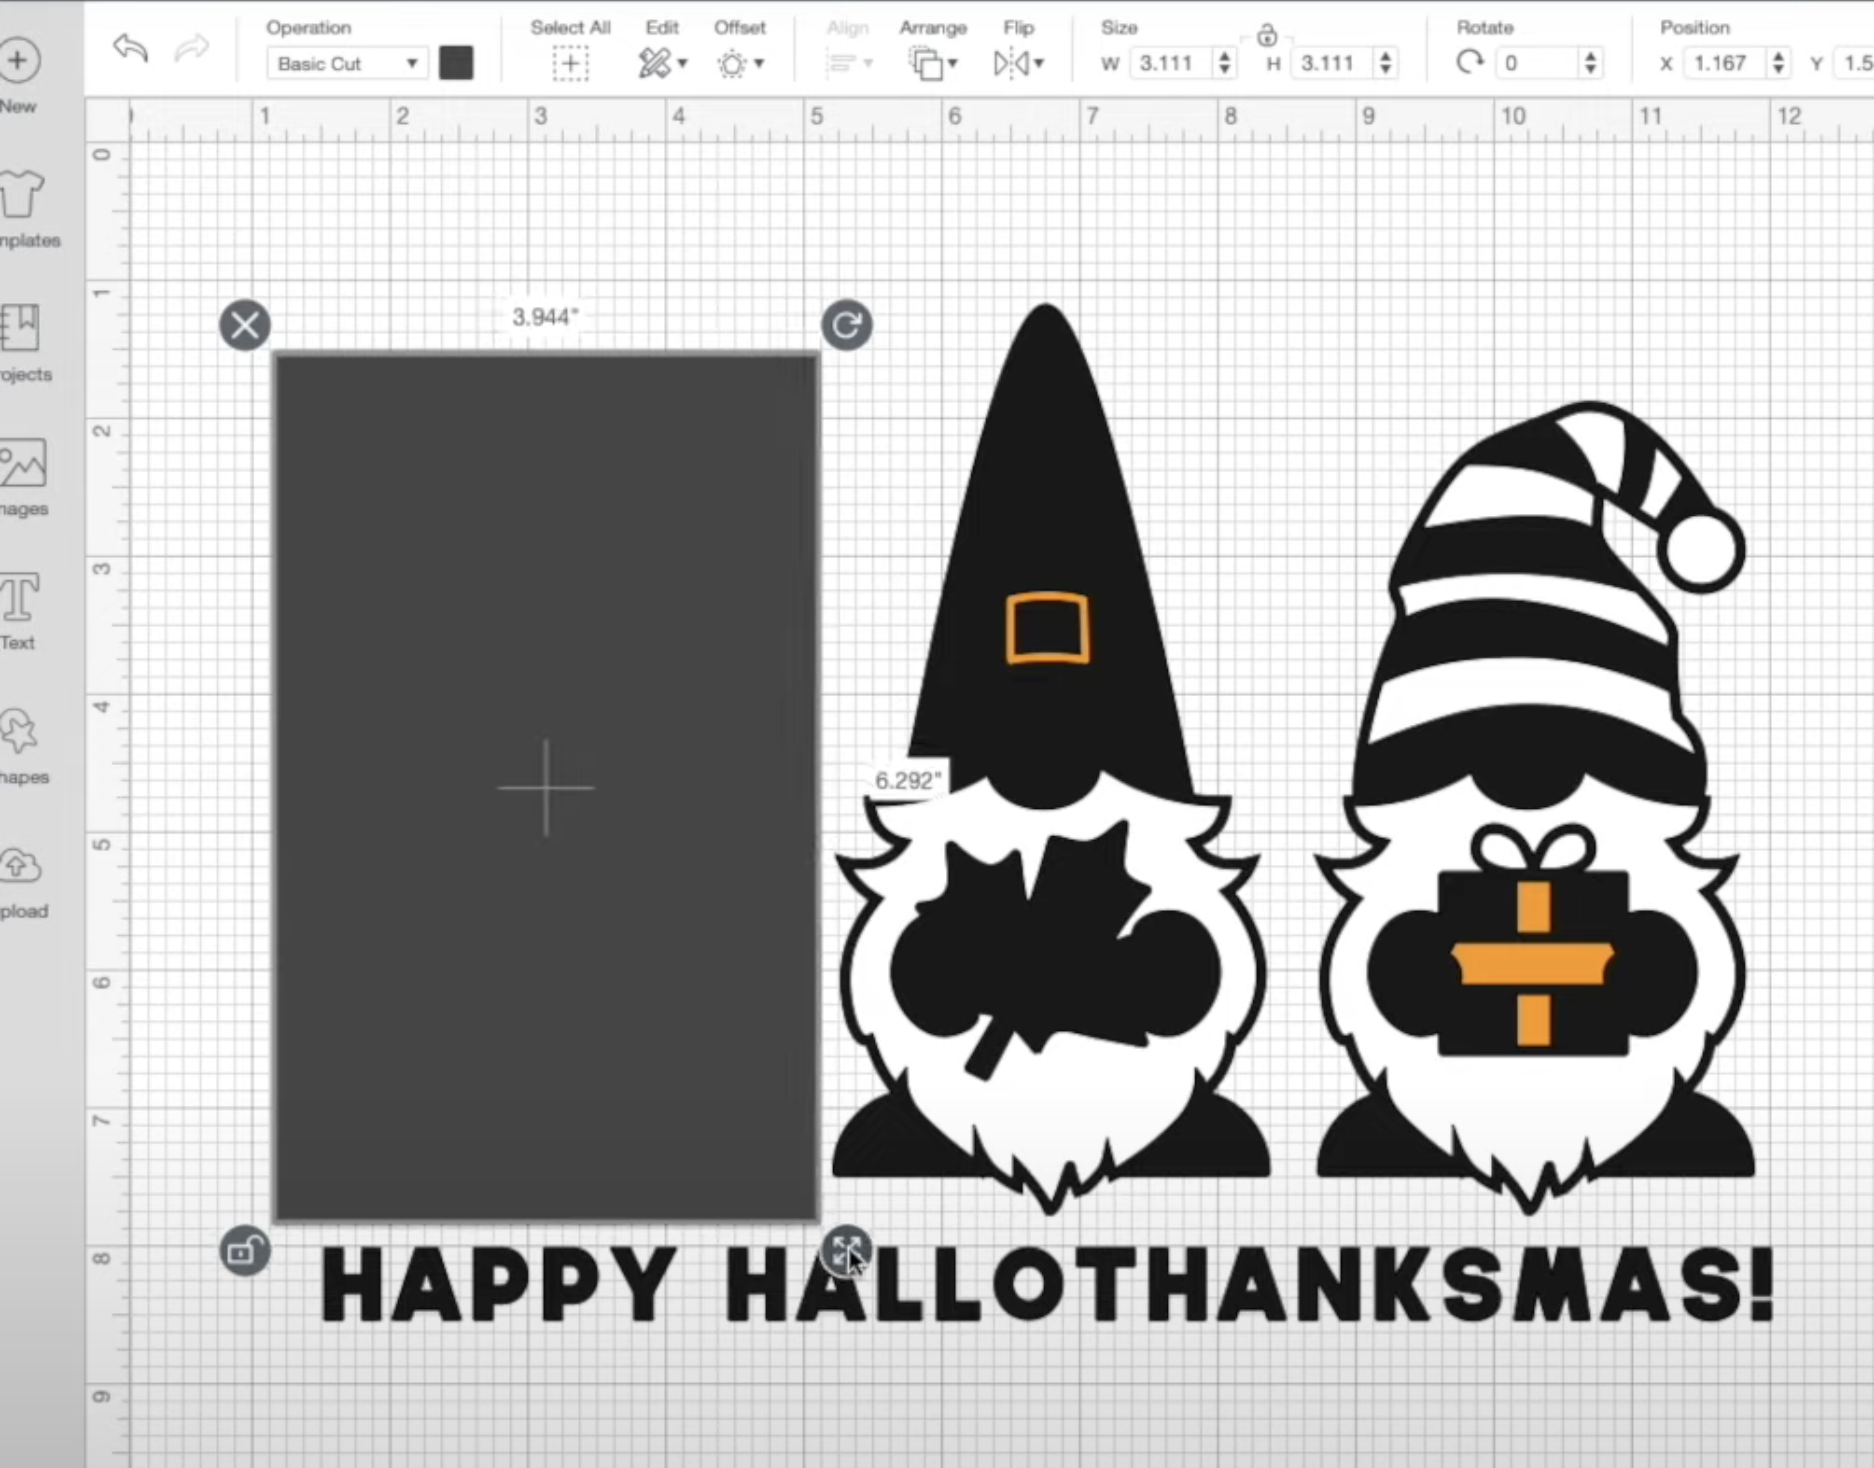
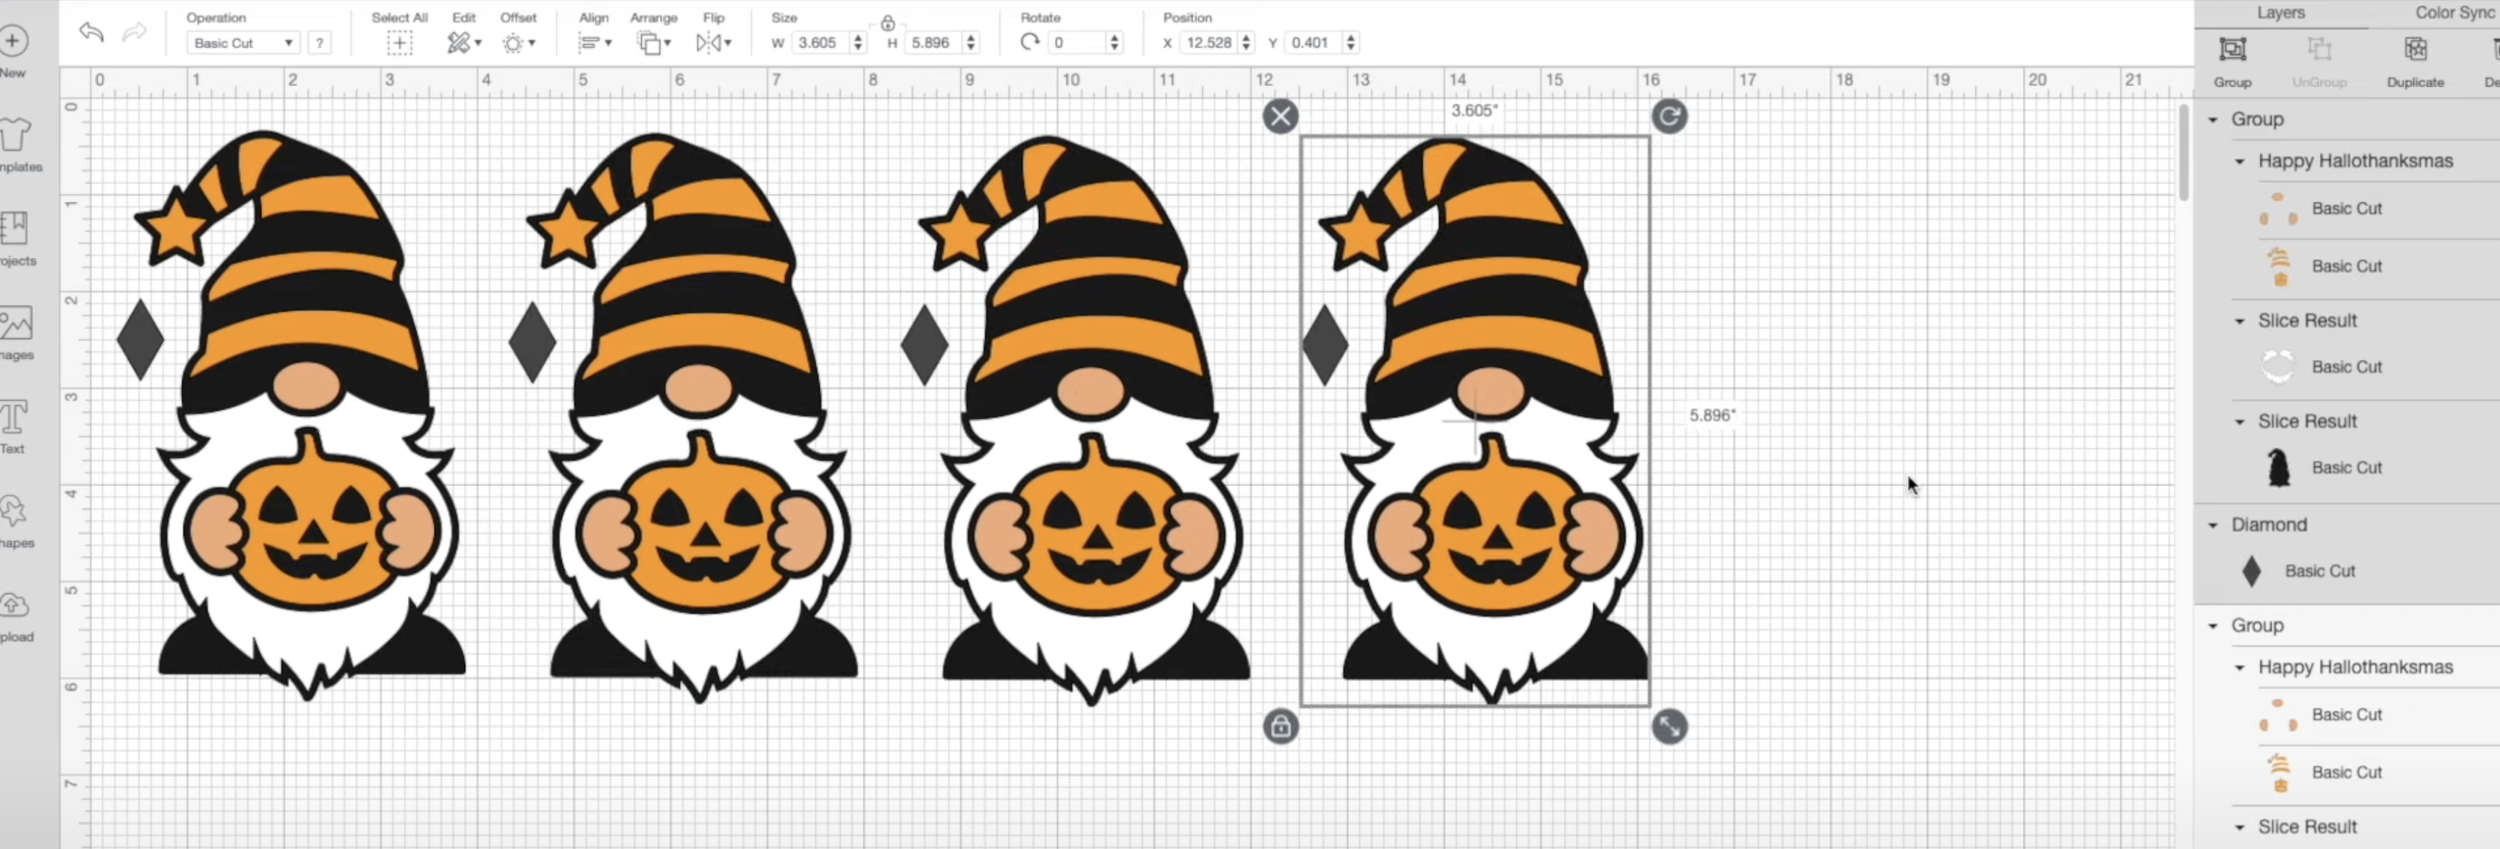
Group all elements of the design together and pick a shape (from the left panel). It can be a diamond or a star or a heart - any shape that will be quite easy to line up. I used a diamond shape.
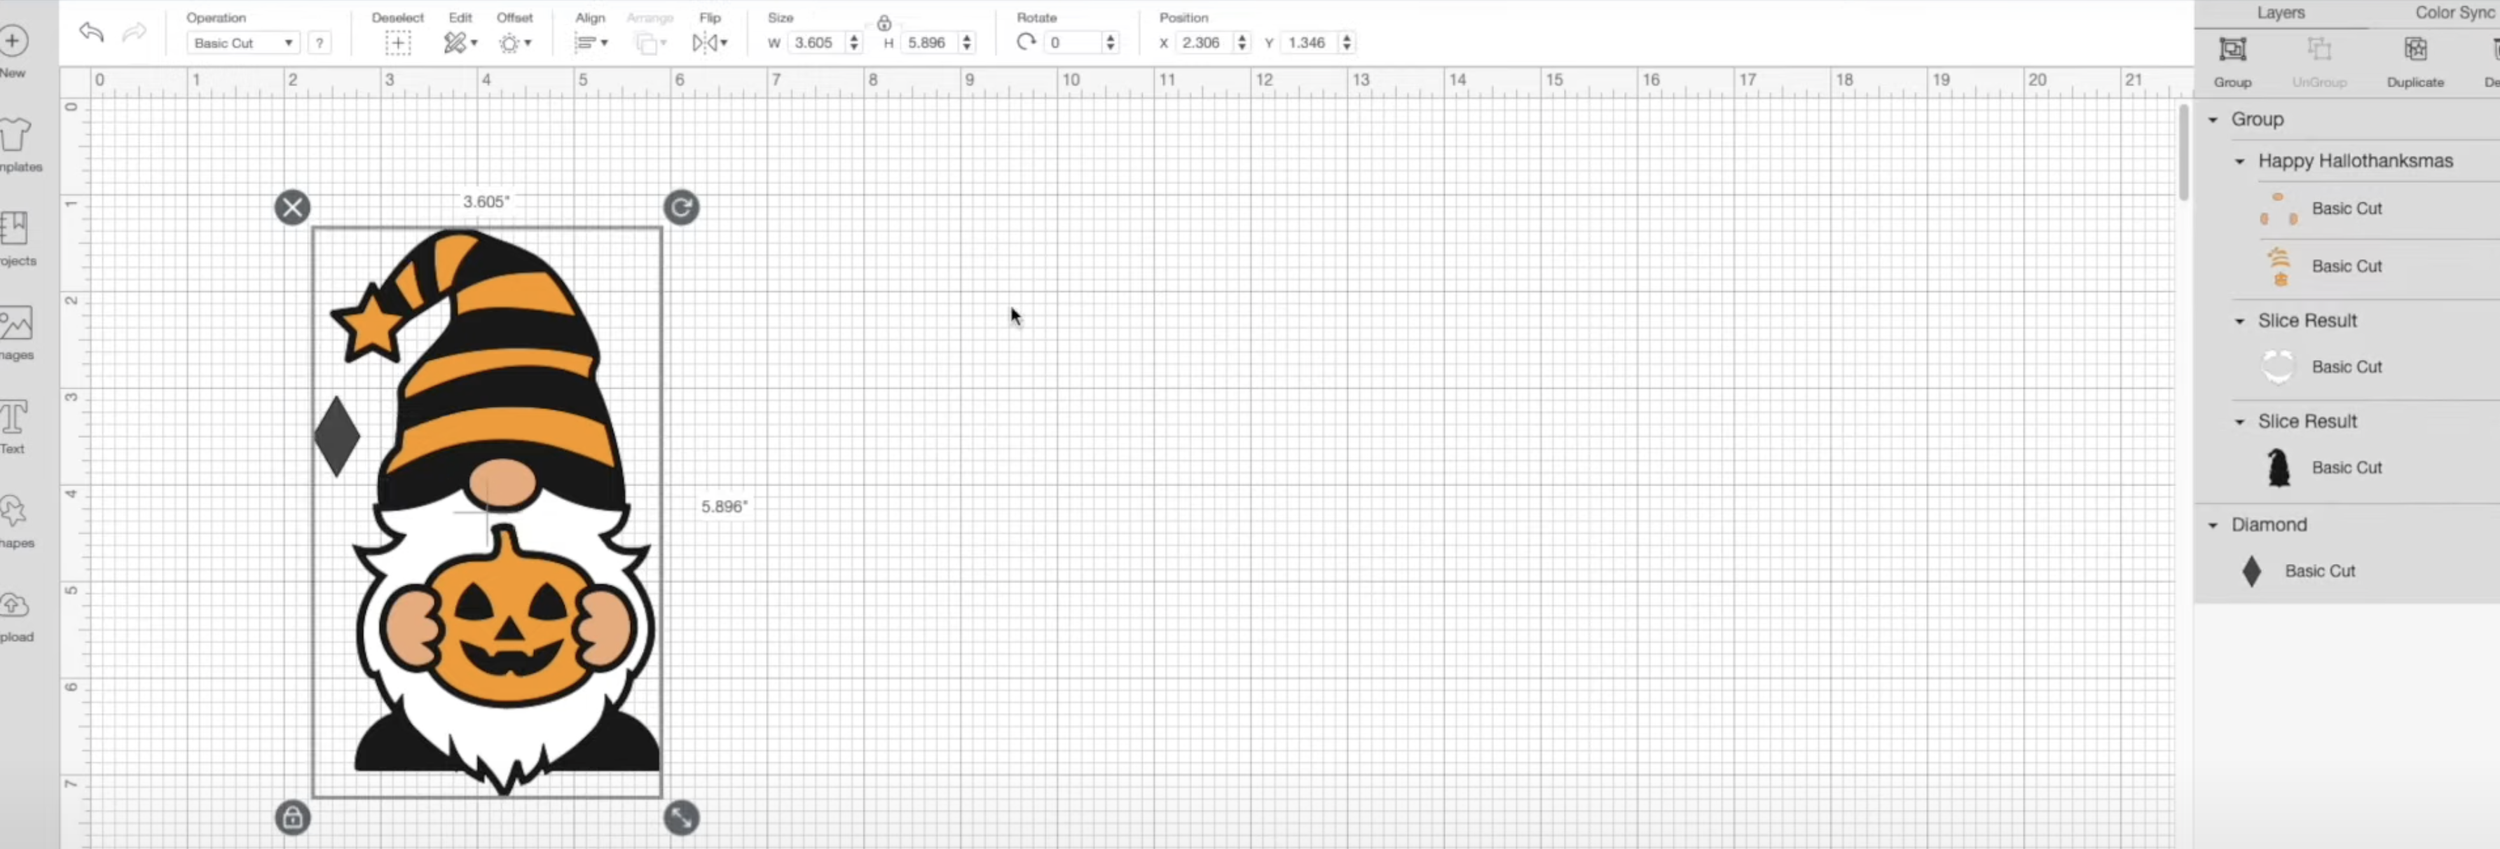
Make sure that's within that group and select all of it. Duplicate the image for the amount of colours you need to cut for each layer. In this case, I duplicated the image four times.
Step 2
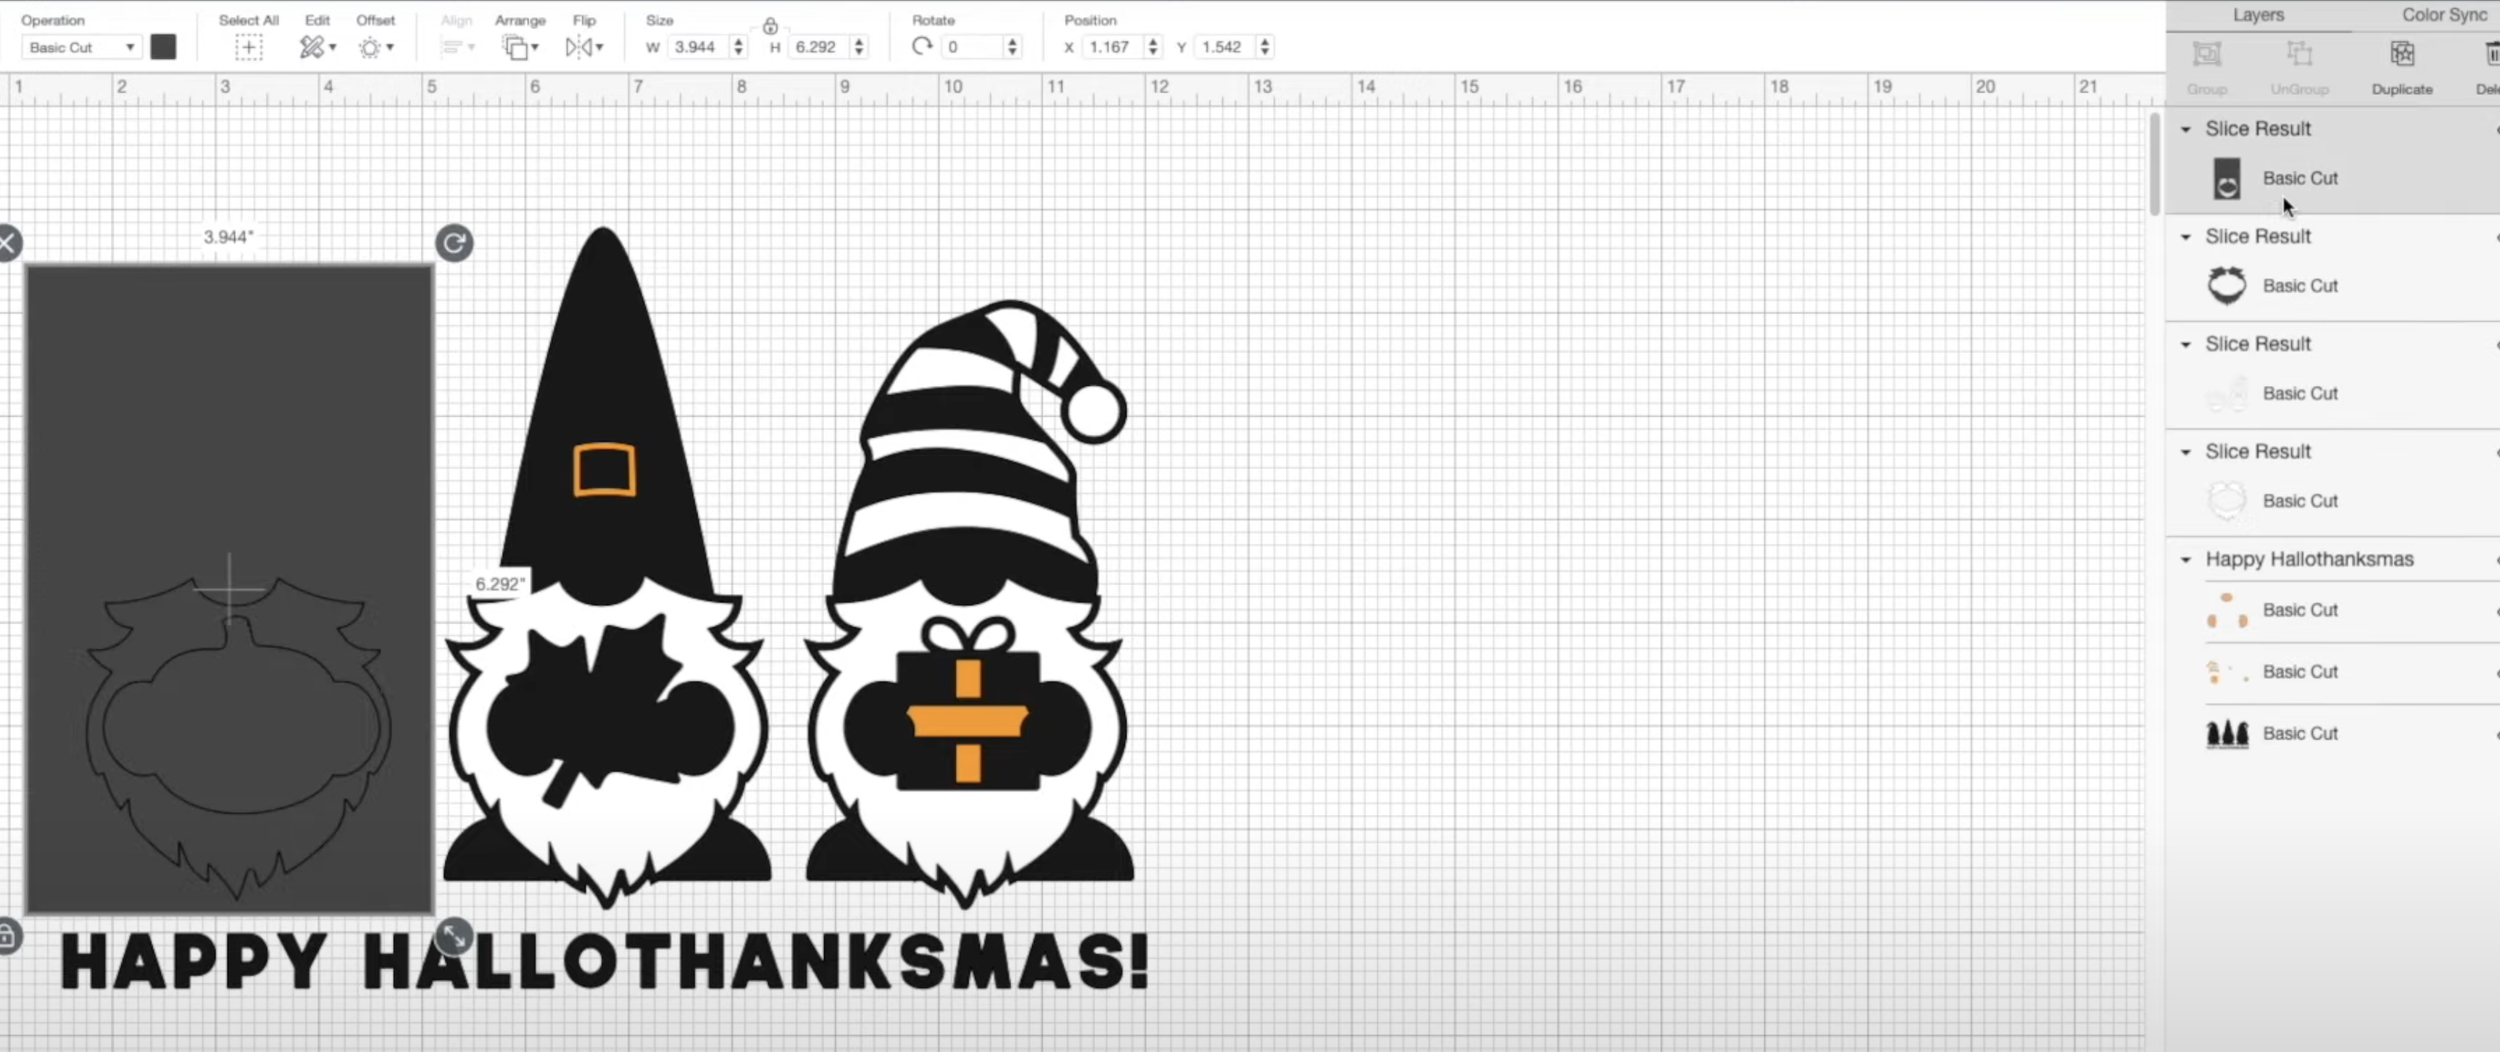
The next step is to isolate each colour layer, so get rid of everything except the chosen colour. In this instance, it's peach. Make sure you turn the shape the same colour as well but don't move it.
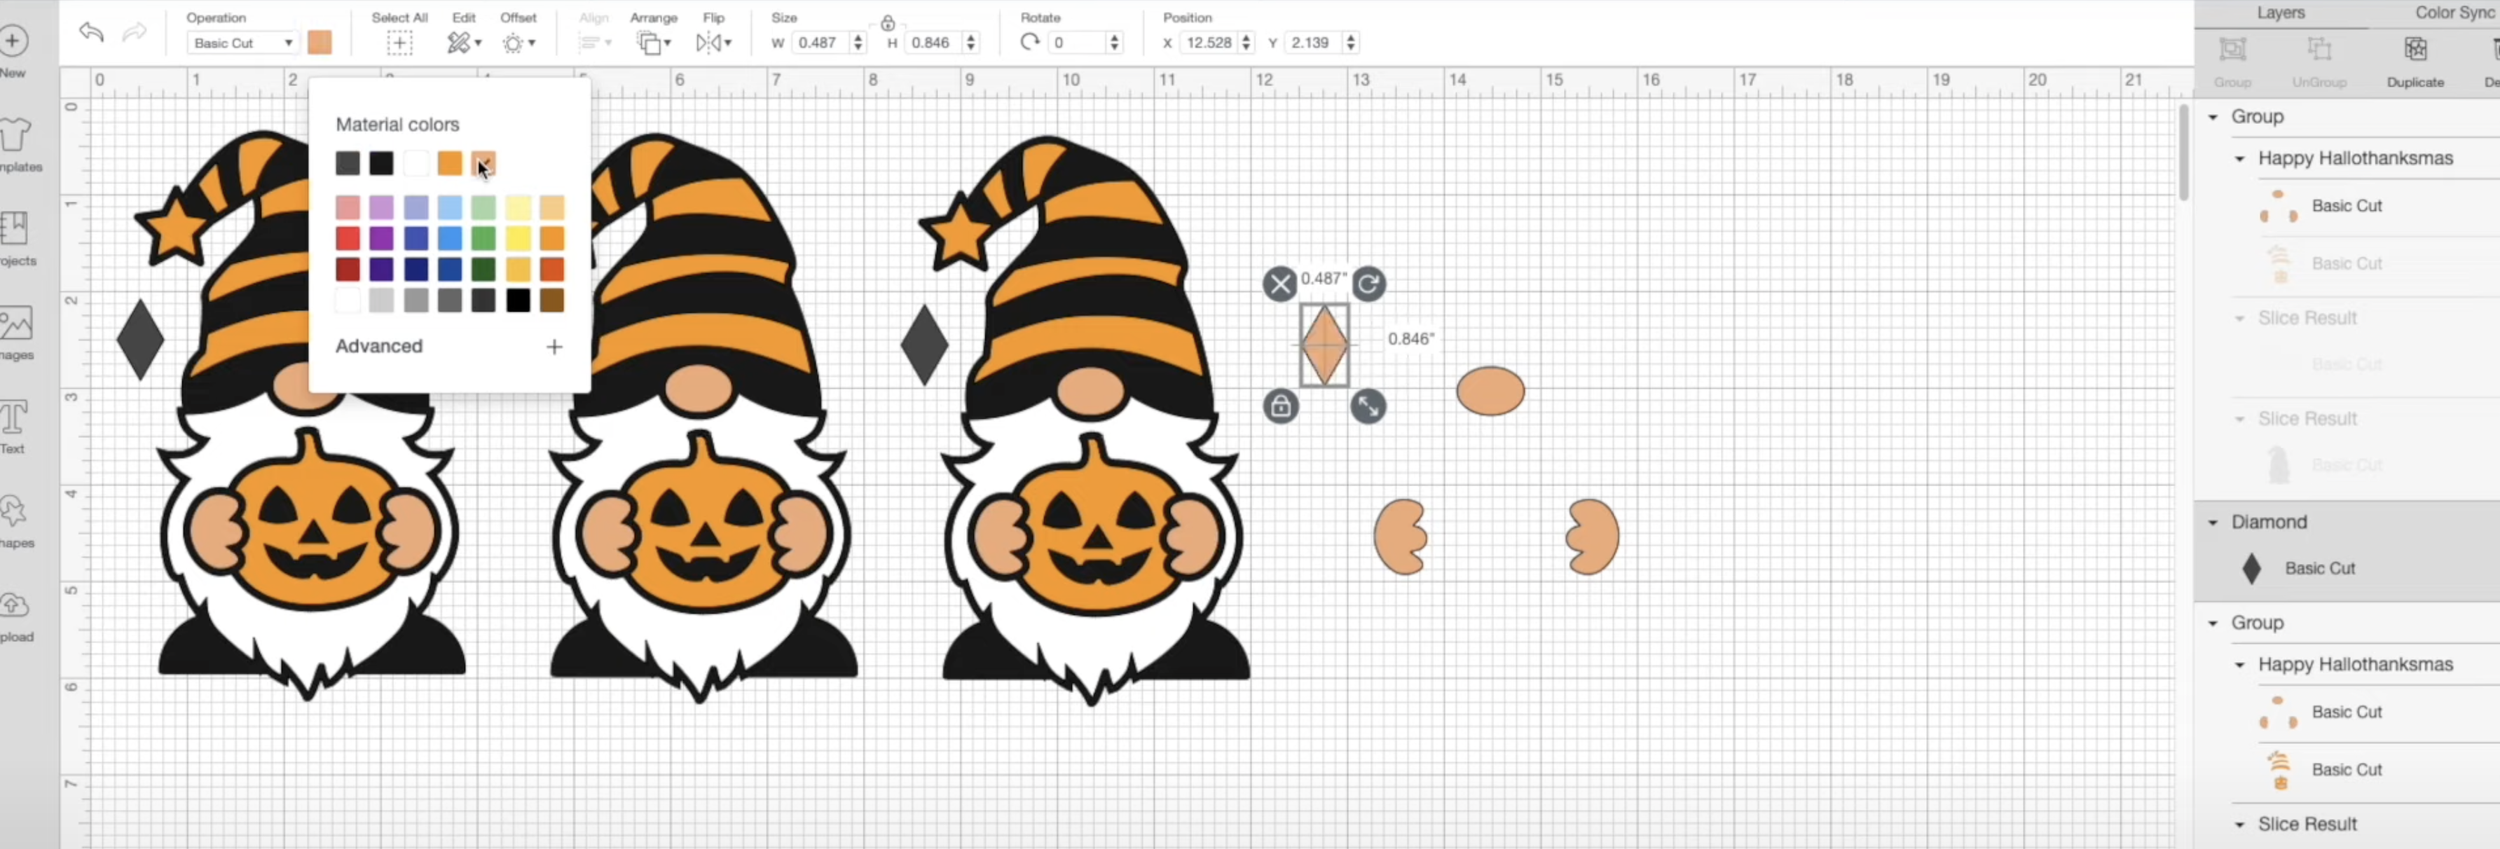
Step 3
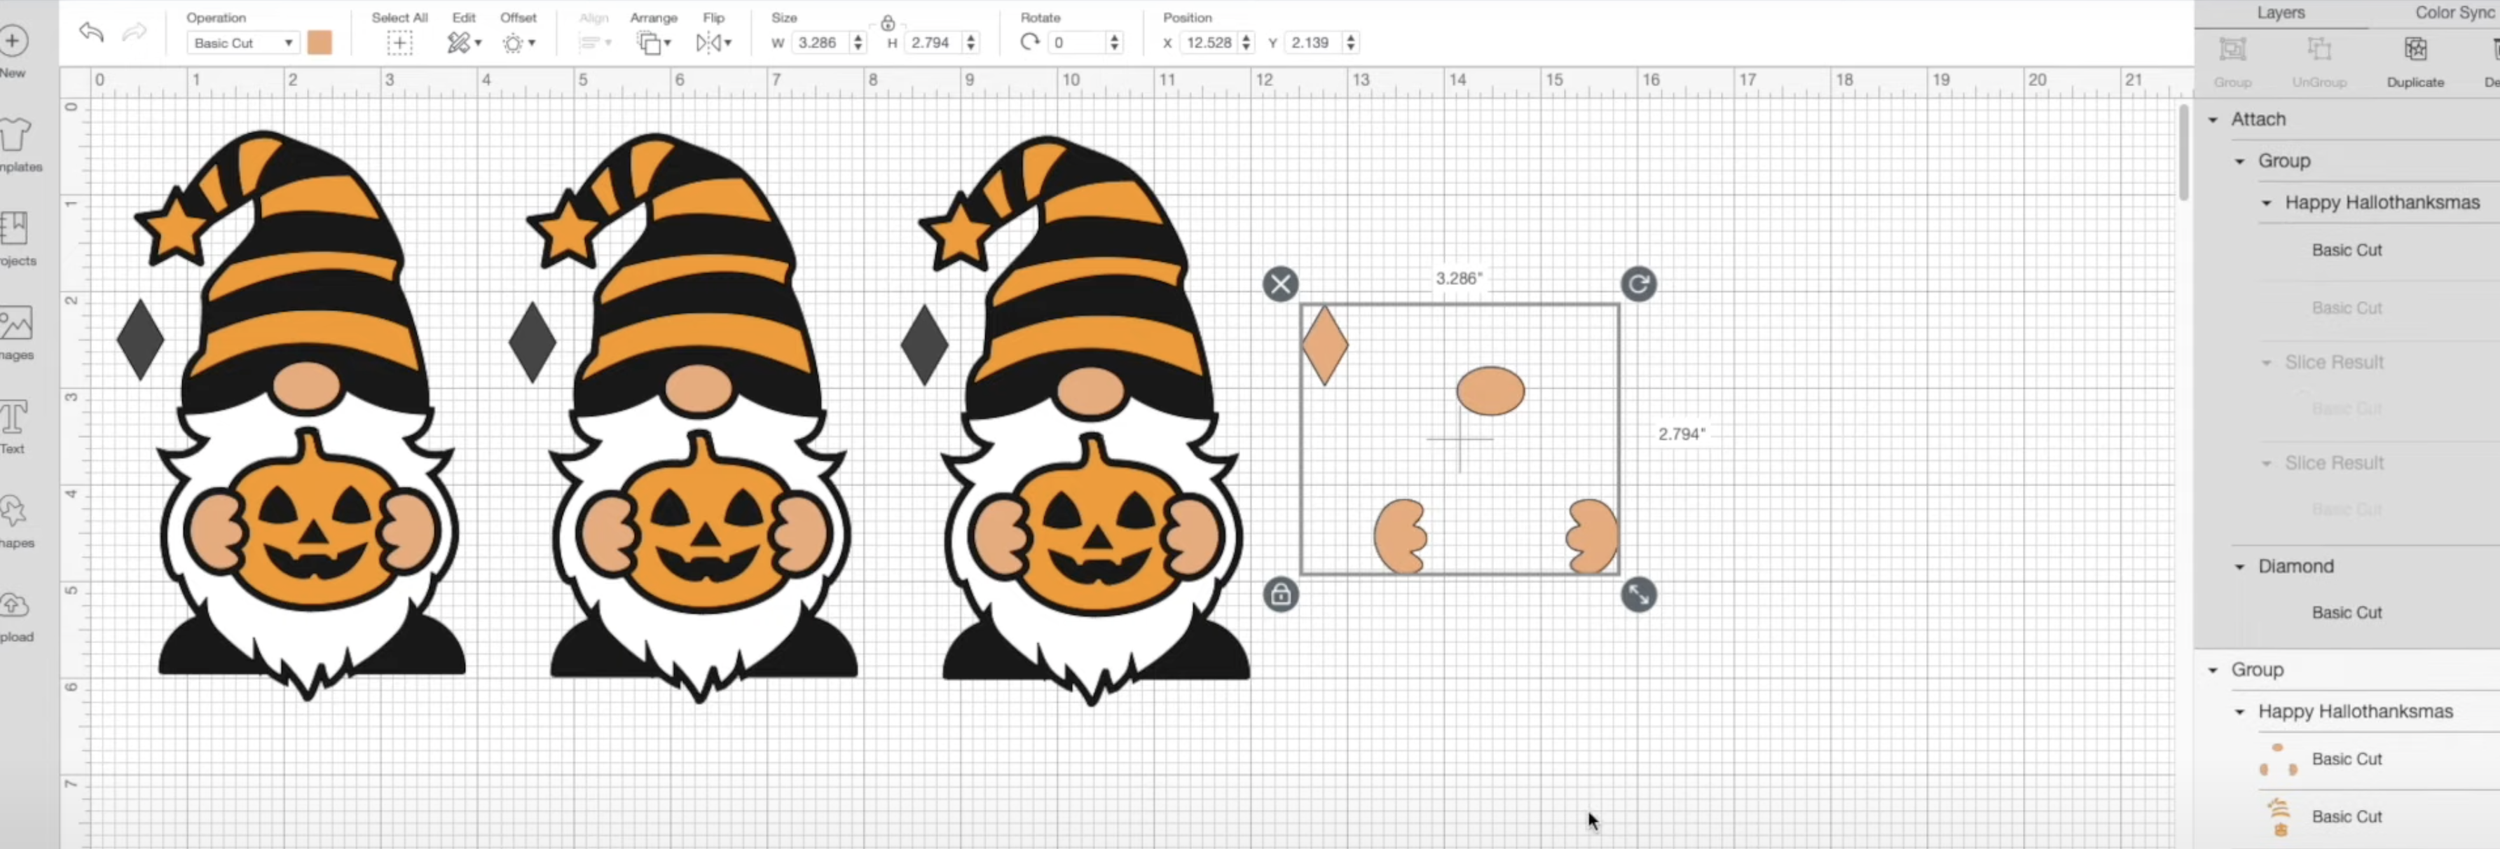
Isolate the next colour (this time it’s orange). Make sure the chosen shape is still in the same place as it was before and then attach each one. Turn the diamond the same colour and then select both of those.
Again, don't move the main picture, and attach them.
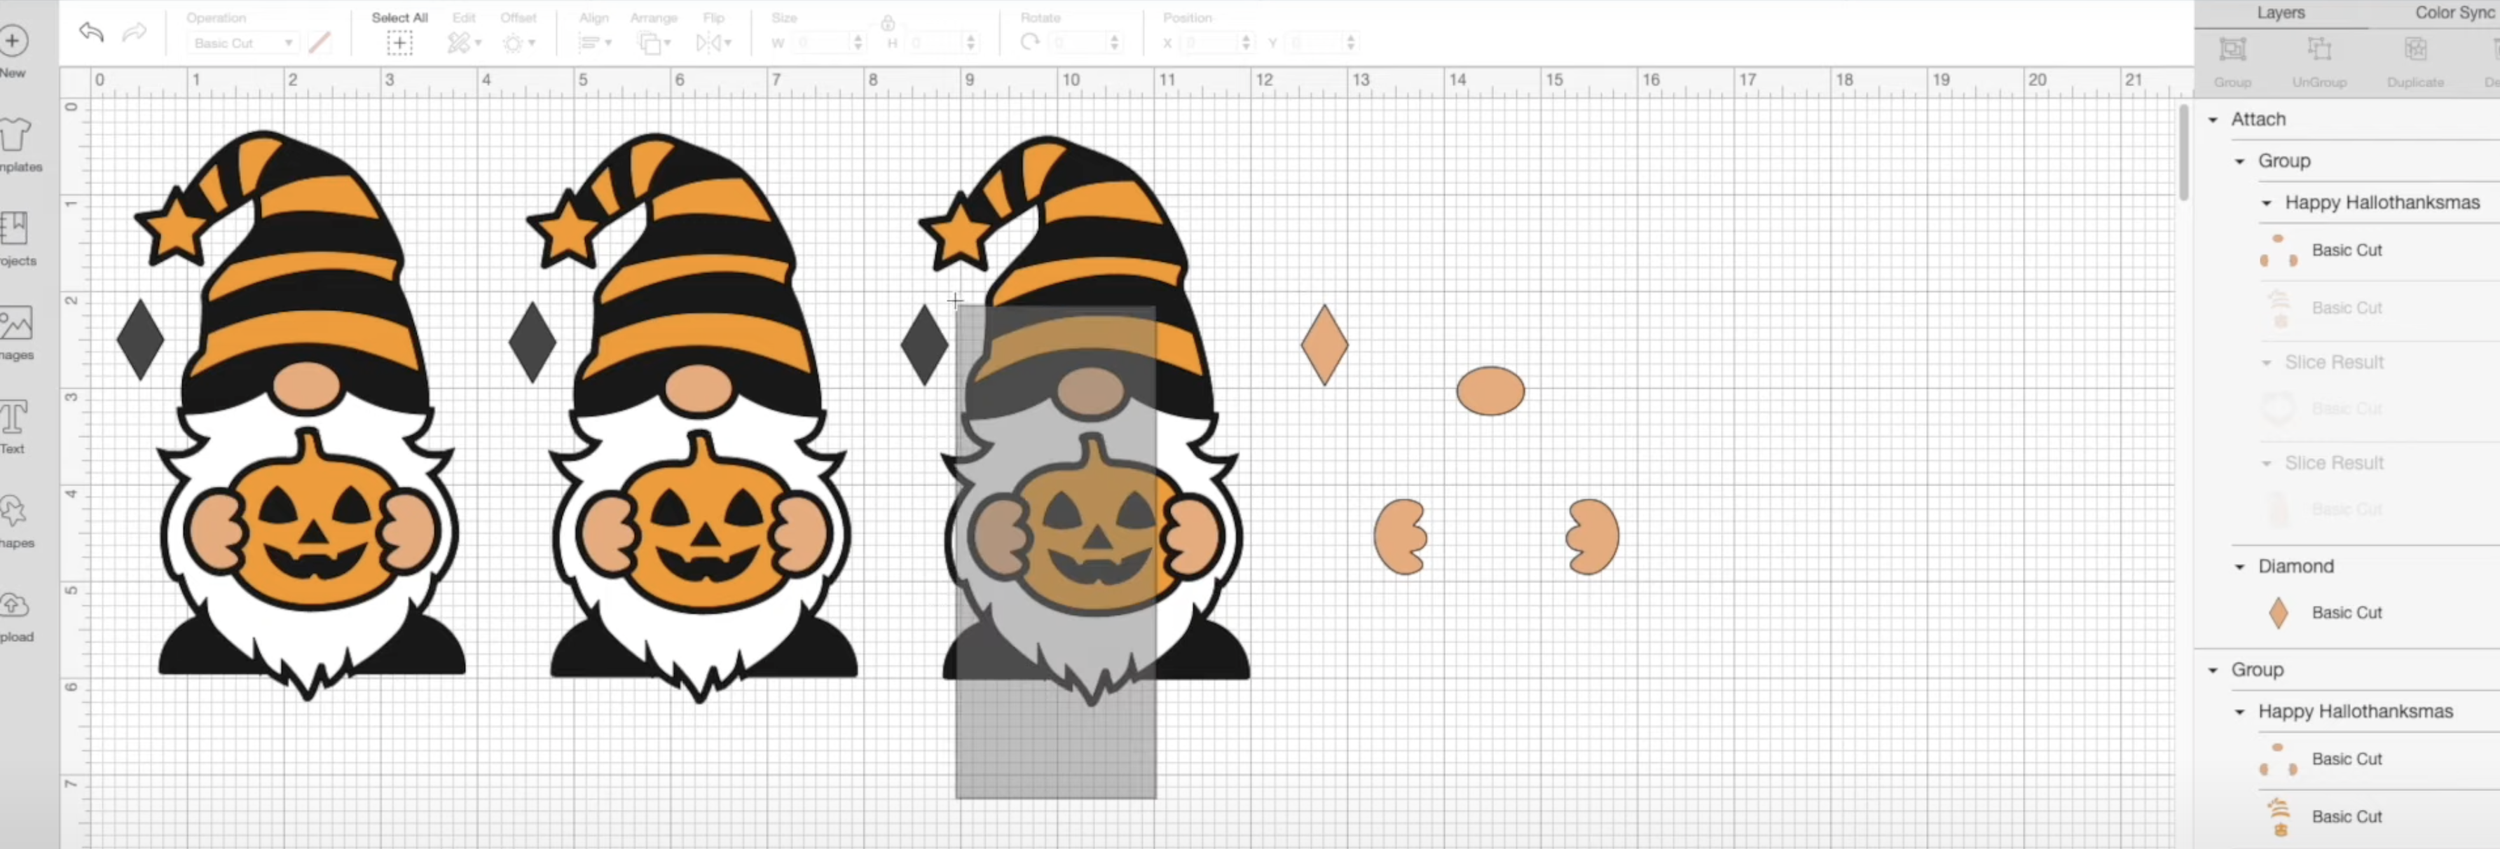
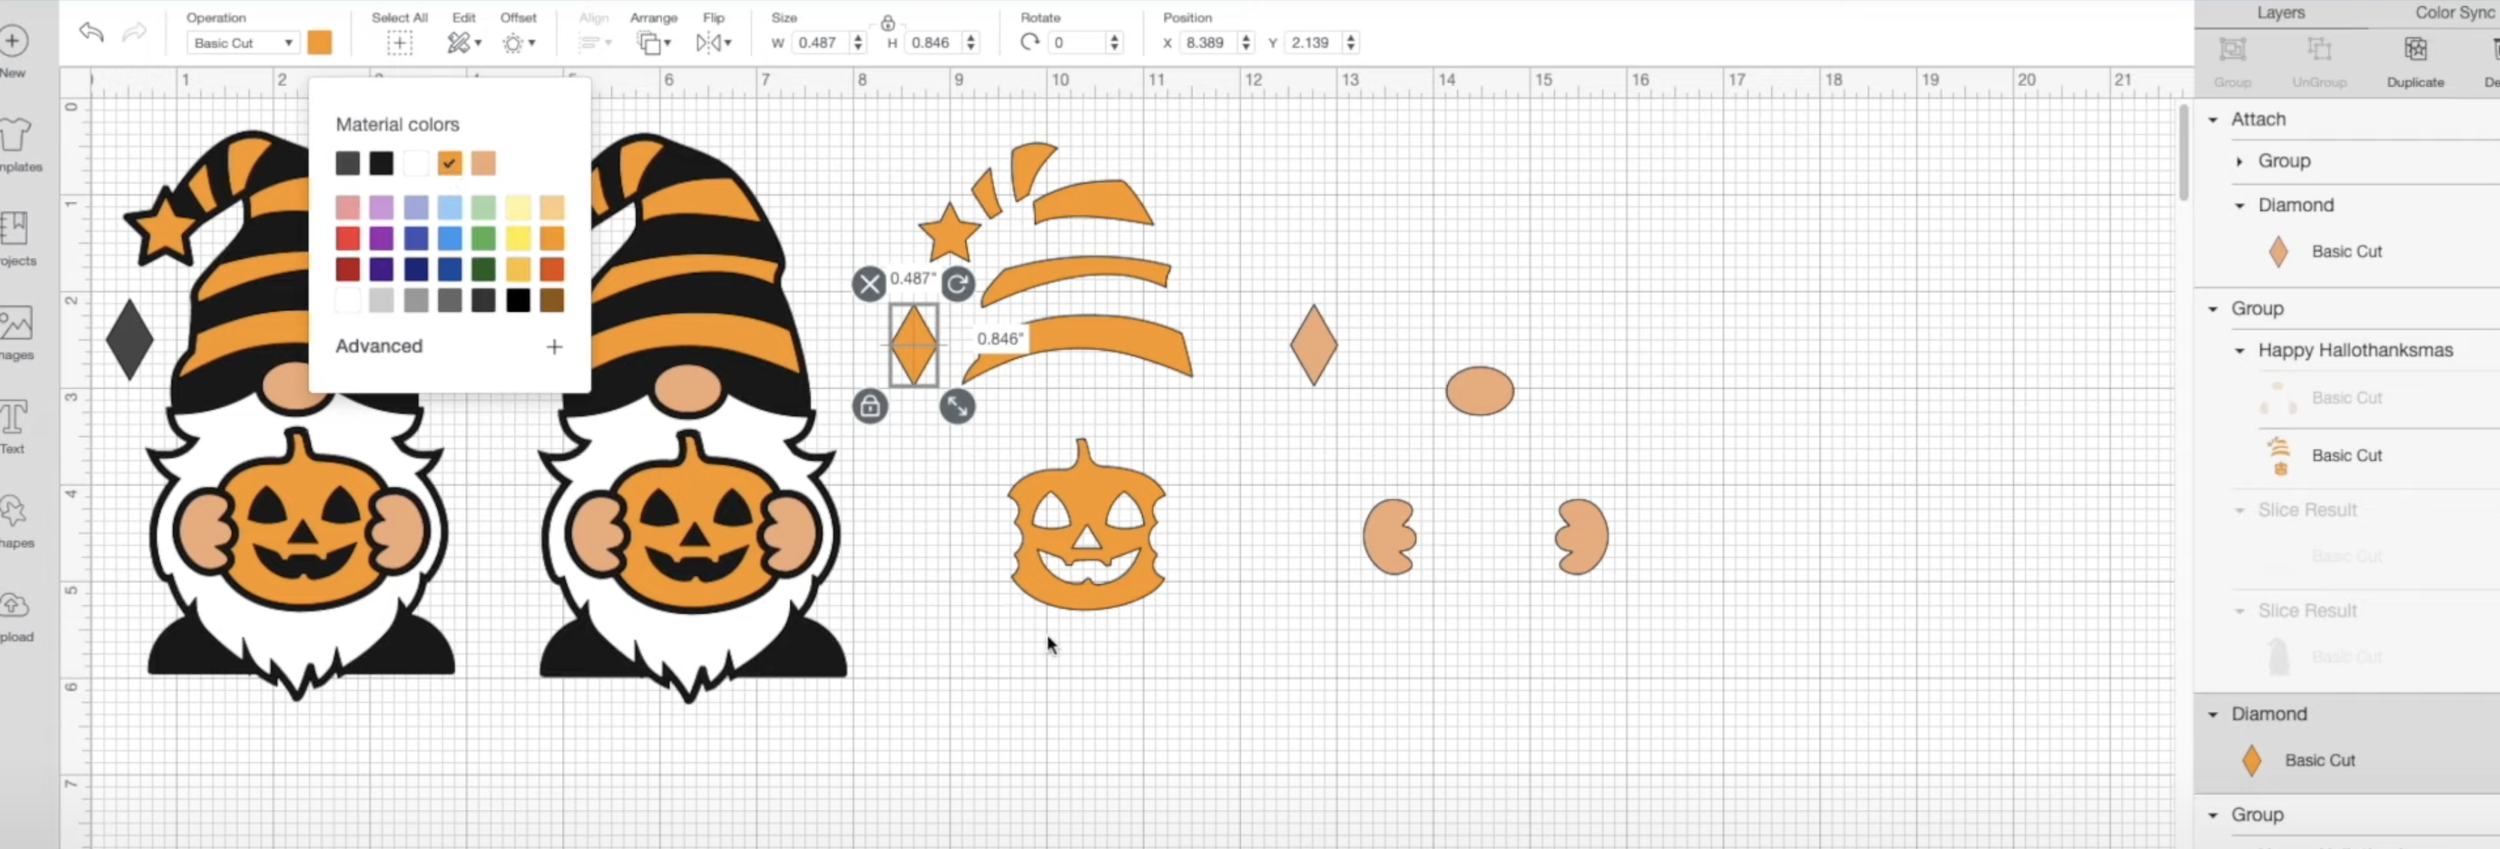
Repeat the process again for both colours. Once you have your four colours, they will be cut on individual mats.

Cutting
You can put them all on the same mat and use the SnapMat feature. If you have a lot of scrap bits of vinyl you can place them in the right place for where they need to be cut. You would just need to remember which colour is which because once they are attached they all turn the same colour.
I didn’t do that (because I'm likely to forget which ones are which) so I cut them all separately.
I used mostly scraps for this project and used my Brayer roller on the vinyl to make sure everything stuck on my mat before I loaded it. It doesn't matter what order you cut the shapes.
I weeded them and then figured out what order to do everything in so that it was layered correctly. Remember not to peel away the diamond shapes on each colour layer! I had forgotten, so dug it out of the bin and replaced it.

Apply
Next, apply using transfer tape.
You don't have to get it particularly straight because it's the diamonds that you're lining up. It probably does help a bit if you have the gridded tape on straight but if you don't have gridded tape it's fine.
Line up the diamonds as close as possible, making sure it looks right. In this case, with the white on top of the black.
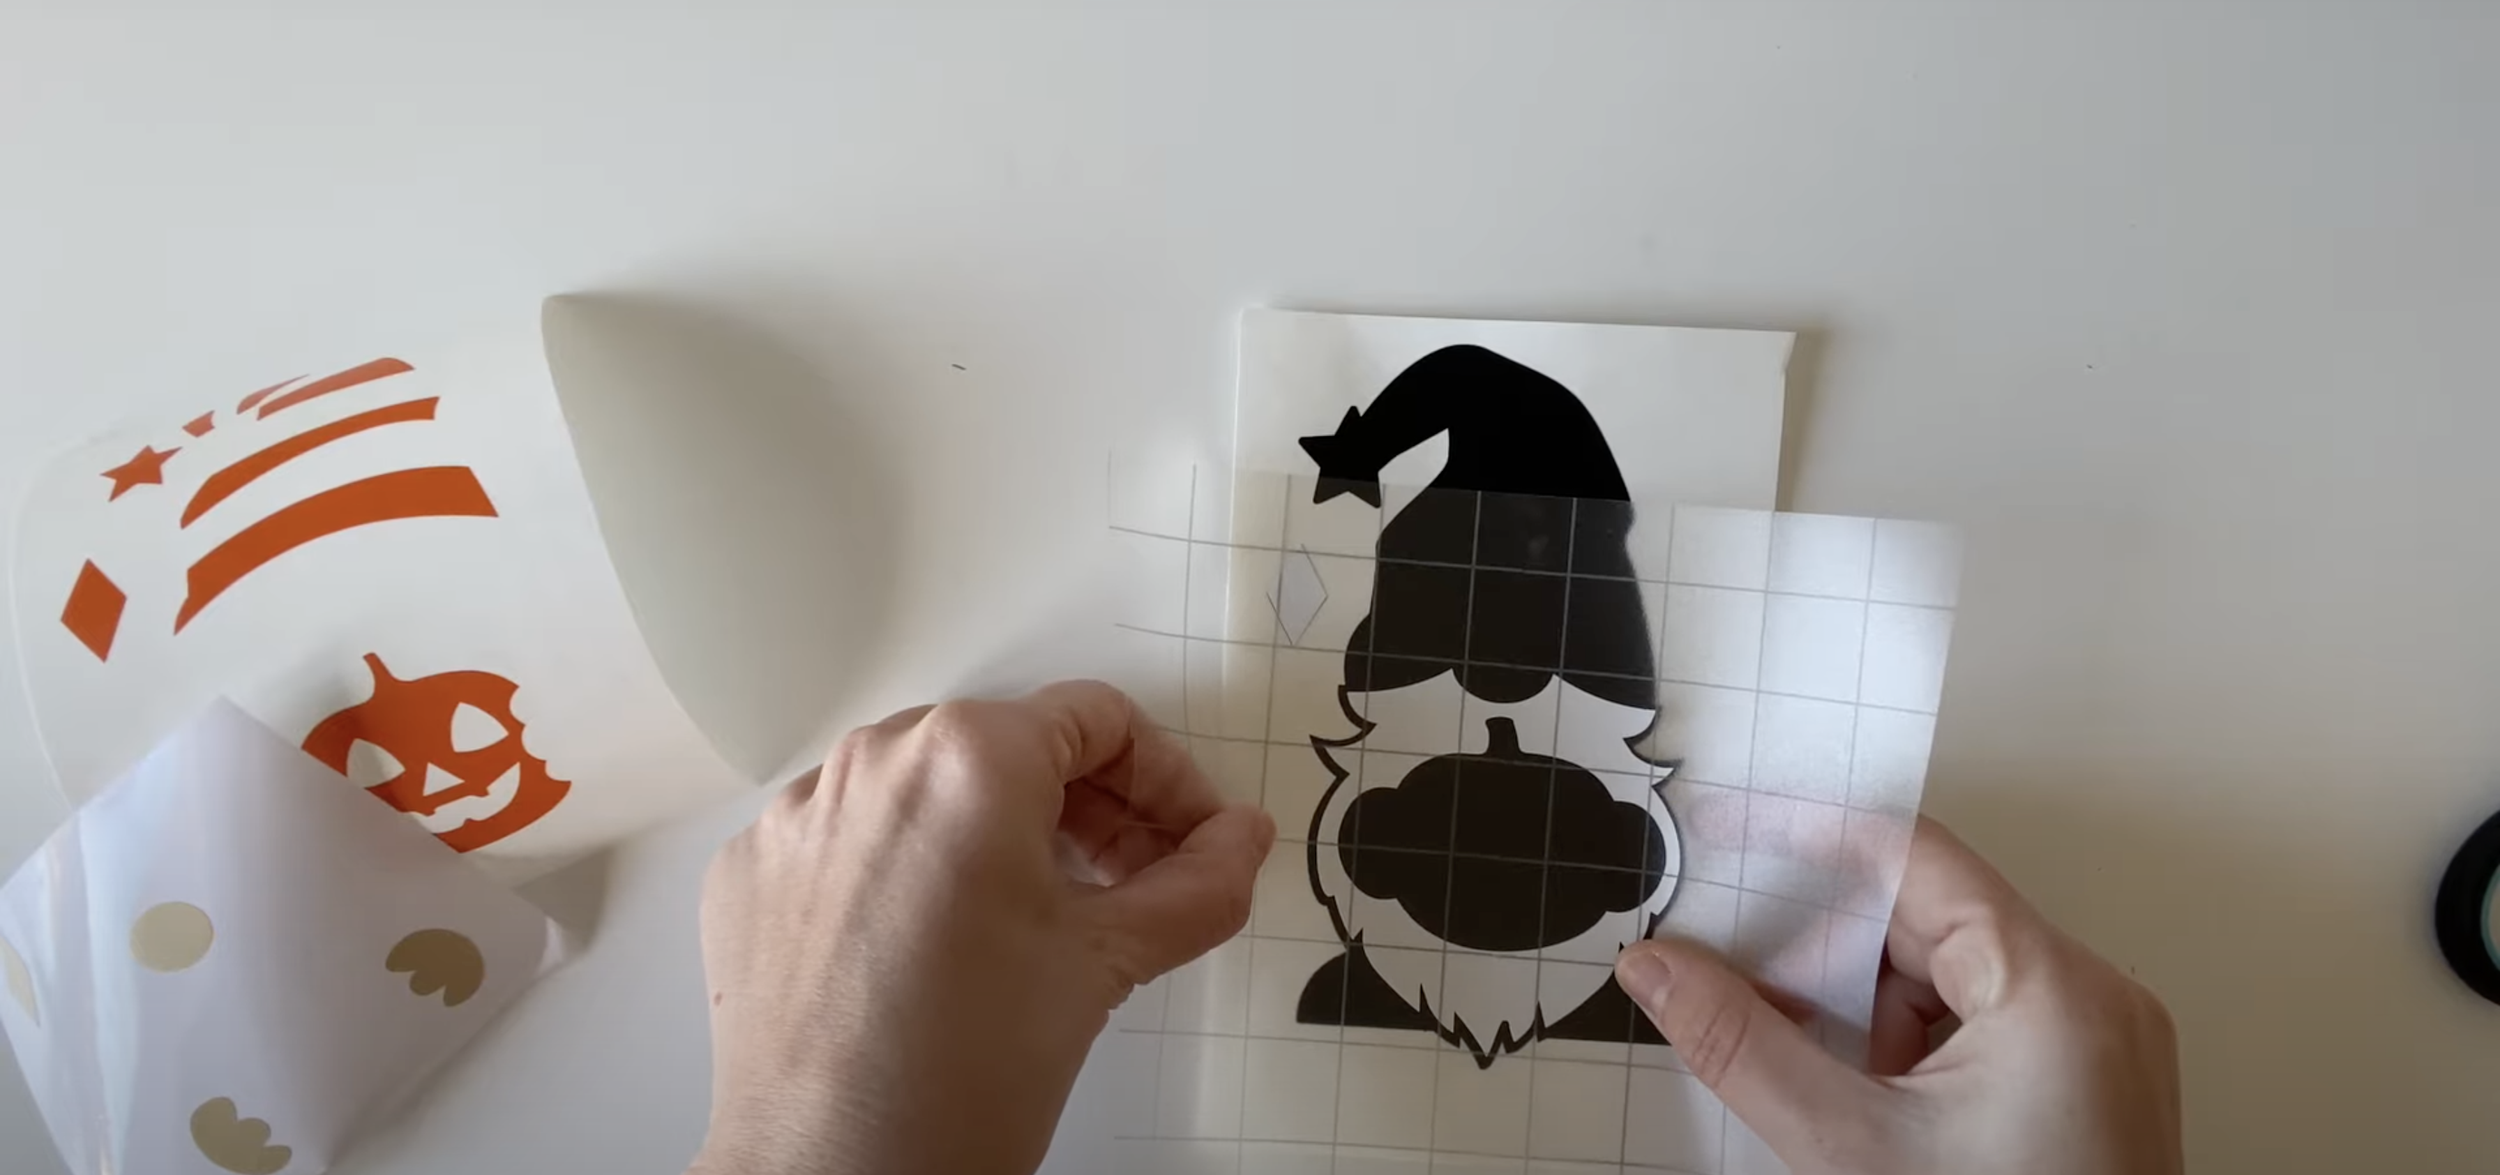
I wasn't just relying on the diamonds, it's just a good reference point to have as well as your design. Then peel off the vinyl backing. Sometimes the tape can be a bit sticky when you're doing layering like this so you might want to unstick it a bit.
Repeat the same process with every layer, again making sure that diamond matches up but it also matches up with the design. When you unpeel be really careful to not peel up any of the previous design as you're taking that tape away.
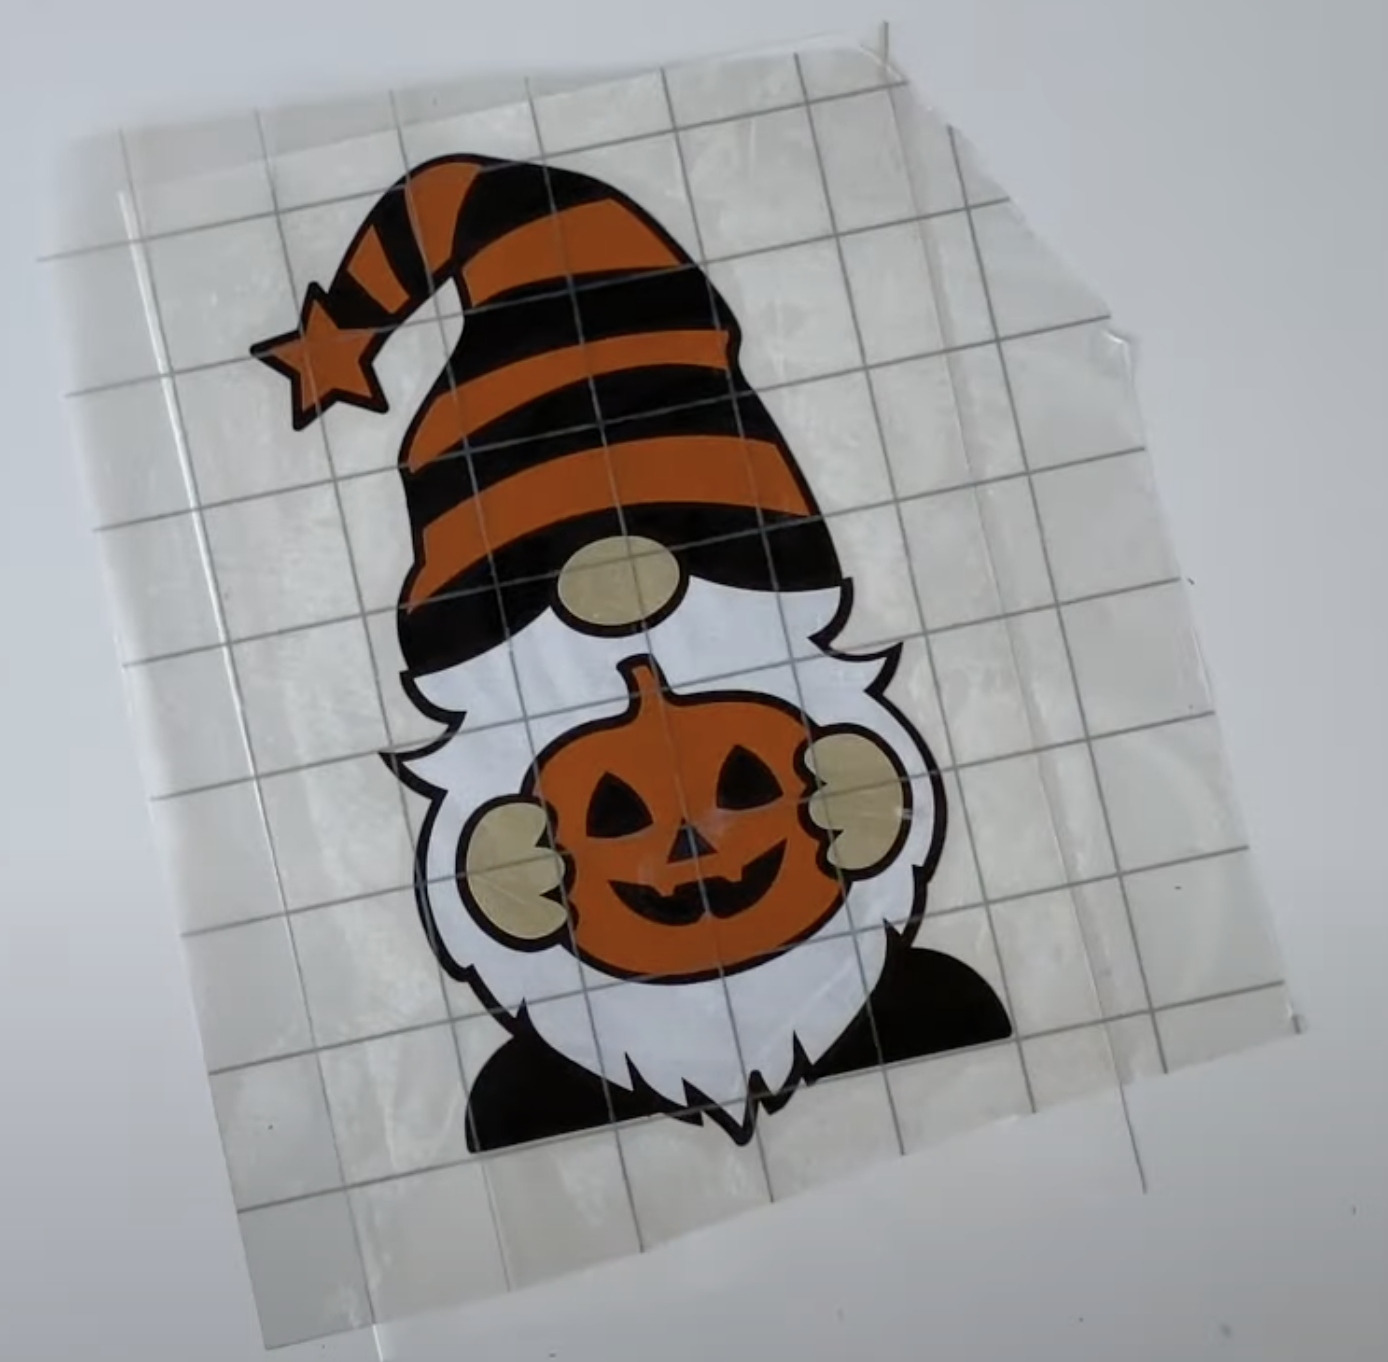
Some layered vinyl projects have a lot more layers than this but perhaps start with something simple like this one.

And there you go!
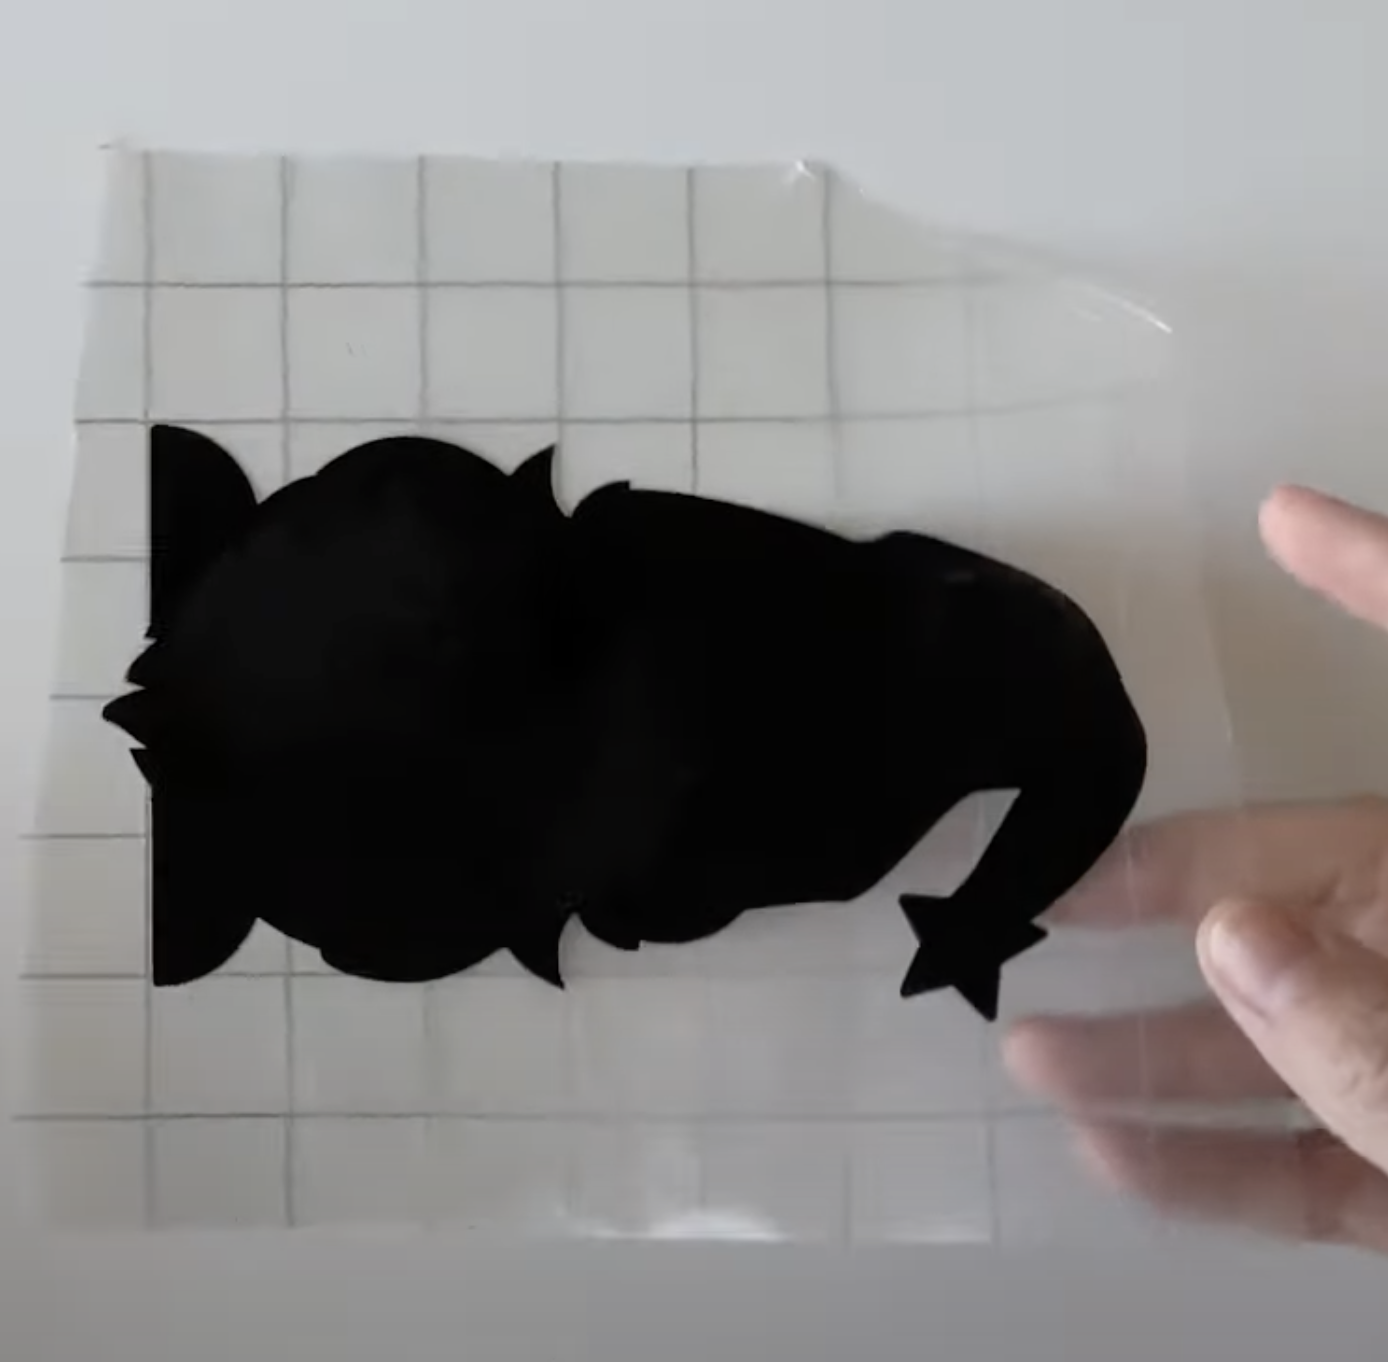
Just take off the little diamond and you're left with your finished layered vinyl project.
If you want to apply it to something else just pop the transfer tape back on again and make sure it's all stuck down (don't accidentally leave a layer behind), and then peel the backing off.
It might need a bit of rubbing on the back because it will be quite thick now. I just added it to a blank frame to be put somewhere for Halloween.


I hope you enjoyed that and found it helpful.
Let me know in the comments what layered vinyl projects you're going to make.
Remember to like, follow and subscribe for more videos like this in future!