

How To Add A New Etsy Listing (+tips & tricks)
Watch this to see how I add a new Etsy Listing and my tips for how to improve them…
The below content contains affiliate links and we may earn a commission if you shop through them, however this won't cost you anything, it just helps us to keep the site running for free. For more information on affiliate links, see the disclosure here.
Or check out the step by step & my tips below…
If you don’t already have an Etsy shop, then do follow the below link to open one and you will get 40 free listings and can start it for free!
Step 1
Go to the listings section of your Etsy shop, and click ‘Add A Listing’ and this will create a new, blank one for you. The first section is for adding photos…

…ideally you want to add as many as you can, from various angles, but make your brightest and clearest one the primary photo as this is the one your potential customers will see as a thumbnail.
For decals I like to make mockups, (check out this video that will show you how), but no matter what kind of product it is, make sure you’re making it clear what it actually is that you’re selling, don’t clutter the photo up with too many other things, and keep it bright and light. I also usually include one photo of instructions for ordering, especially if you need personalised information to be added, and then you could also add a photo with your different font or colour choices if you are giving those.
I tend to save all of my photos as jpegs for uploading.
Step 2
Etsy are really pushing people to add videos to their listings now…

…you don’t have to, but it could help you stand out against competitors and it also gives you a chance to show off a feature of your product. Or if you’re selling decals like me, a quick video of you applying one can show your customers just how easy they are to use! It doesn’t have to be anything elaborate.
Step 3
The next step is another important one, and that is coming up with your title…

You want to try and add as many keywords into this title as you can, but also obviously make it readable and make sense to what you’re selling. Also try and make it obvious what it is, so there is no confusion over what the customer will recieve when they buy it!
For example, in this one from my Vinyl Decal School Etsy I have begun with a description of what it is (making sure I mention that its a printable), but also what I think someone might search for if they’re looking for it…

…but then I have also added some keywords, and some more information about the sizes and the file types that will be received.
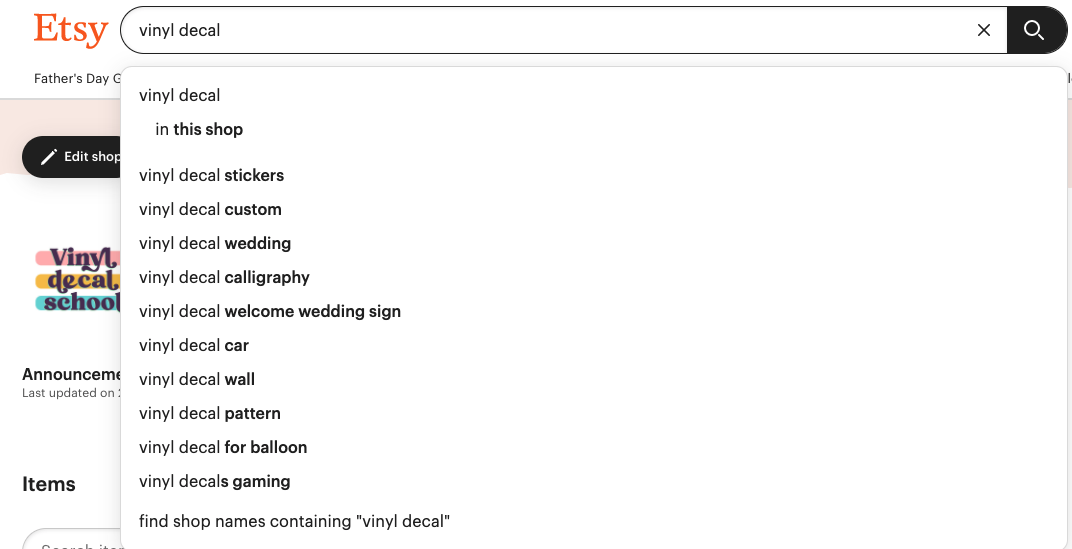
To find keywords and what your customer is searching for, you can either go to the Etsy search bar, type in your product, and see what terms have already been used previously to look for similar items…
Or you can use a tool like eRank or Marmalead to help you find the best keywords for your niche.
AND, once you start making sales, you can use the terms your customers use to find you as your keywords and to also give you ideas for future products. You can find those by going to Marketing -> Search Analytics and this should give you a big list of ideas, as well as how many people clicked on each one, and where they show up in Etsy search.
Step 4
The next few lines are quite easy to fill in, just add who made it, if it’s a finished product or not and when it was made or if it is made to order.
Then for the category, you can’t always get it added to something exactly right, but if you type in your item it usually comes up with a list of options and there should be something that fits.
For renewal options… the easiest thing to do is to leave it on automatic and then you don’t have to manually renew it each time it sells out or expires (after 4 months with no sales). However, if this is a new shop and you’re not sure whether your listing will sell in the next 4 months or not, then it may be best to leave it on ‘manual’ and you can reevaluate whether you want to pay the fee to renew it or not.
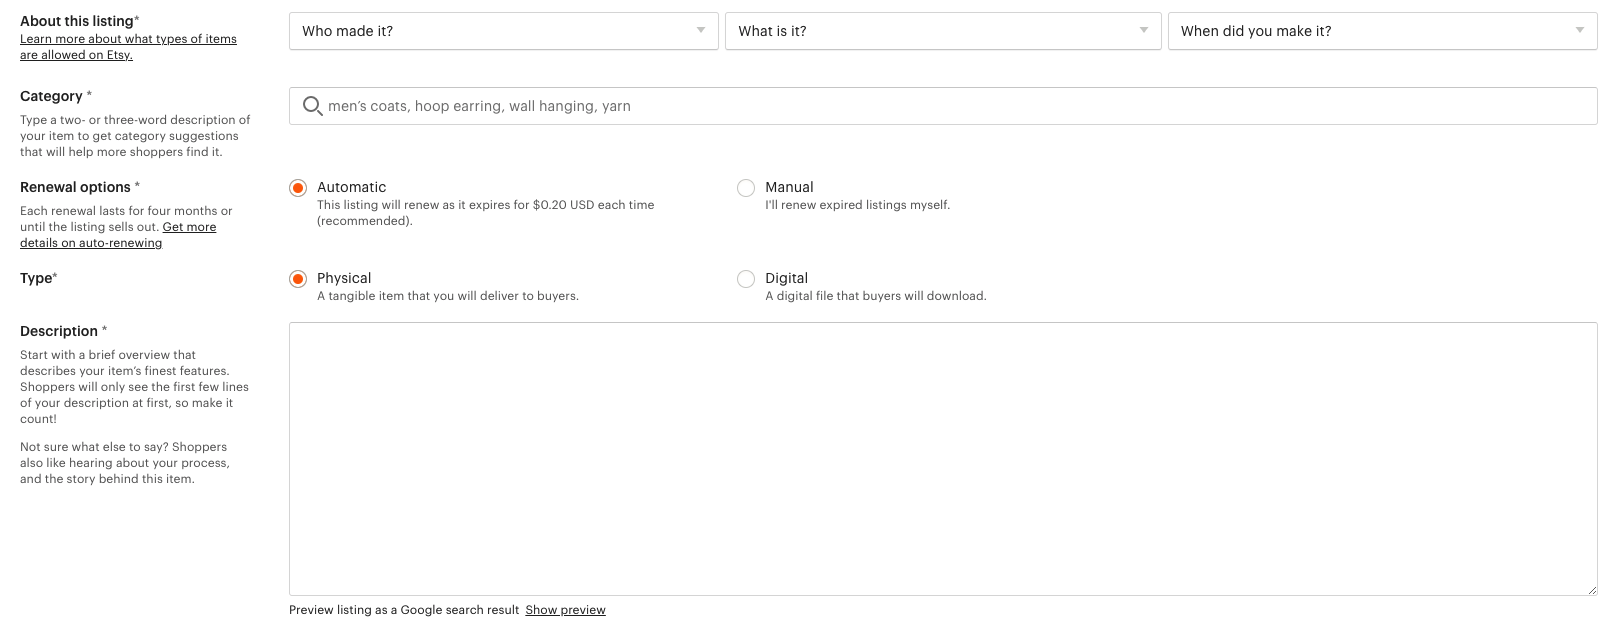
Then the description is where you need to let your customers know ALL of the details about your item, but you also want to add keywords in this section too, including who it’s for and what it can be used for.
So for example… “This welcome to our wedding decal is perfect for couples who want to make their own DIY signage for a boho wedding” - I’m sure you can write it better than that, but hopefully that gives you an idea!
Then add all of the details like dimensions, colours, design choices and anything else they need to know below this.
Step 5
Add sections for each different category of products you have… you could either do this by season, by style type, by customer type, or however works best for what you’re selling. You can see here I have split my Vinyl Decal School Etsy up into what kind of design it is…

…just try and organise it in a way that makes it easy for your customers to find other complimentary products that they might be buy at the same time as the one they are currently looking at.
Step 6
I know you’re probably sick of me banging on about keywords, but they are super important for getting your products to show up when customers search on Etsy, and that is your main goal! If you can get it right, it means you may not have to spend money on ads or put lots of time into social media and you can just rely on customers coming to you.
And this section is another one where you need to add 13 of the most suitable and relevant keywords you can think of…

Always add the full 13, and try and add any that you weren’t able to fit into the description and title, especially seasonal tags which you can change throughout the year. Again use eRank or Marmalead if you need some help!
And then for materials I usually just add either every material I use, down to the packaging, or the file types that are provided if it is a digital listing.
Step 7
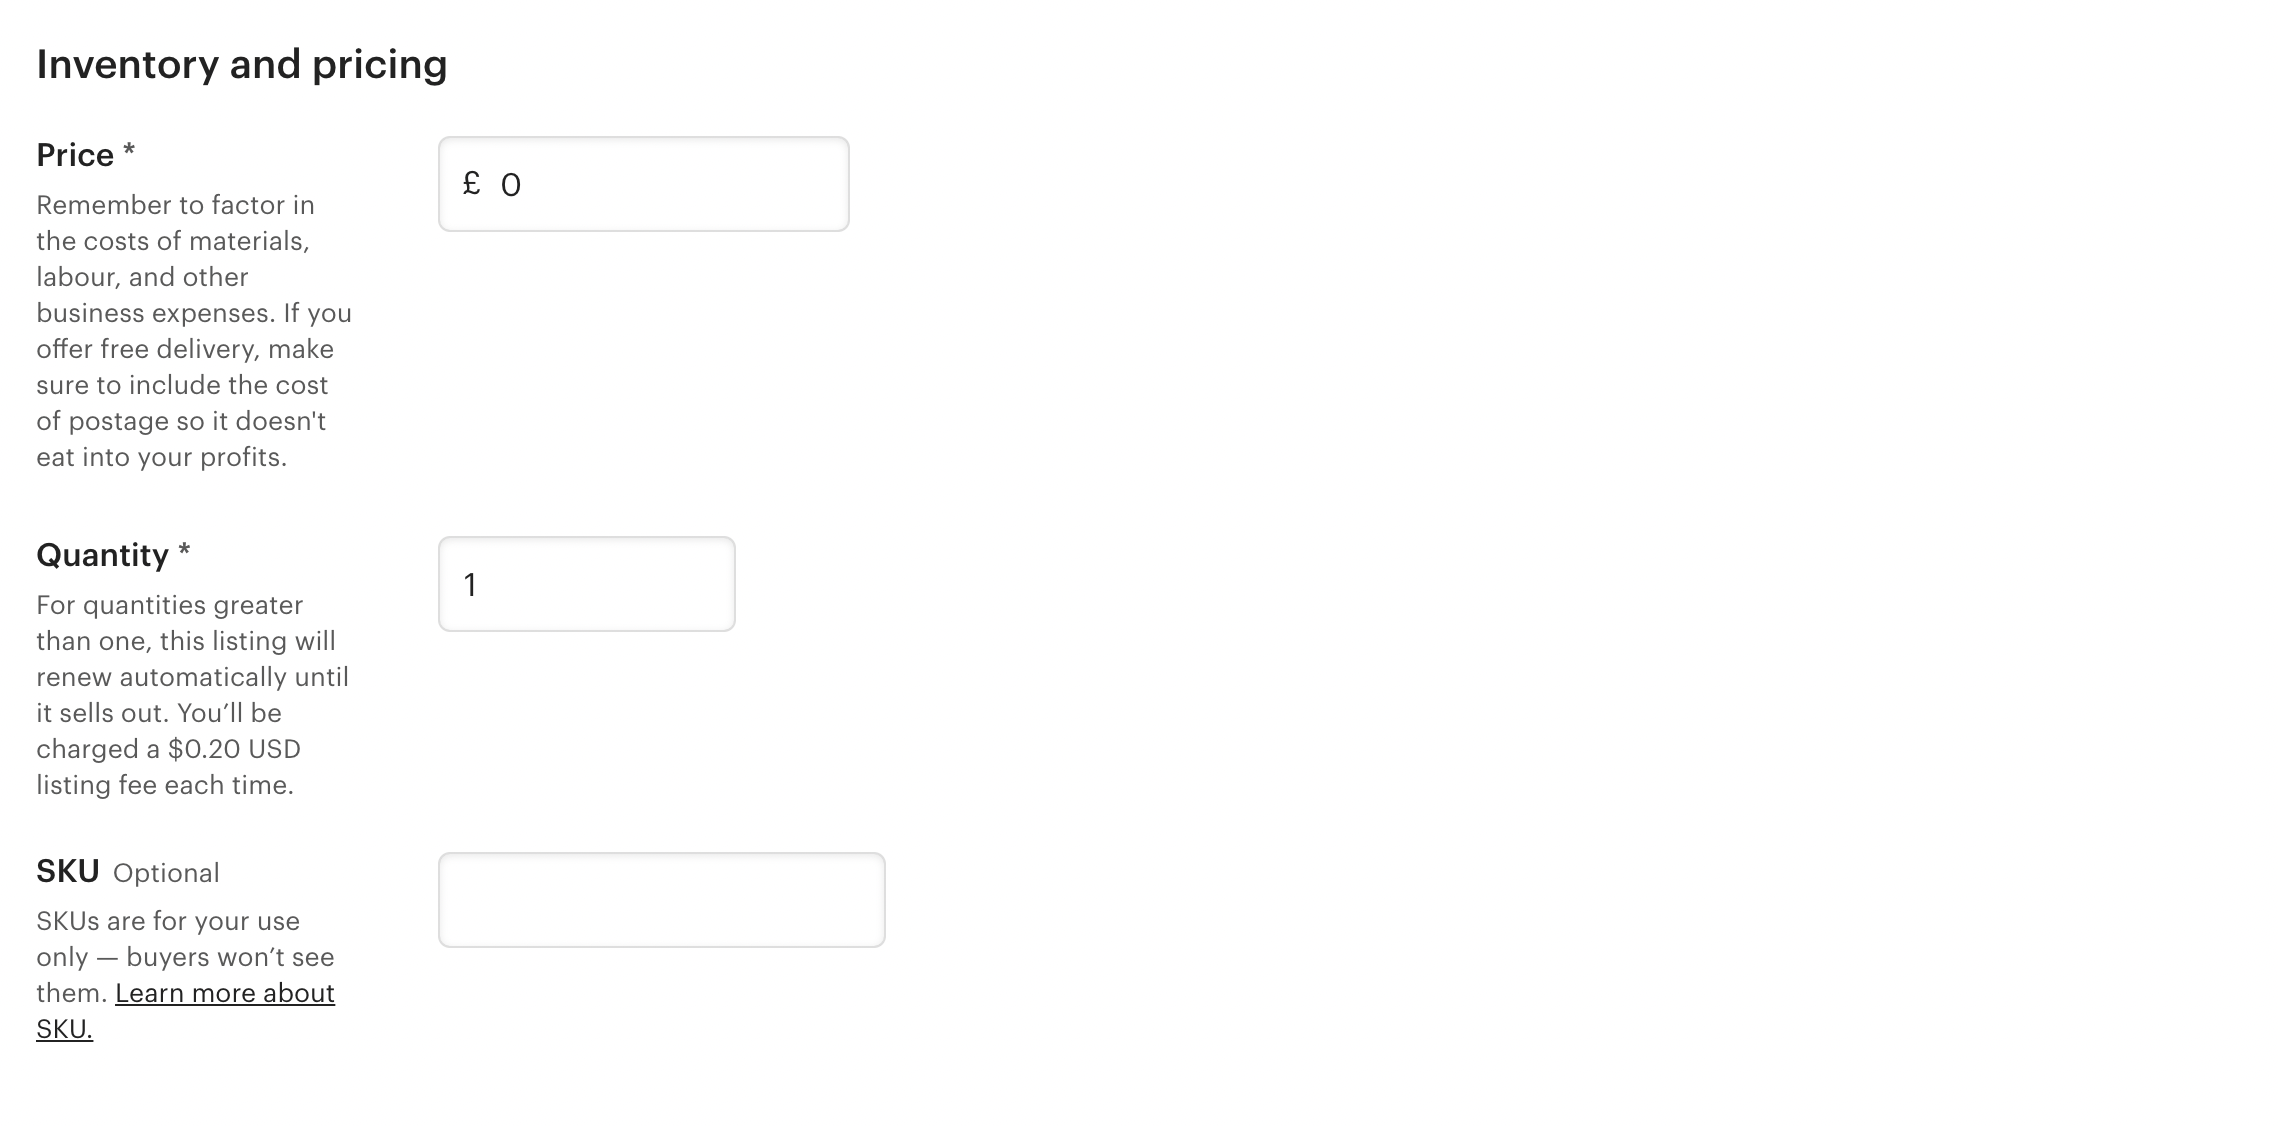
And then for your prices, you can either add one price if it is one item with no colour, size or style choices (and then quantity is obviously how many you have available, although if it is a custom or digital item I usually set that to 999)…
or you can add variations…

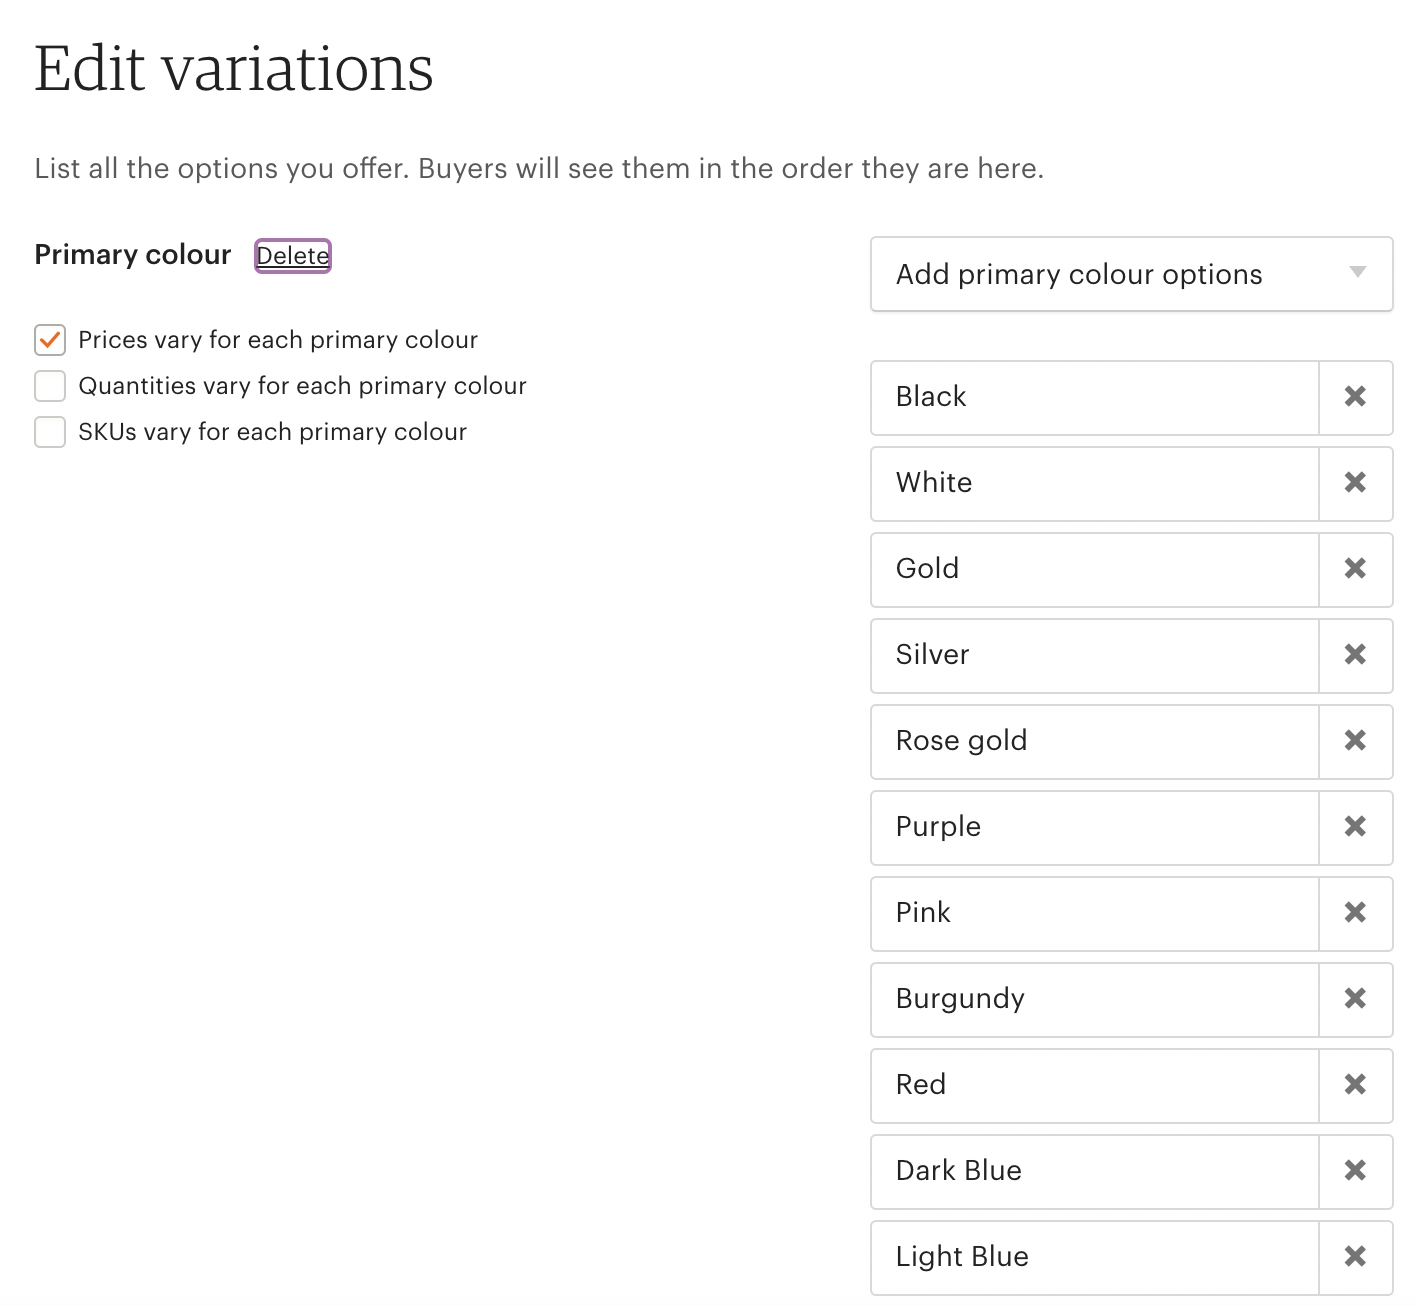
You can multiple variations. And make sure to tick the boxes on the left if your variations have different prices, or quantities, and then it will let you add the costs once you confirm your options…

…you can also link your photos to each one if you want to show customers what the different colours look like, for example.
If you’re struggling with how to set costs, then do check out my course ‘How To Sell Decals Online’, even if you sell other items, as I have a lot of information and tips in it about what you need to consider when pricing your handmade products so that you’re making a profit.

Step 8
The next section is for requesting personalised information if you are creating something custom. Make sure you are making it clear what kind of information they need to add to the box in order for you to create their item…

Step 9
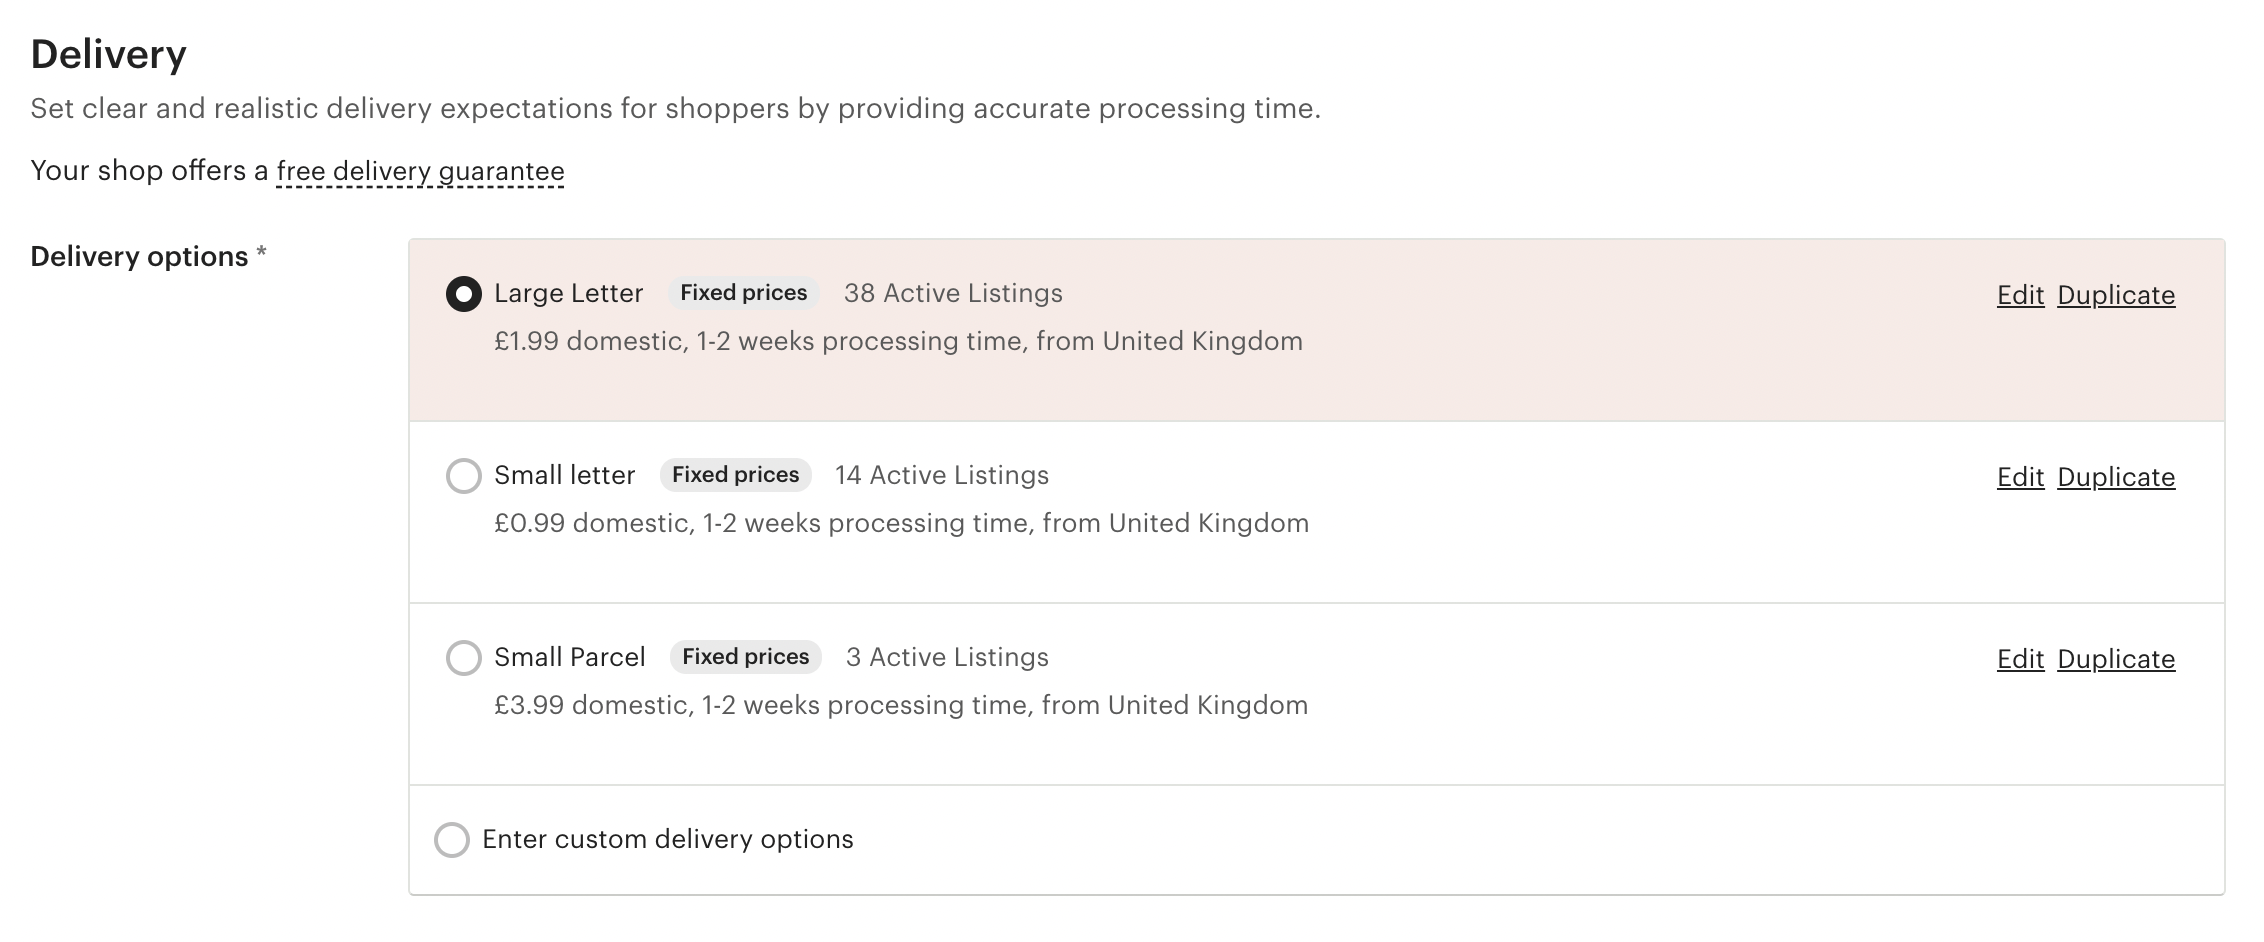
Then the last step is to set your delivery profiles if you haven’t already. So either save your listing as a draft for now, or open a new tab with your etsy shop, go to Settings -> Delivery Settings and you will be taken to this page…

You want to add a profile for each of your envelope choices, or shipping options. As you can see above I send items out in either a small letter, large letter or small parcel and they all have different costs associated with them.
So to begin, click ‘Add profile’, make sure your country of origin is correct and choose your processing time (this is how long it typically takes you to make and send your item). The shorter the processing time the better for customers, however you don’t want put unnecessary stress and pressure on yourself by making it too quick of a turnaround.

Choose the company you will be using to send your mail, and the class you will be sending it by.

Then unless you’re keeping it as free delivery, then set your prices for delivery. Make sure you’re factoring in the cost of your envelopes, order form printing costs, the time it takes you to go to the post office etc, unless you have already factored that into the price of the item you are selling.
You can also add a little bit into the additional item section for anyone who buys multiple items from you, if there’s a chance that is going to cost extra shipping fees because of weight etc.

Once your domestic shipping is set up, then you can add other countries and set individual costs for those too. Or you can just delete those sections if you only want to sell within your home country.

You can also add delivery upgrades if you want to offer your customers express or tracked postage. This is added to the standard postage cost, so you want to set it as the cost you want to charge MINUS your original postage cost from above.

Then give it a name so you know which delivery setting it is, and save profile. Then repeat for all of your different delivery options.

Then go back to your draft listing and select the relevant postage profile for that listing.
Although you can add a custom delivery price for each listing if you have lots of different sizes and weights and you think that might be easier!
Then you’re ready to hit that publish button! If you have missed anything it will give you a warning message, and may ask for your permission to charge you $0.20 for the listing, but otherwise your listing is now live and available for your customers to purchase! Hurraayyy!!
Let me know in the comments if you have any questions or other tips that might be helpful to others.